![Mitchfork :]](../images/banner.png)
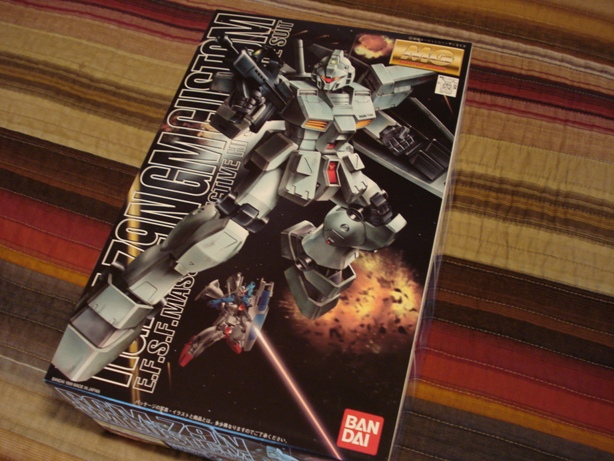
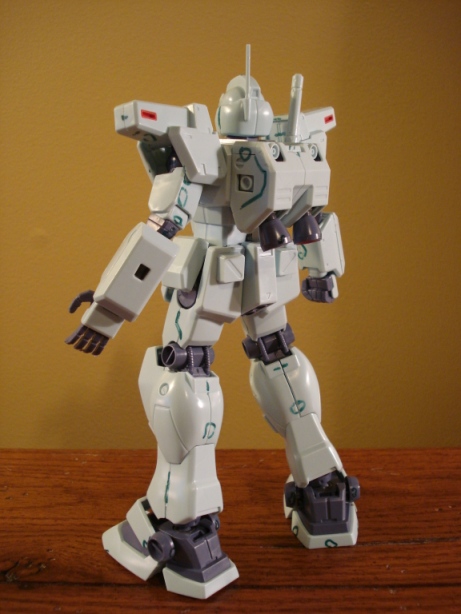
1/100 Master Grade GM Custom
Mobile Suit: RGM-79N GM Custom
Release Date: December 1999
Series: Mobile Suit Gundam 0083: Stardust Memory
Start Date: July 6, 2012
Finish Date: May 28, 2019
I was considering a few different suits to purchase after Wing, and this is the one that I eventually settled on. When I bought it, I hadn't watched
0083: Stardust Memory, but did soon after. This OVA is incredibly flawed, with some mildly enraging character work in the last half, but has absolutely gorgeous visual and suit designs. Since it's an older kit, I was looking forward to experiencing something that wasn't as well-engineered as Wing was. Although I enjoyed putting it together, it was perhaps a bit too easy for my liking.
I did a few part modifications on this kit (nothing major- just some putty and sand work for the most part) and went for a custom color scheme. The anime colors are alright, but too monochrome for my liking. The colors that the kit was cast in are dreadful though - they are way more saturated, and the purplish tint to the frame pieces make them very toy-like.
There was a huge multi-year gap in this project, since I moved out to a new apartment where it was pretty difficult to spray, and I fell out of the hobby in the time I was there.
Looking back, the limitations I ran into with rattle cans were very annoying during the painting, and if I paint again in the future I'll definitely invest in an airbrush. Additionally, my panel lining technique wasn't great, and will be something I work on more intentionally in future projects. Everything else was very positive though - I'm proud of the color planning, the paint technique itself was good, and I ended up very happy with the decals.
Date Posted: May 16, 2025
Gallery
×
1 / 11
2 / 11

3 / 11
4 / 11
5 / 11

6 / 11
7 / 11
8 / 11
9 / 11

10 / 11
11 / 11
❮
❯
Progress Update 1
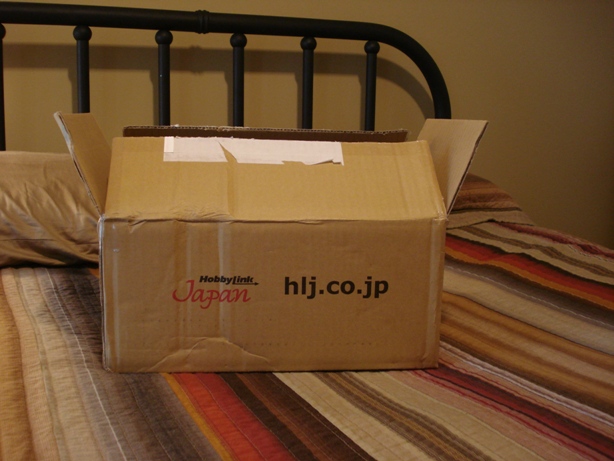
Seven days shipping on EMS, which isn't too shabby. Might decide not to spring for it next time and just go SAL, since I'm not really on a time-crunch to churn these out or anything.
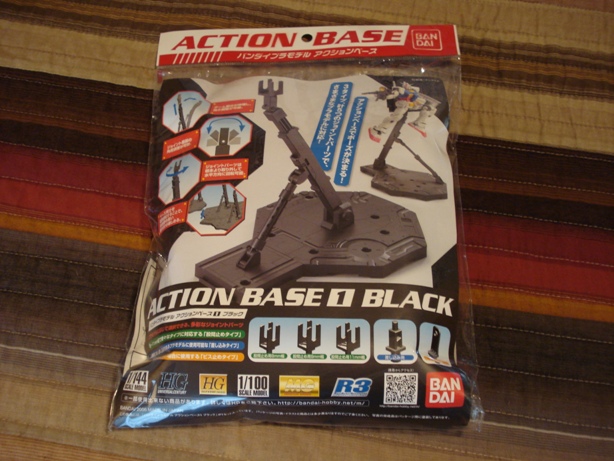
I also purchased a 1/100 base with this kit and assembled it pretty much immediately after unpacking. It's supporting Wing on the dresser right now; no pics until I get the buster rifle painted, though. I also got some kind of rice cracker snack called Bakauke as part of HLJ's 15th Anniversary Sale; I have no idea what the flavor is though.
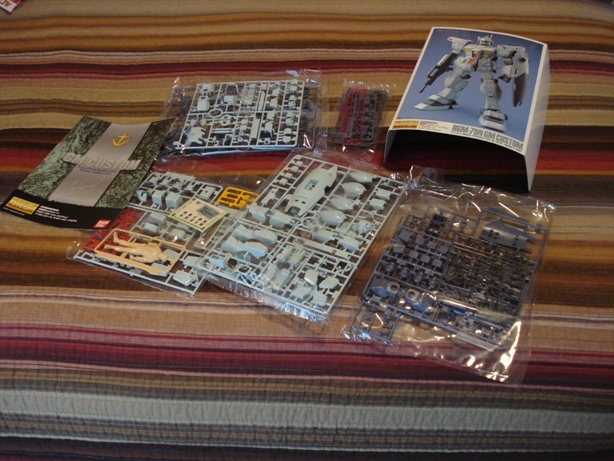
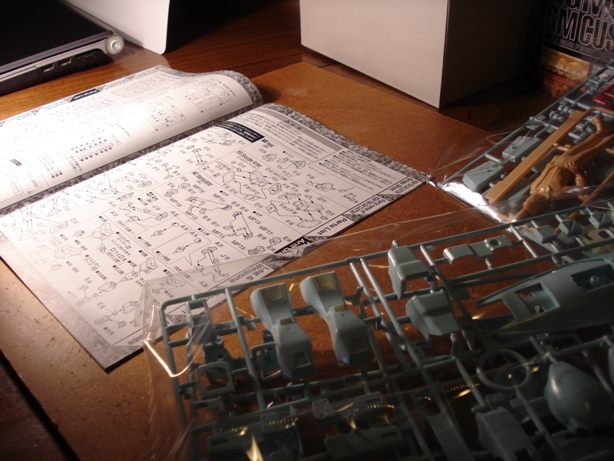
The model kit is the main attraction, though. In total there are seven full-size runners, with various smaller runners and a couple of polycap trees as well. It also comes with a 1/20 figure of the pilot which I probably won't be touching at all.
Workstation, a bit more cramped than I like but not too bad. Now I'm ready for the pre-assembly, where I'll plan out the touch-ups that I'll take care of before painting.
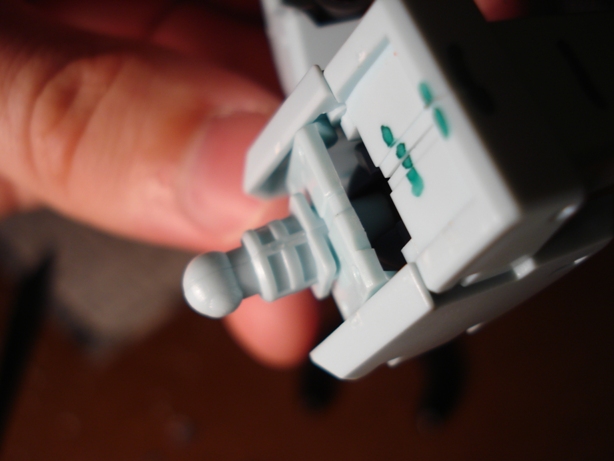
Assembling the arms, I'm definitely seeing some things that I'm not too happy with. While the joints are a bit better than a high grade kit, there's still quite a gap between this and the newer master grade kits Bandai has rolled out. The shoulder armor has no backing, so you can see right into the back of the plastic; not good, and it means I'll have to spend some extra effot masking and spraying it. The shoulder-ball mechanism is also pretty loose, so I'm thinking I'll need to cement that in.
The green sharpie is just to mark some problem areas, like seams and places where I scalped the plastic when removing nubs.
The elbow joint is actually pretty neat and does a good job of covering up the gray "skeleton" parts when bent. However, it rubs up against the upper arm a bit and I'm worried about how it'll hold up once painted. These arms also have a
ton of visible seams that will need to be taken care of; it's really making me appreciate the engineering on Wing, but then again I did ask for this...
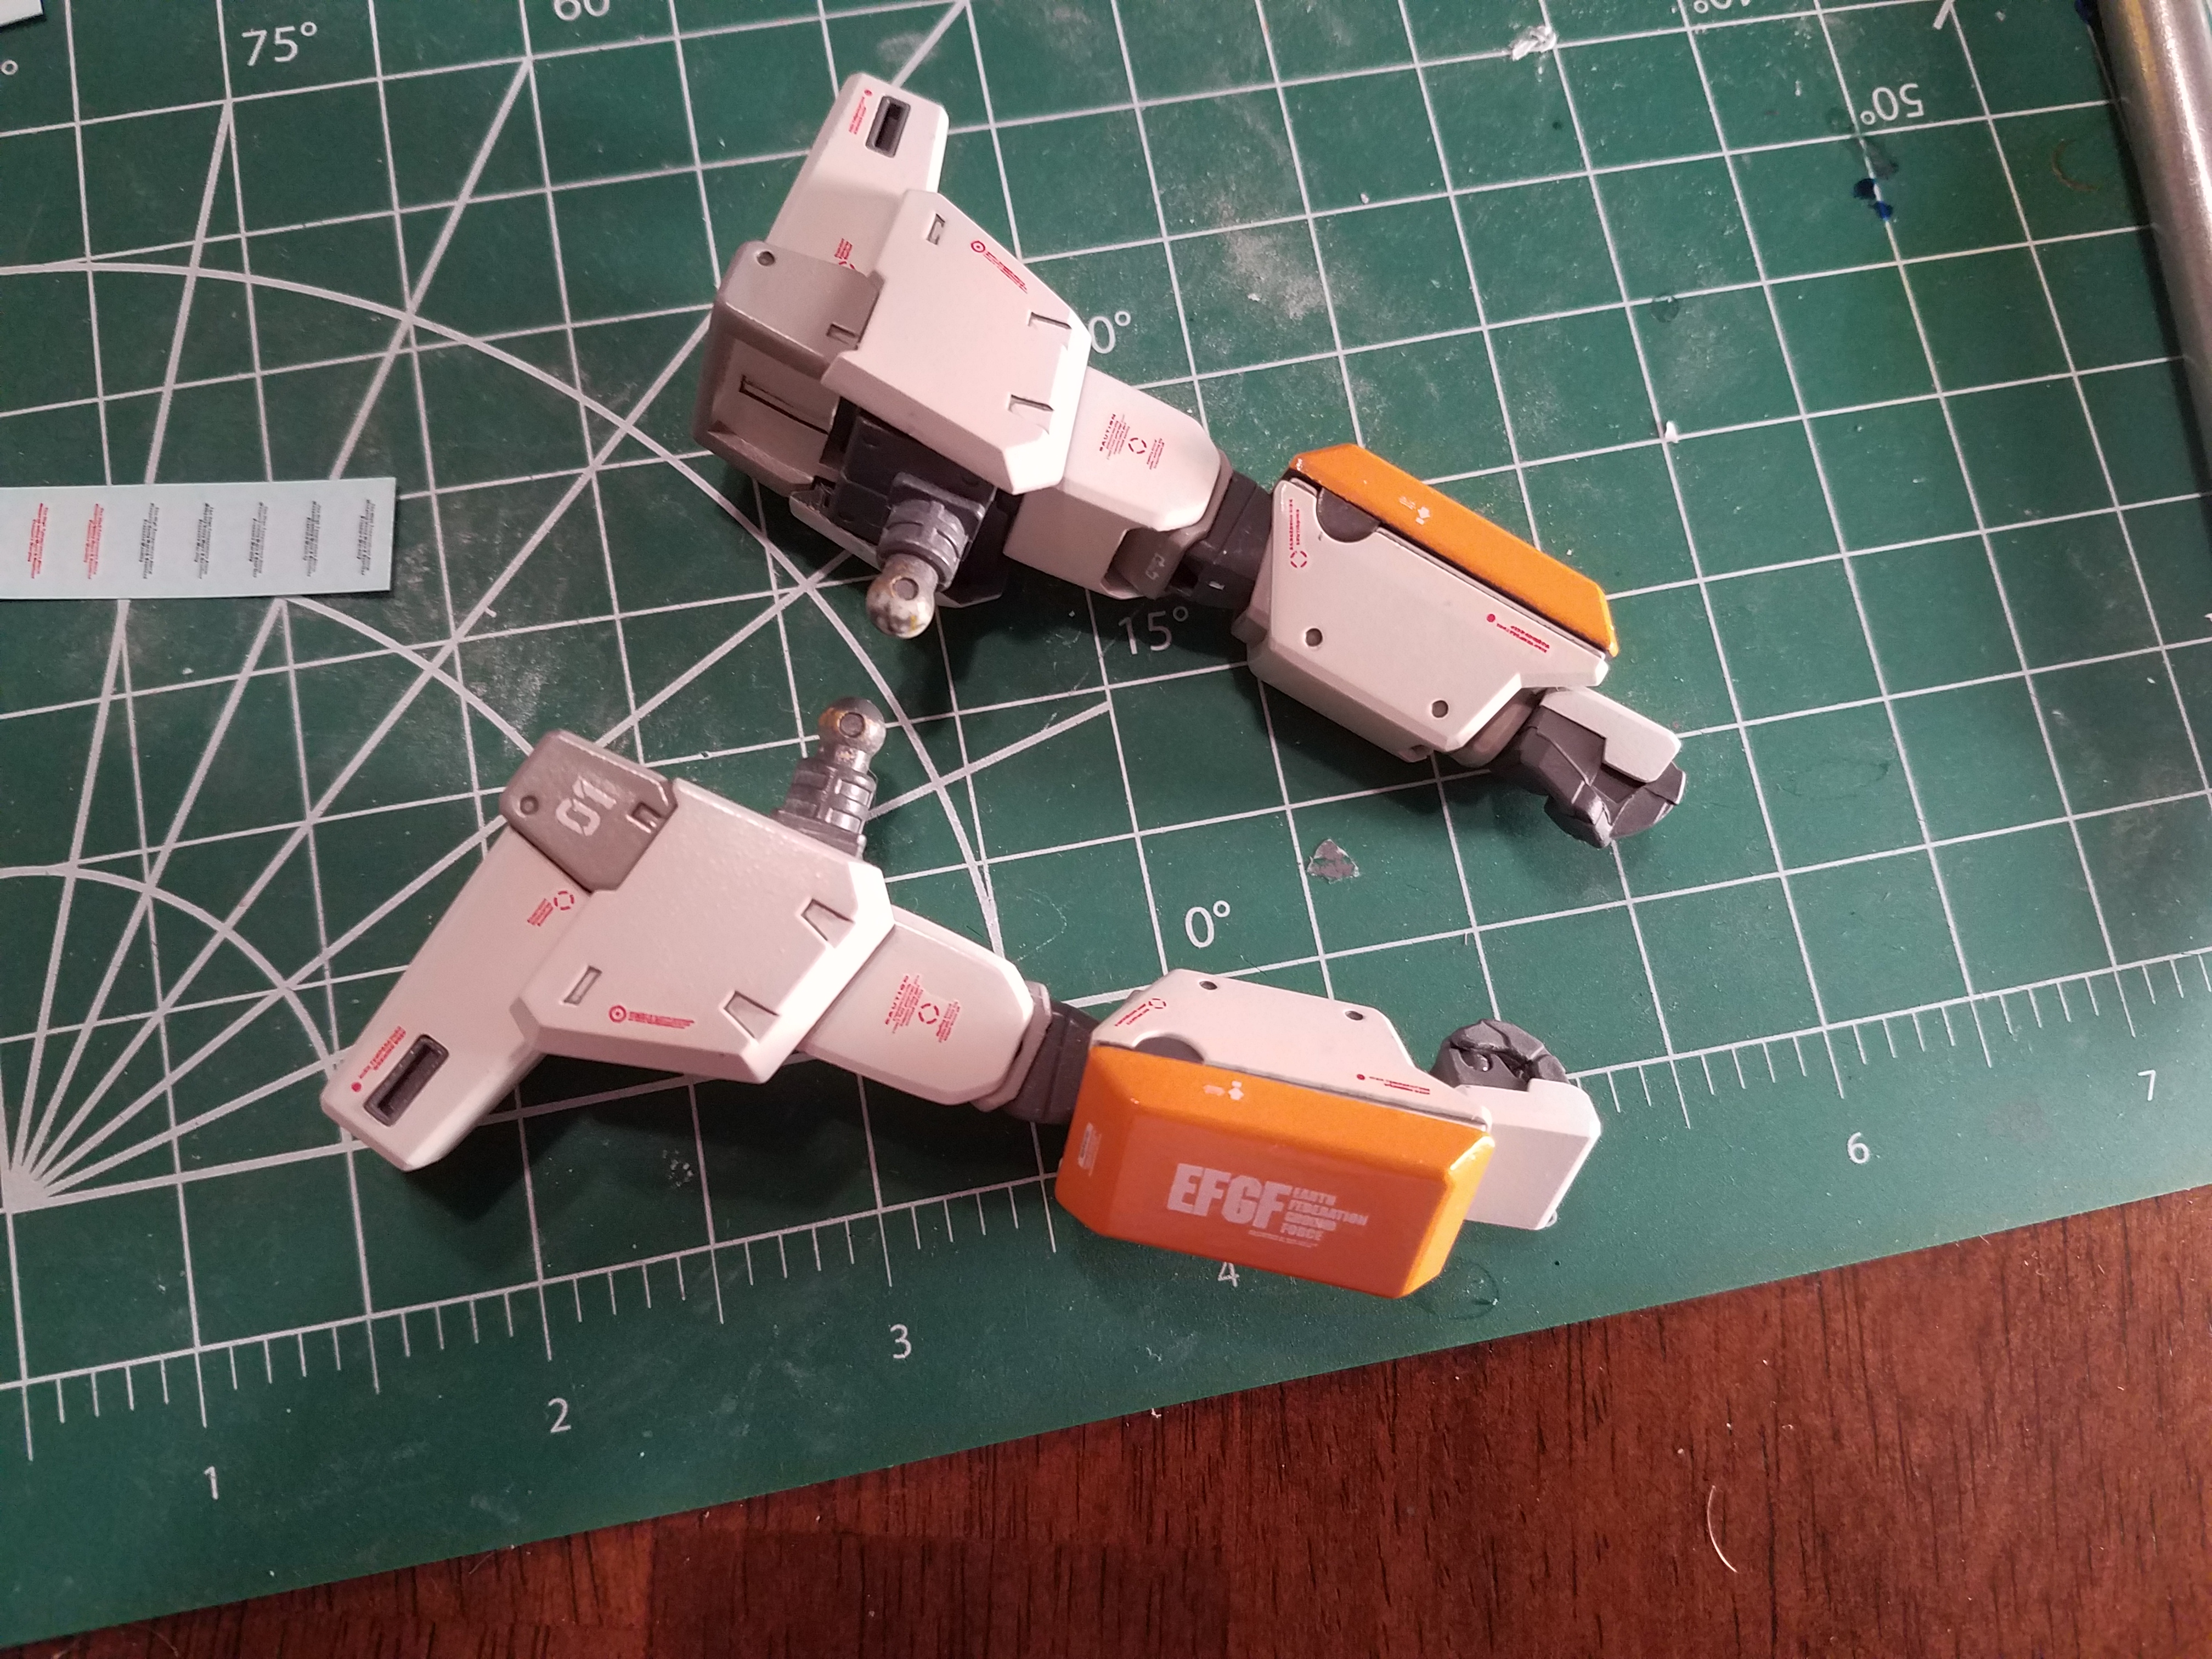
Finished both arms; here they are, fully extended and contracted. The range is pretty good, it's hitting about a 135 degree angle forward and even gets a bit of reverse movement, which is surprising. At this point I was feeling pretty exhausted from some swimming and watersports, so I decided to call it quits for the night. Hopefully I'll be able to finish the snap-fitting tomorrow (or on Sunday) and will start touching the seams up for painting.
Date Posted: July 7, 2012
Progress Update 2
I finished the initial assembly of this kit on Saturday, but took a while to update because I had a pretty busy weekend. It looks... well, like you'd expect an unfinished, sharpie-marked plastic model to look like; not too impressive. I couldn't resist taking some shots, though.
On the ground, articulation is very limited. While the arms have a good range of motion that allow for some nice poses (I really like that the GM can actually reach his beam sword "holster"), the legs have pretty lackluster range; the pose on the left is about the best you can do for an assertive, wide stance with both feet level. Unfortunately this really can't be fixed without some serious hip modifications (that are above my experience and material limits); however, I think that I can file around some areas on the feet to increase the articulation a bit.
He tends to look a bit more natural on an action base, but this also has a few issues. The legs still can't bend all that much, so the GM Custom can't really pull off a dash or charge; mostly he just kind of looks like he's gliding. The head also has very little up-and-down, which means he can't really do upward or downward motion either. This is a mod that I might be tackling; I have more than enough polycaps and some extra plastic parts from my old High Grade Burning Gundam that could be fashioned into a hinge that would sit inside the upper chest, giving a better range of motion without making the neck taller.
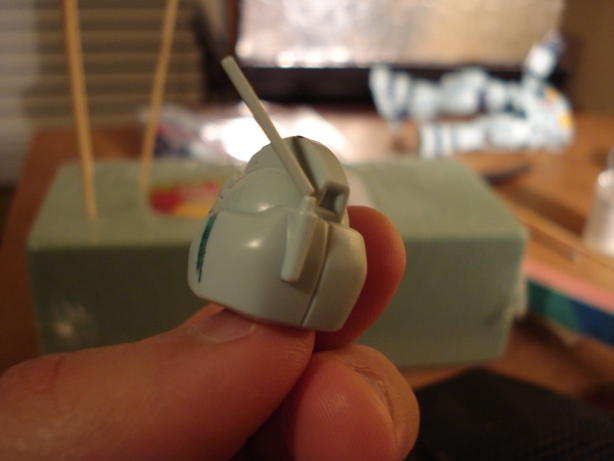
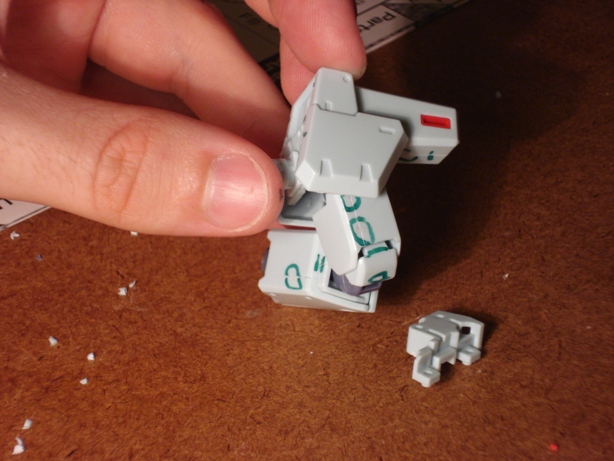
And of course I managed to ham-hand this and break off the head antenna on accident. Fortunately the kit comes with a spare, narrower antenna; I won't have to repair this one unless I manage to break that one as well. This kit actually comes with a lot of spares; there are alternate color wrists, hand-backs, clavicle vents, and top-feet. It also comes with some inner-arm pieces for the NT-1 Gundam Alex; they share a few runners, which is appropriate given the in-universe production history.
Today I took the left arm apart and started the seam removal process. I used a brush jar of Testors plastic cement to weld a few pieces together; tomorrow I'll start sanding these smooth. The arms and legs are constructed in layers, so these will have to be painted before other parts can be assembled around them. This is kind of annoying, since it means I'll have to paint in more batches than I'd really like. It also means I'll have to finalize the color scheme and actually buy some paints/primer pretty soon.
Date Posted: July 10, 2012
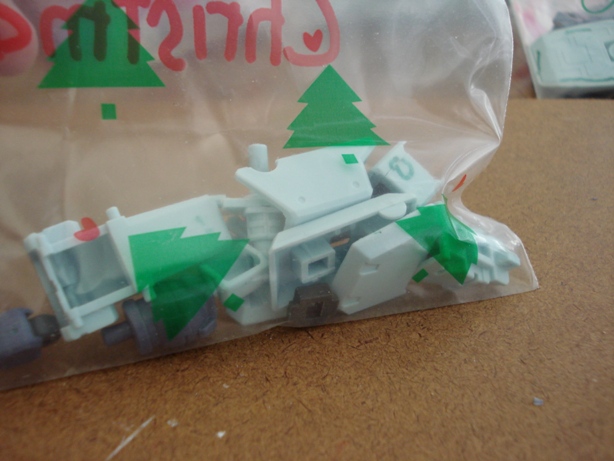
Progress Update 3
It's been a few days, but now I've finally got almost everything disassembled, de-seamed, and bagged. A few pieces will have to wait for other parts to be painted, but I estimate that around 60% of the kit is compltely ready for priming, assuming that I don't have to re-sand them. I don't think I'll have to do much there, but some pieces like the shield weren't cast very well and may require more work.
I filed out the ankles and sanded them round to give the feet some more range. I also sanded the outer armor a bit. The results were pretty disappointing though, I didn't get nearly what I wanted.
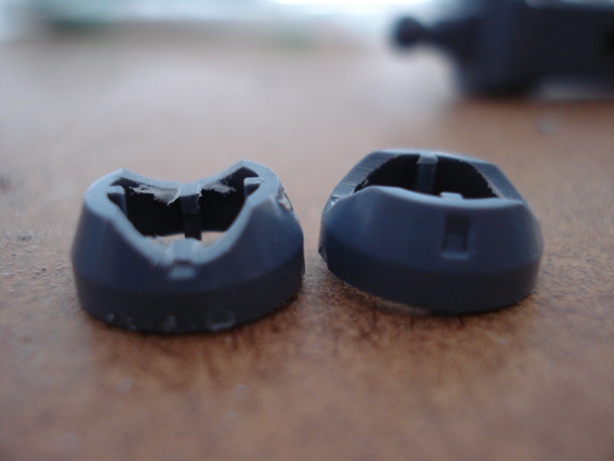
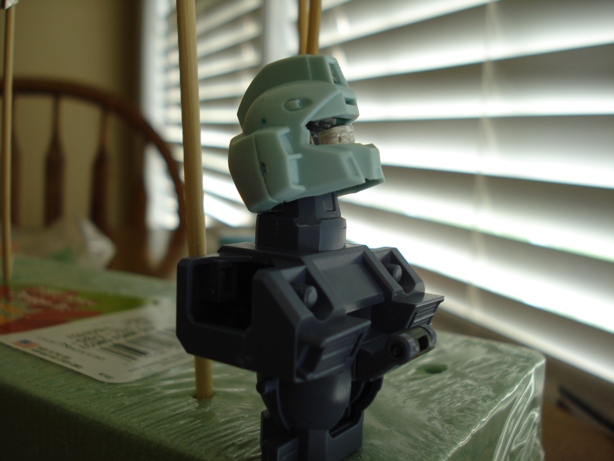
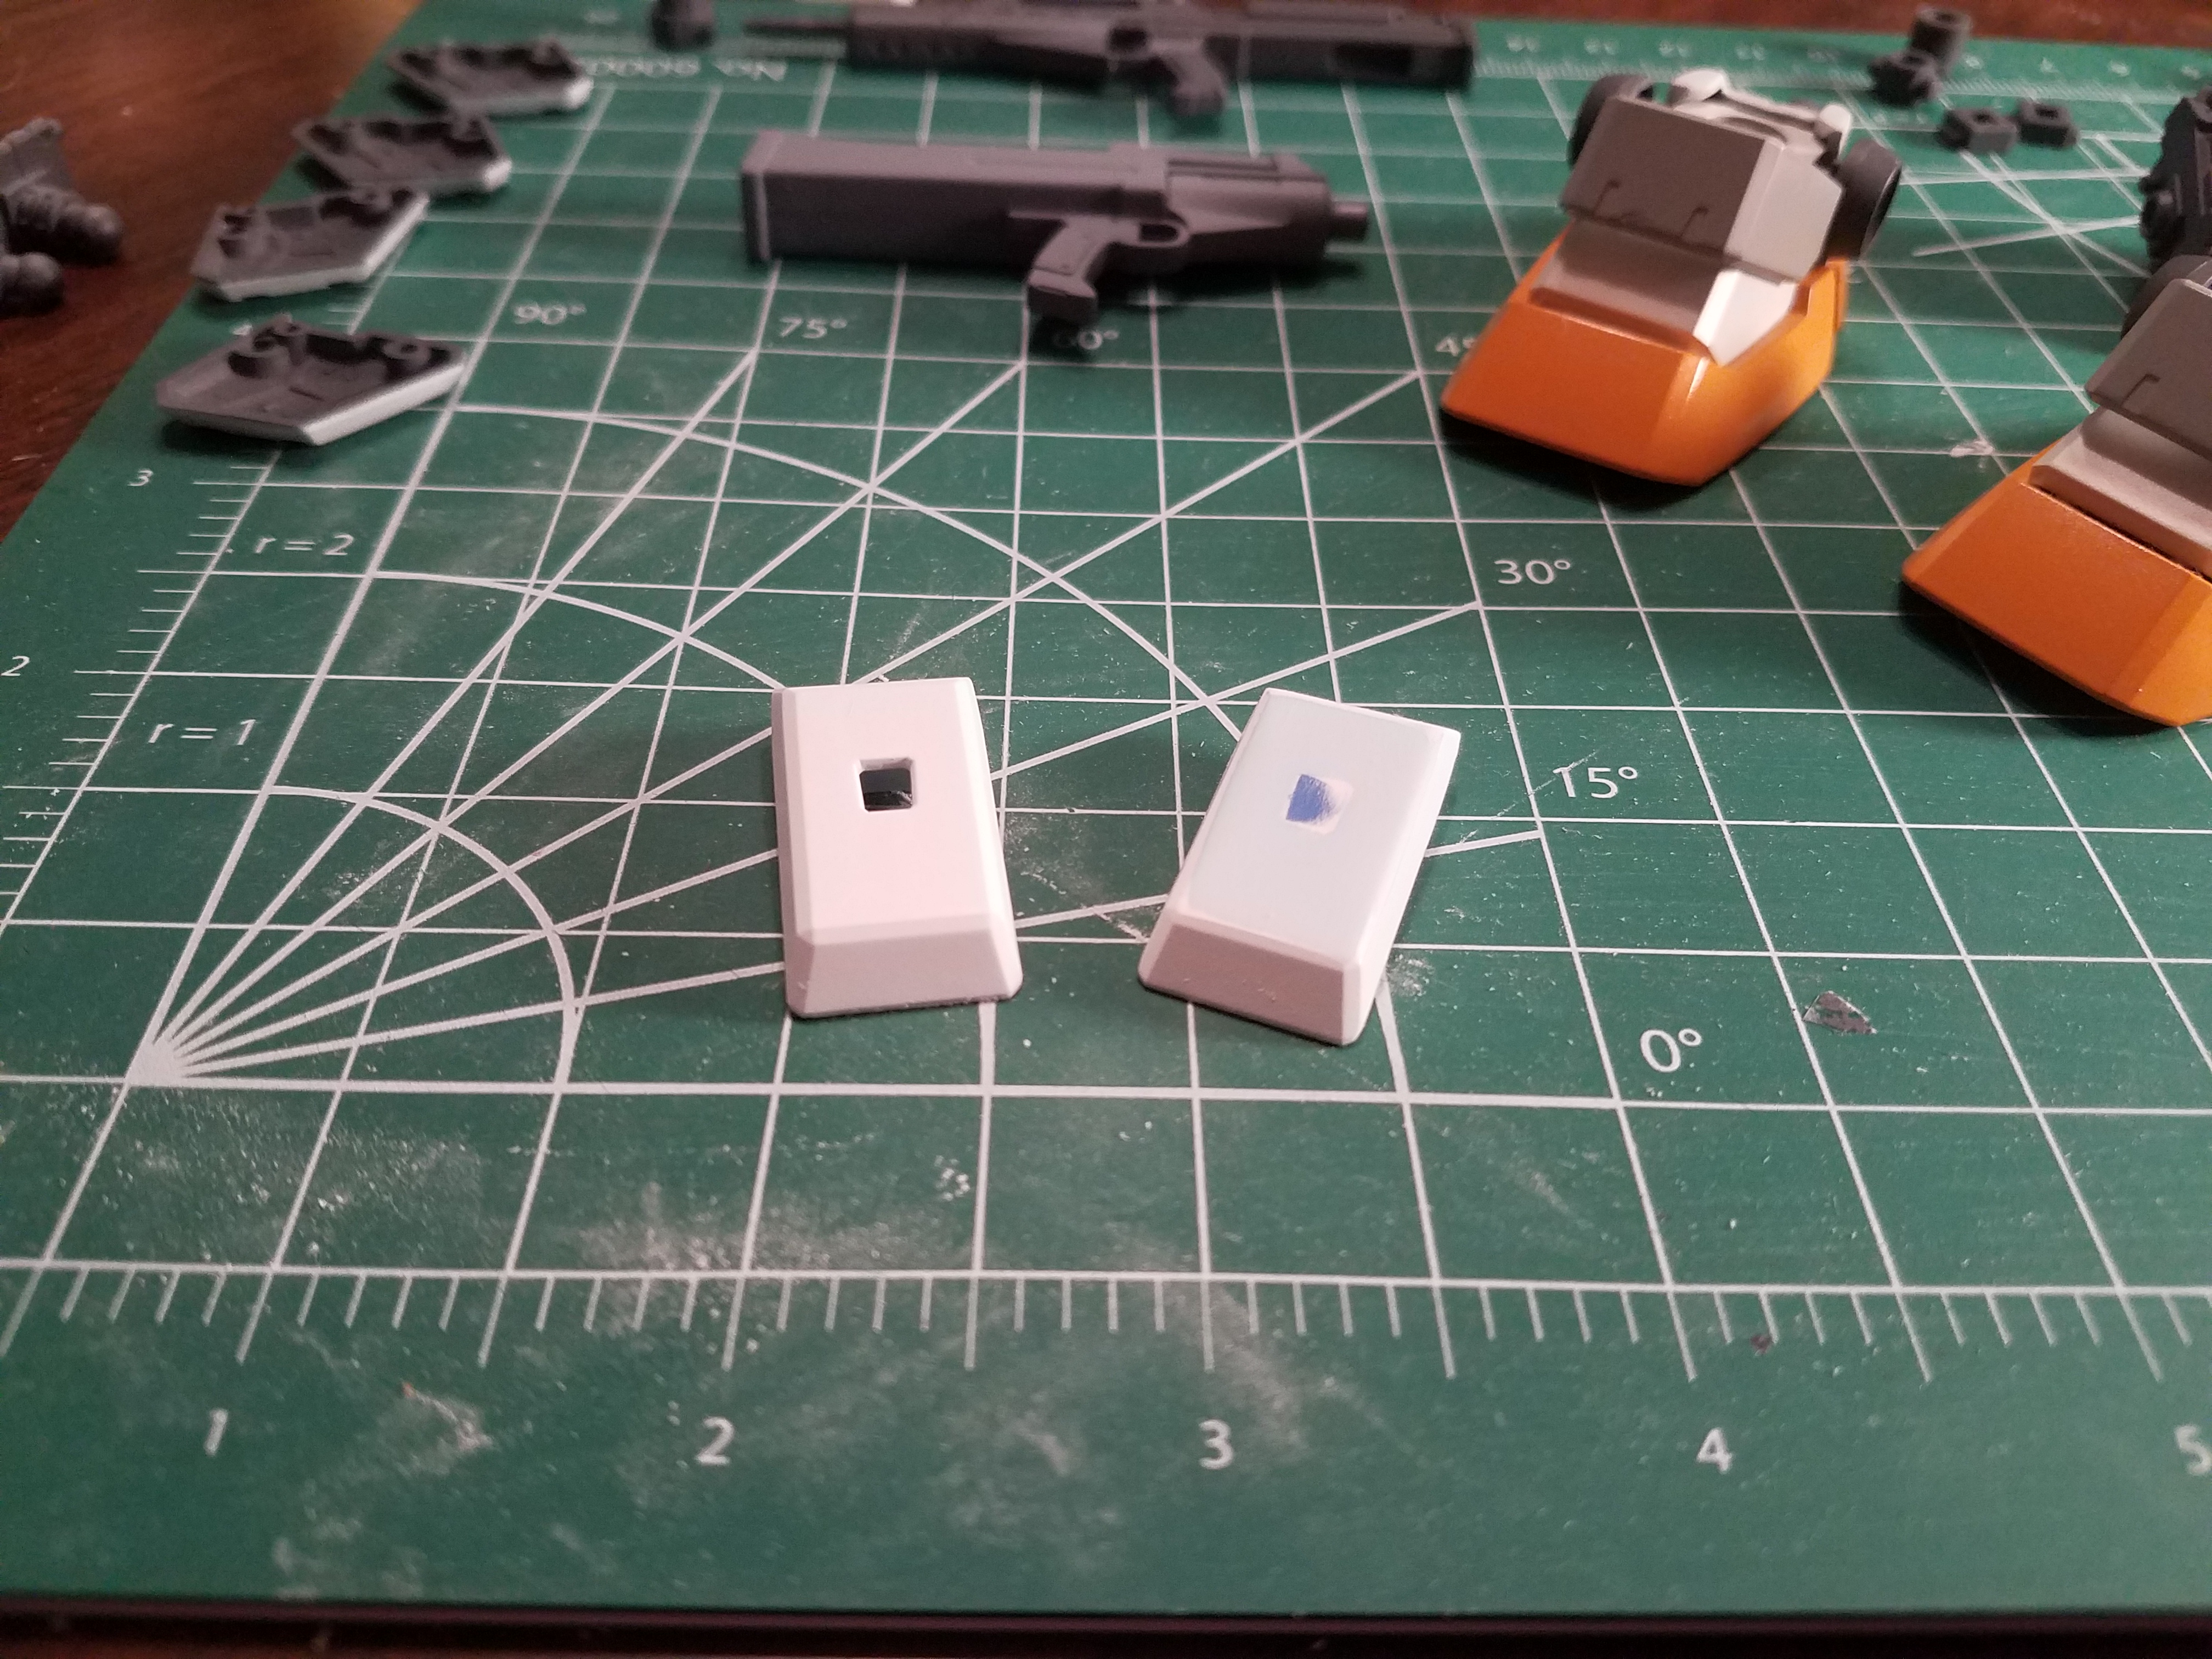
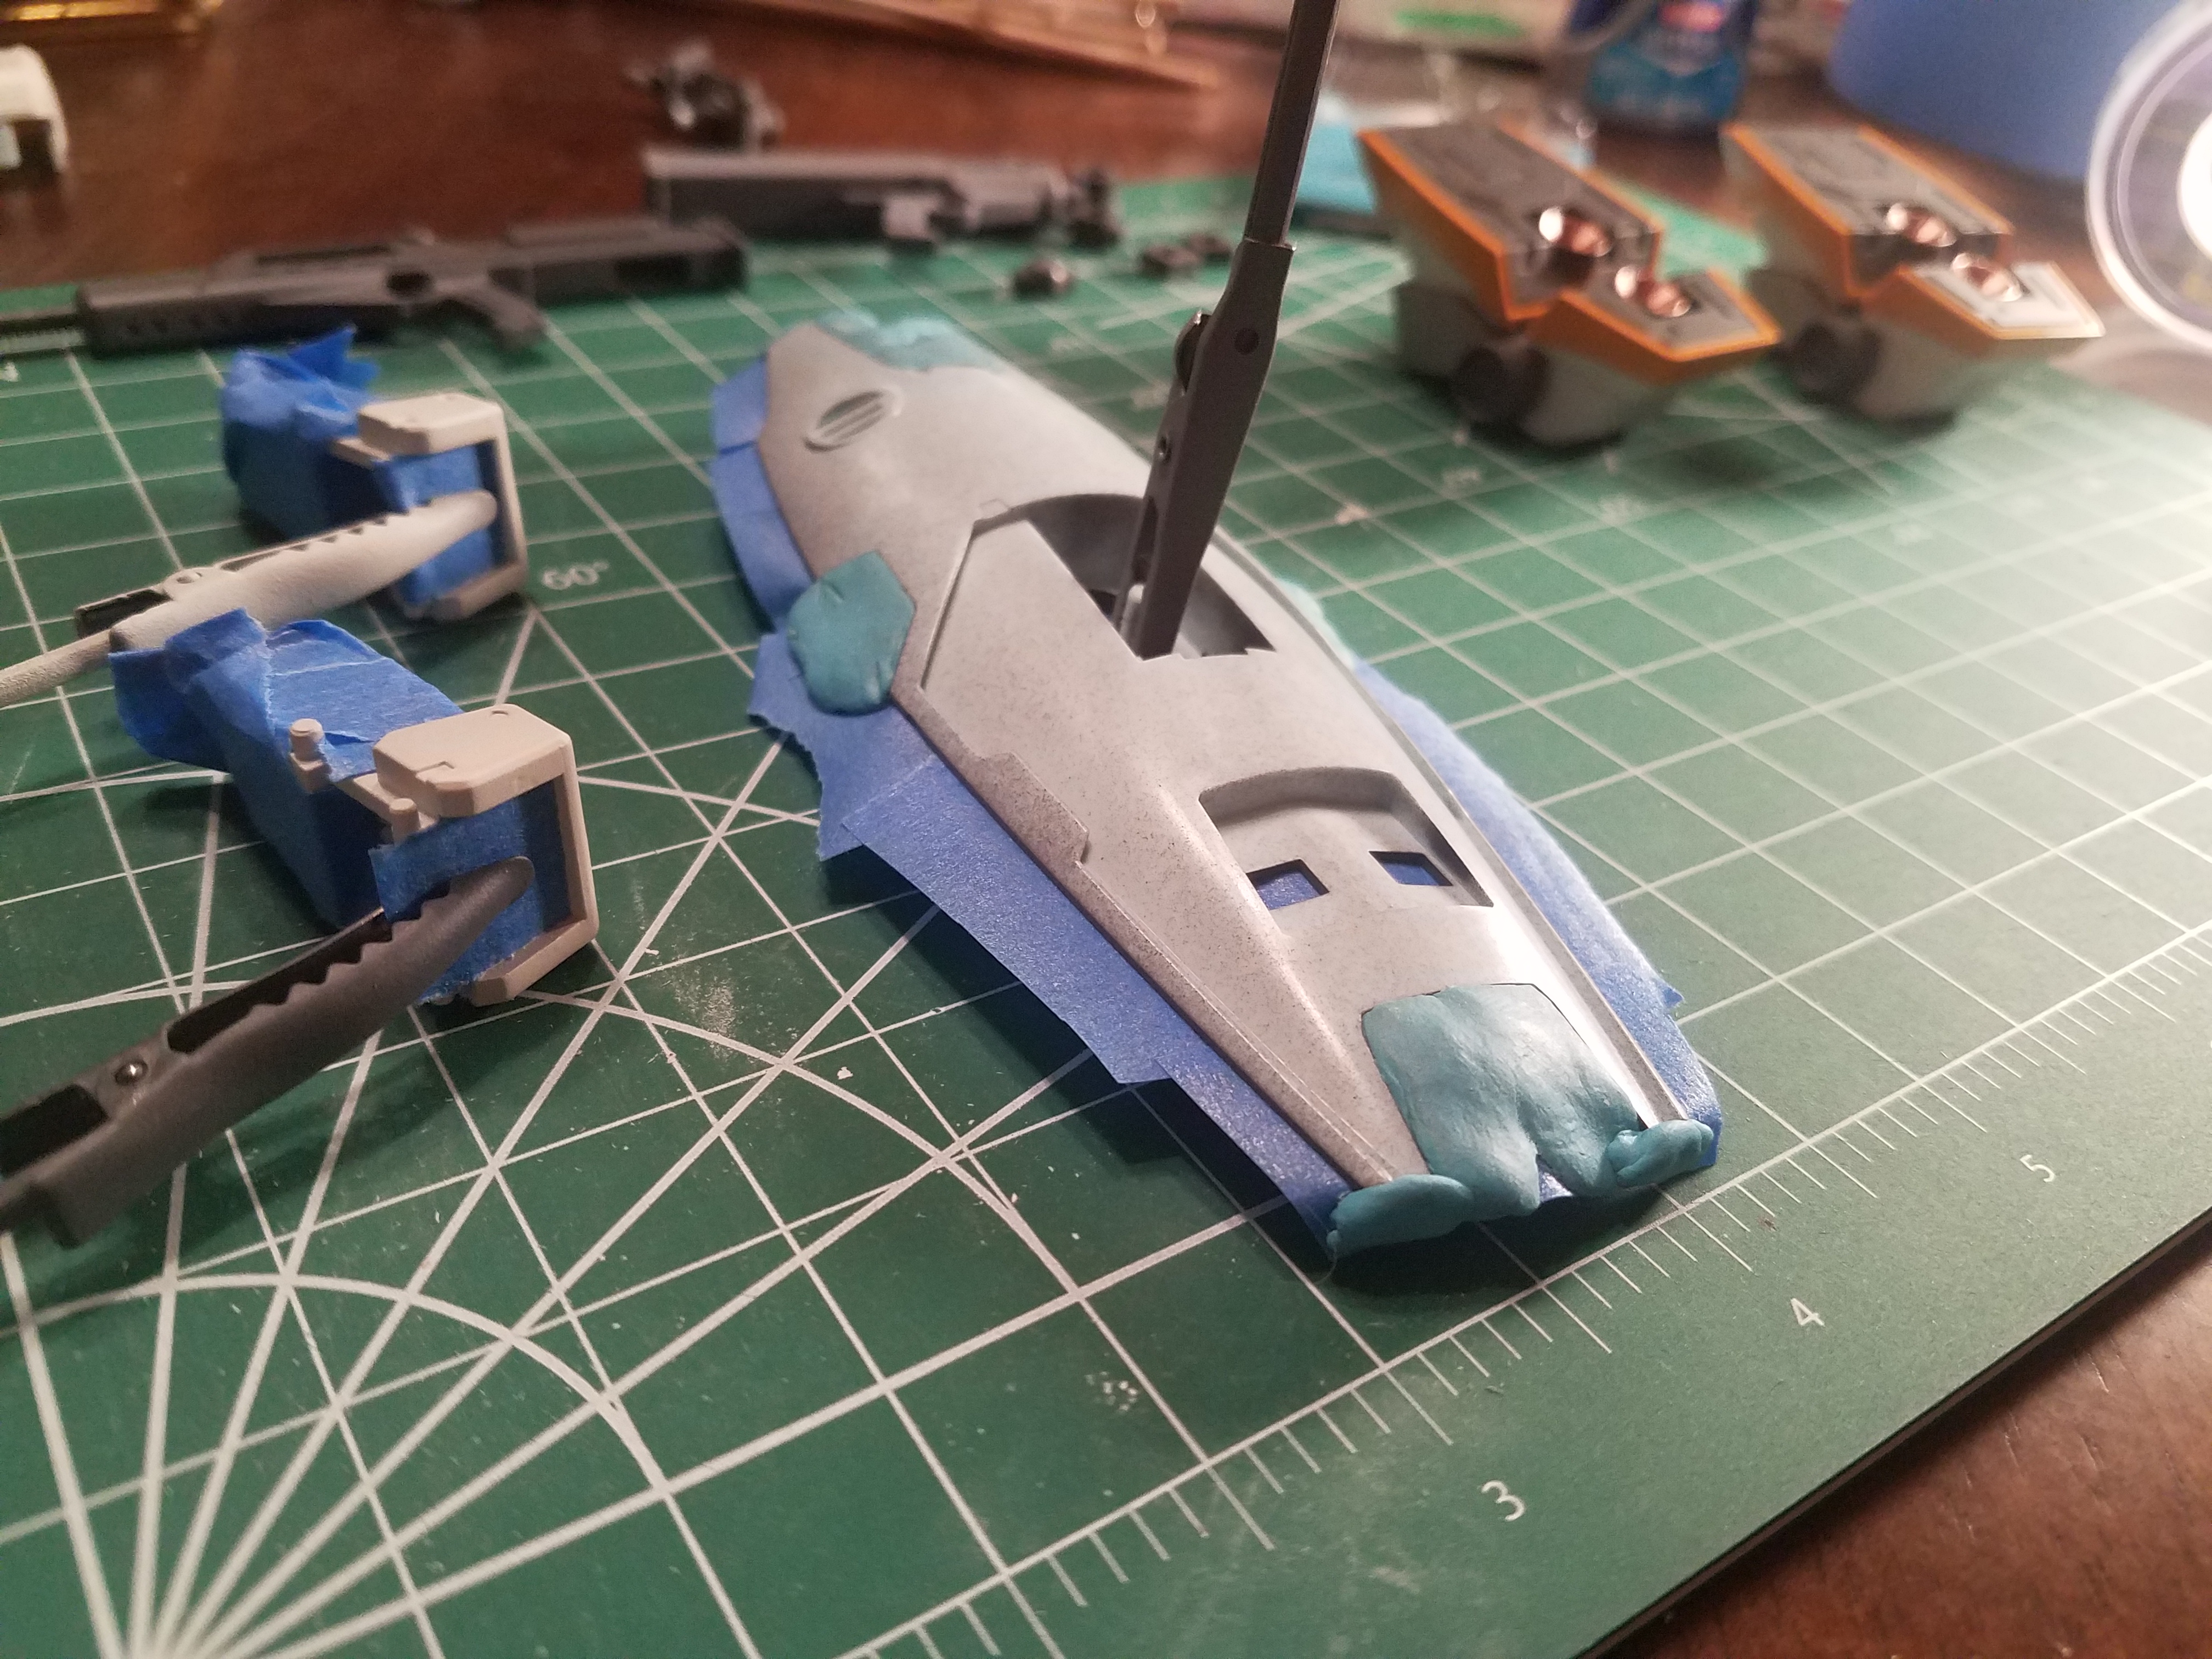
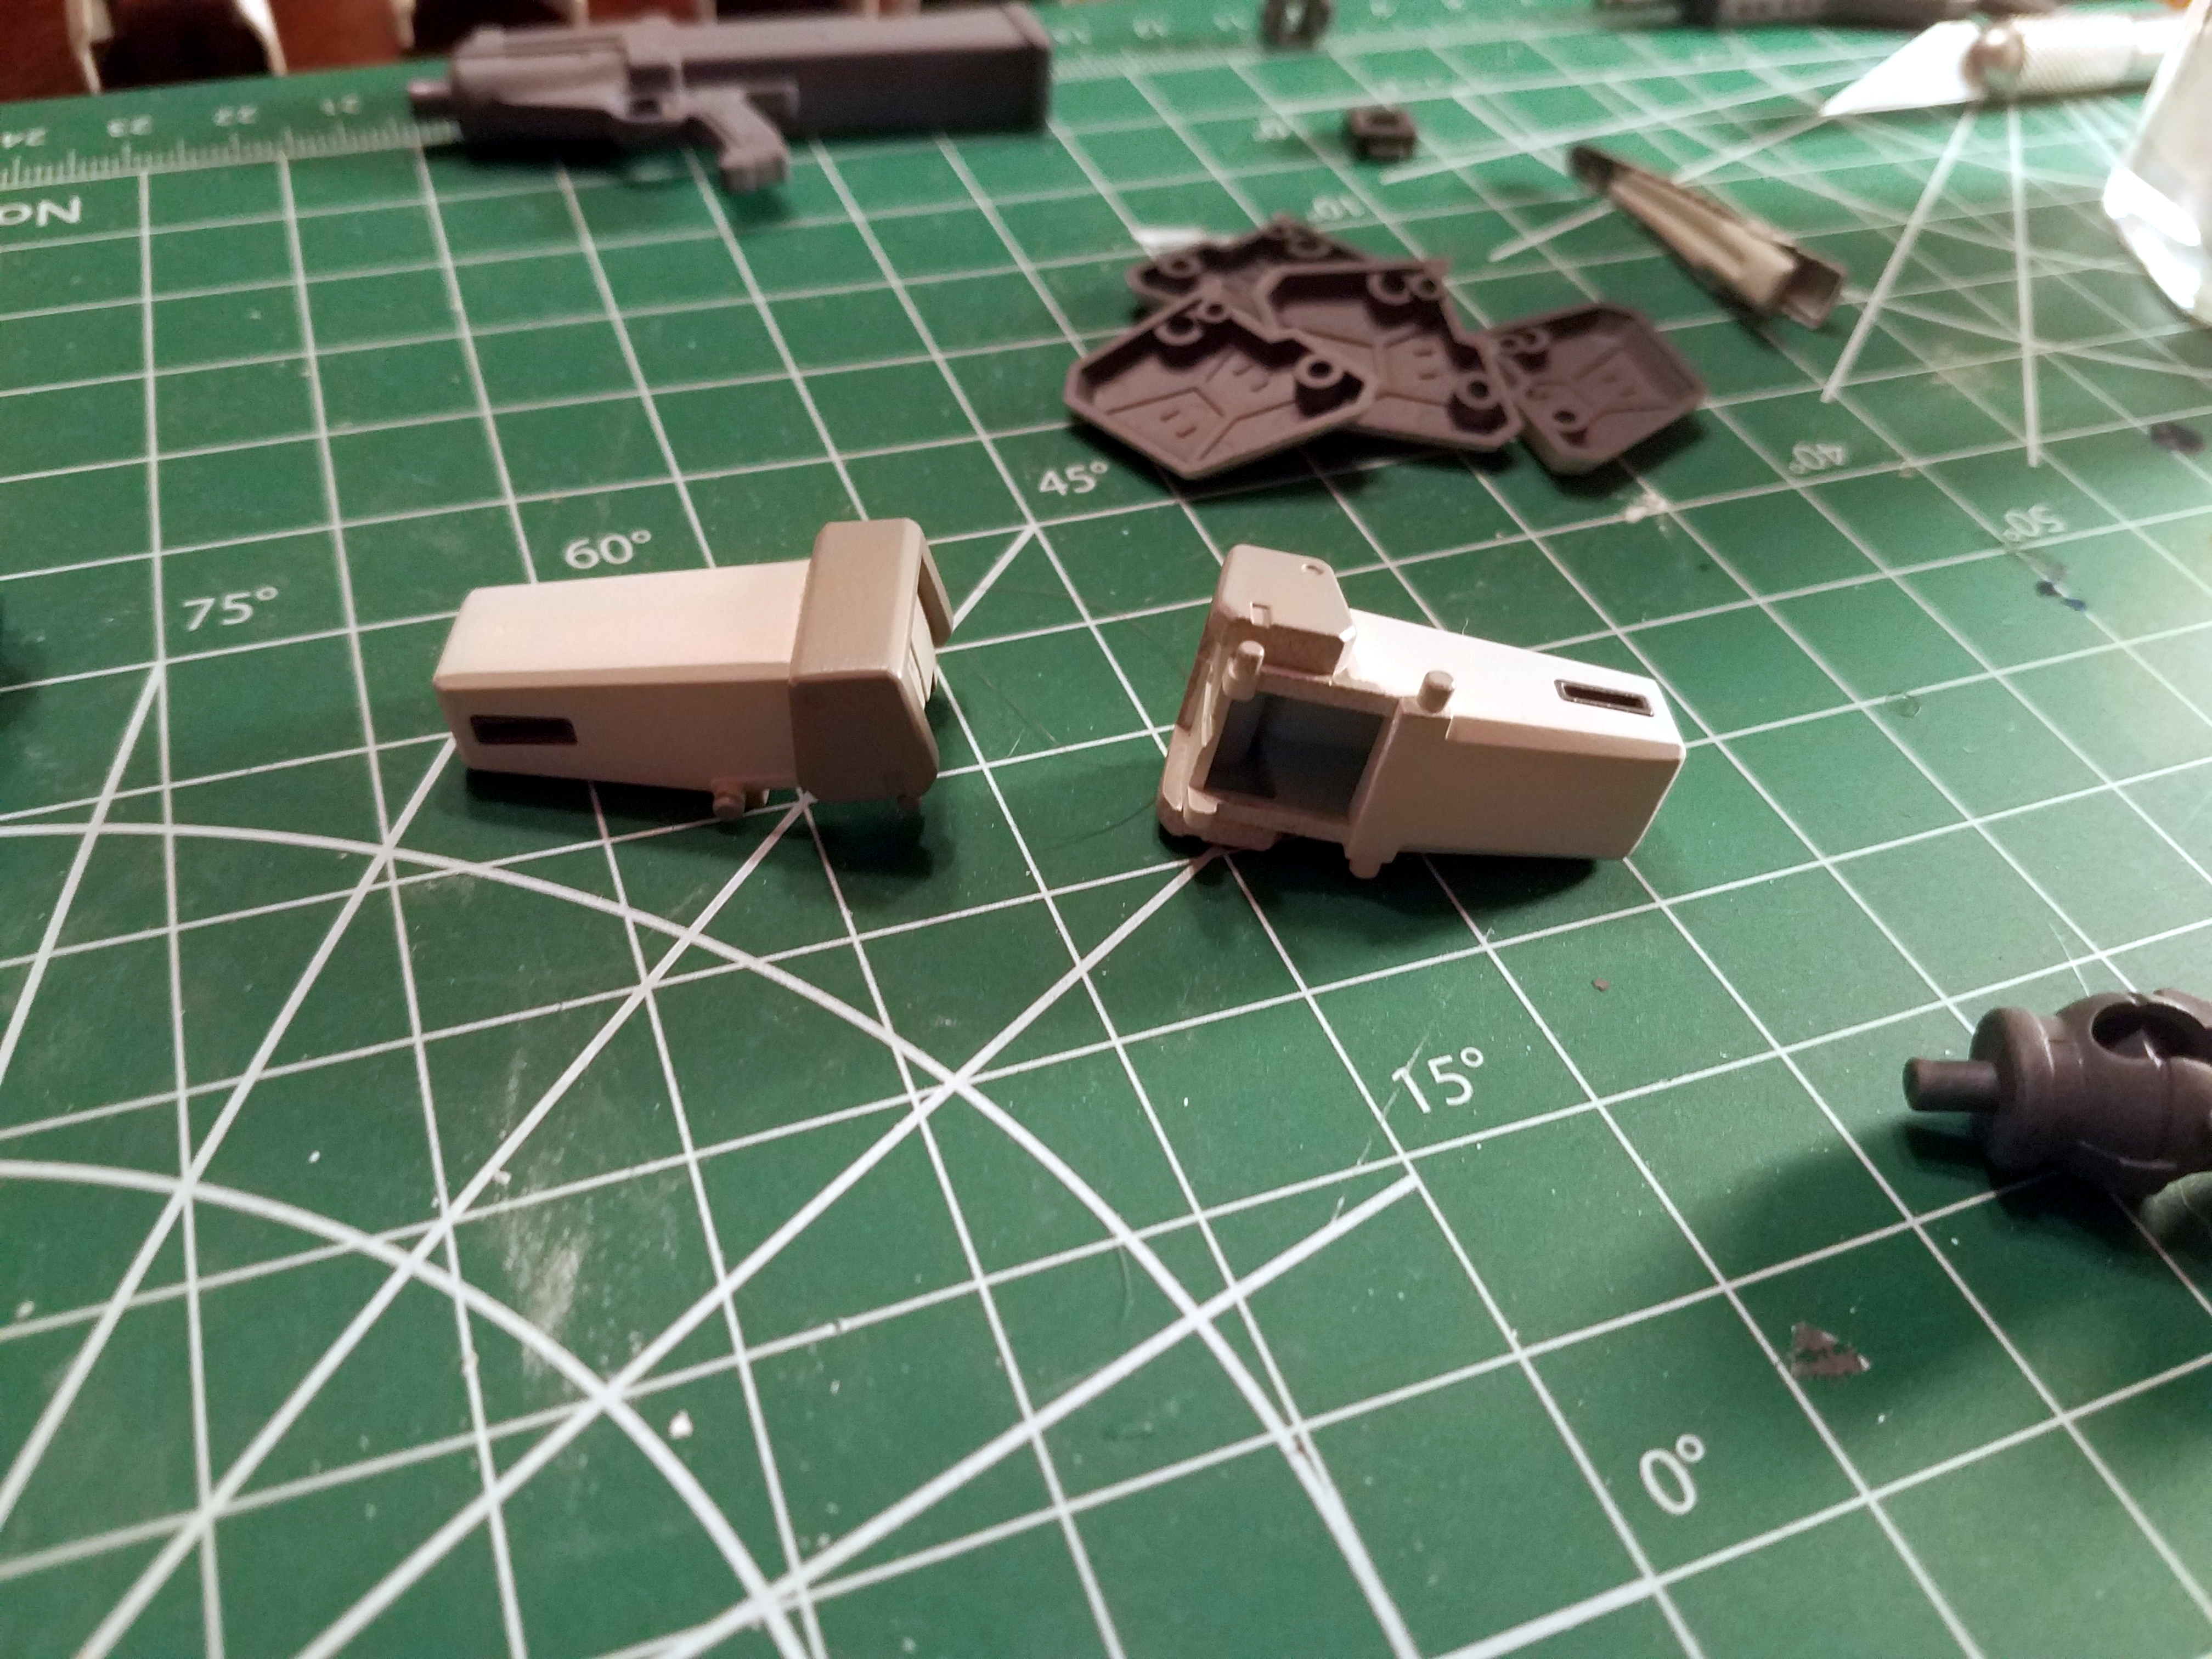
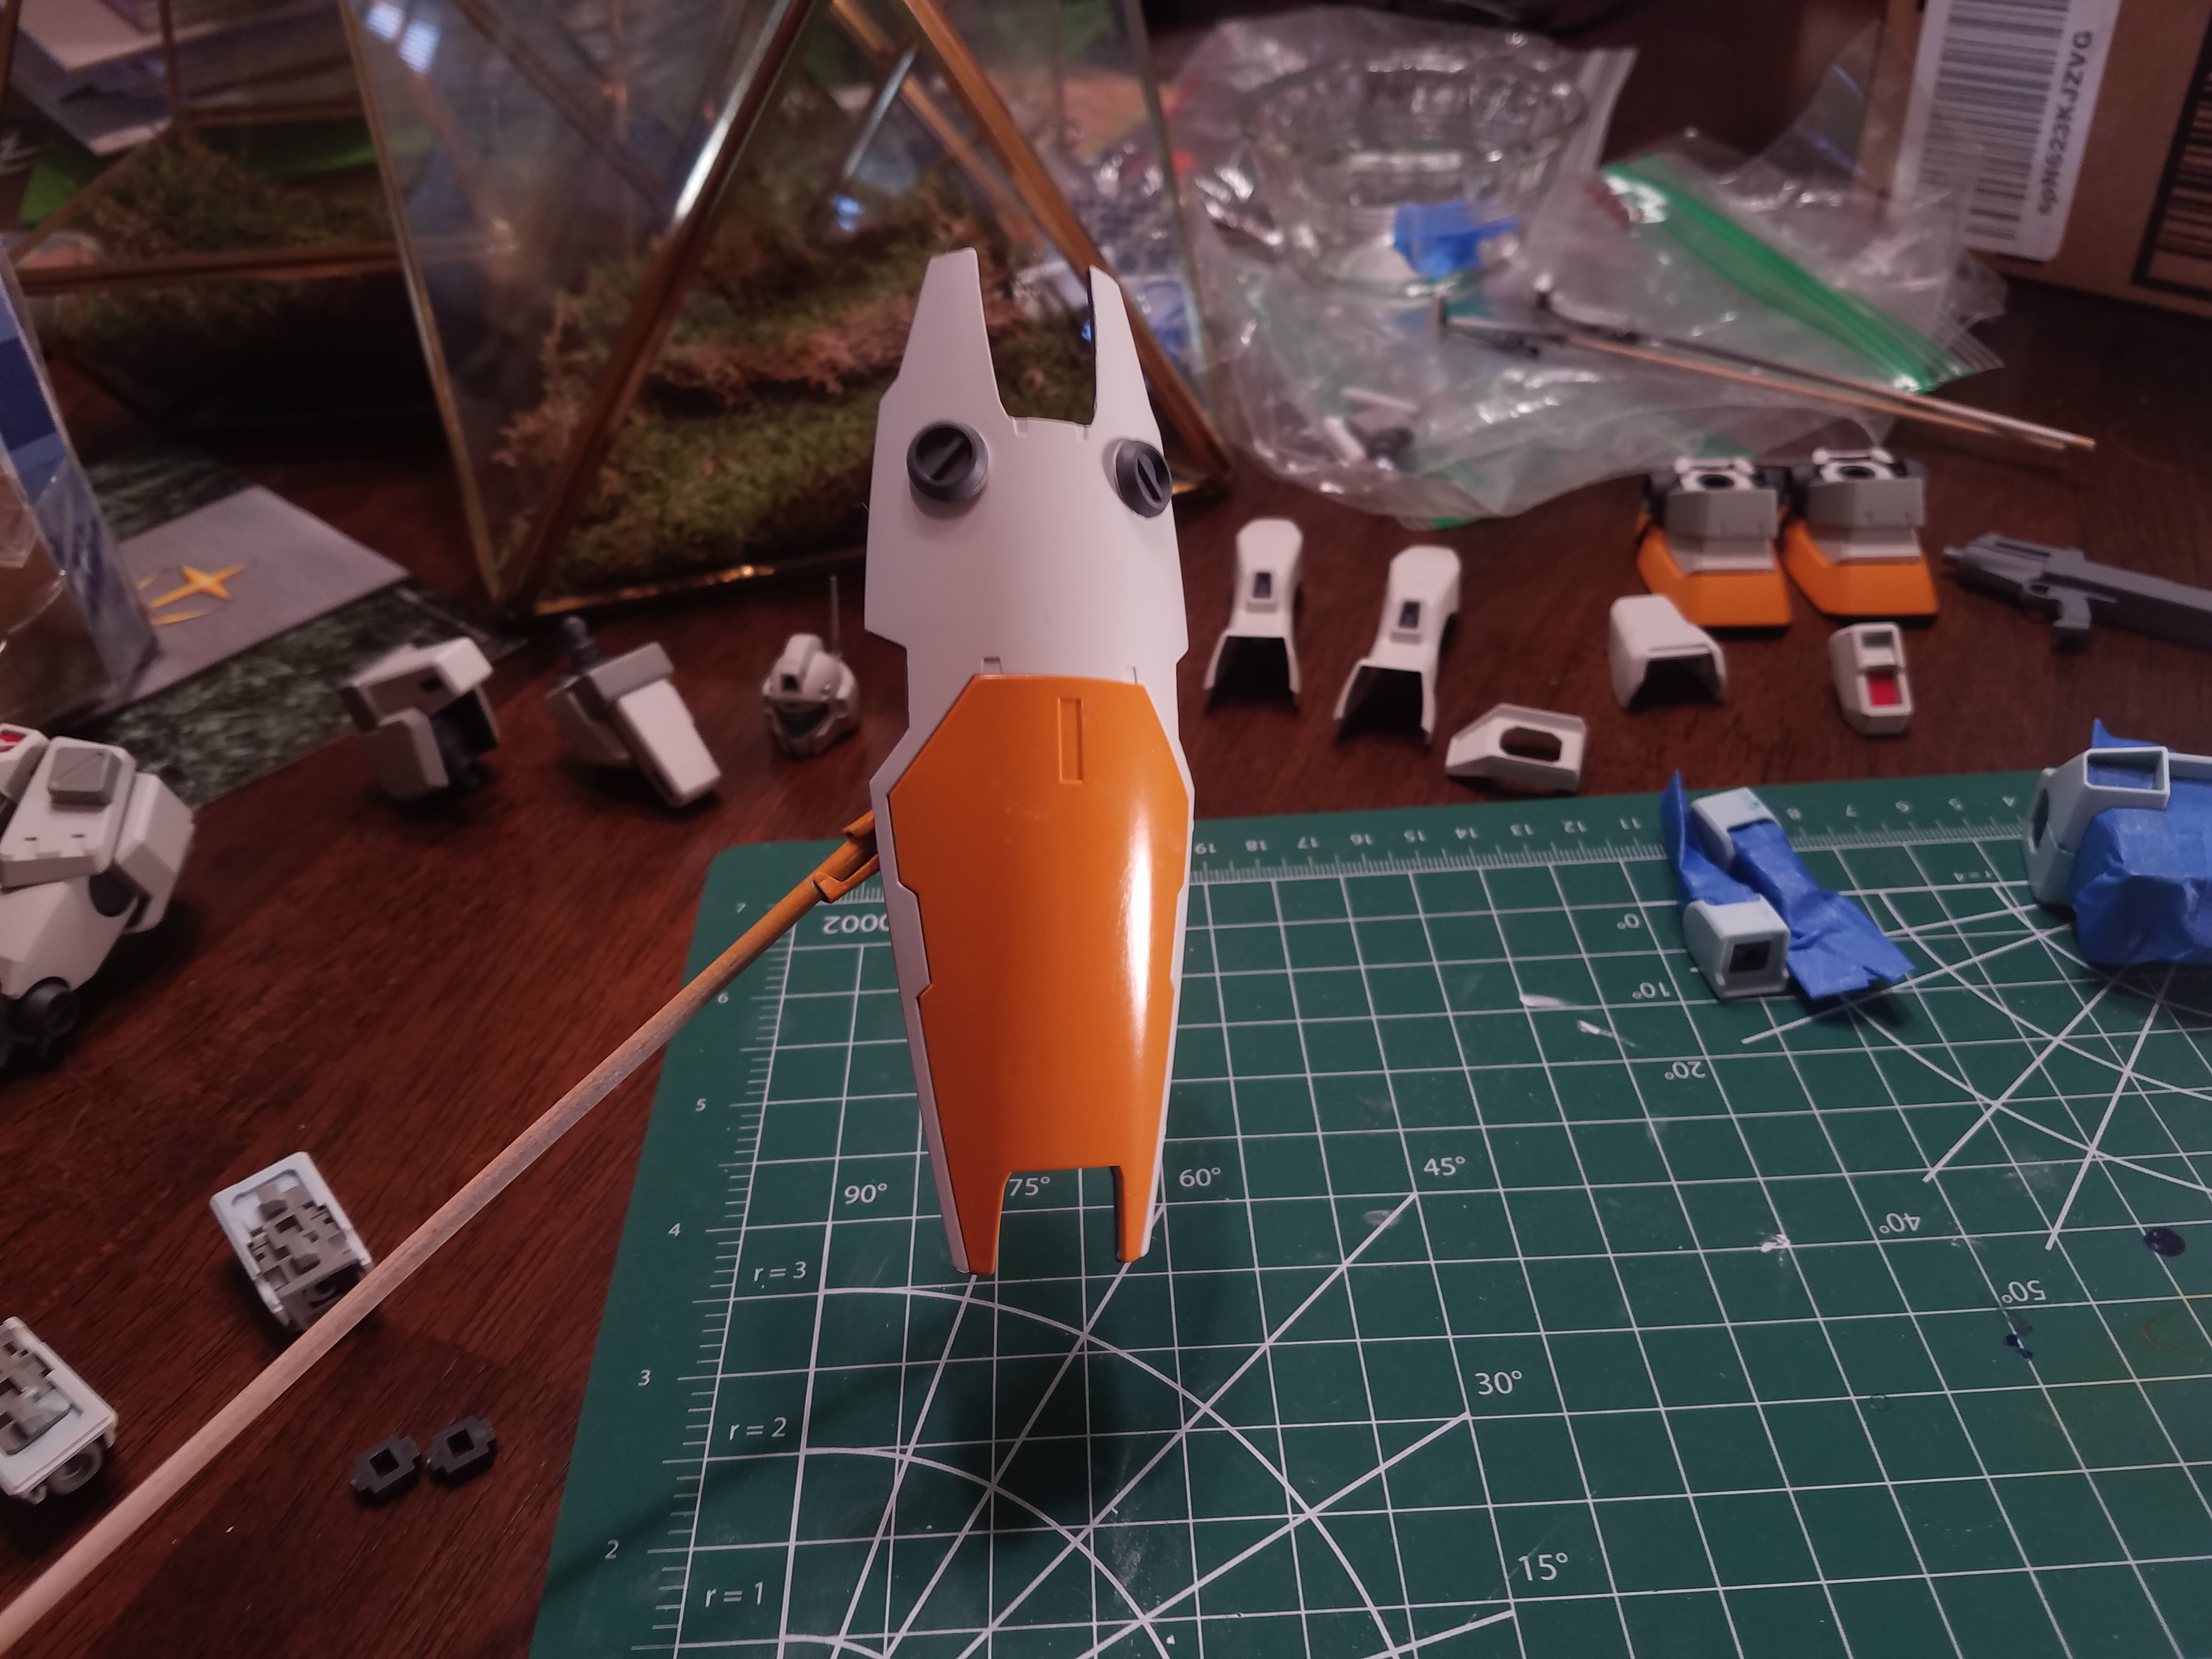
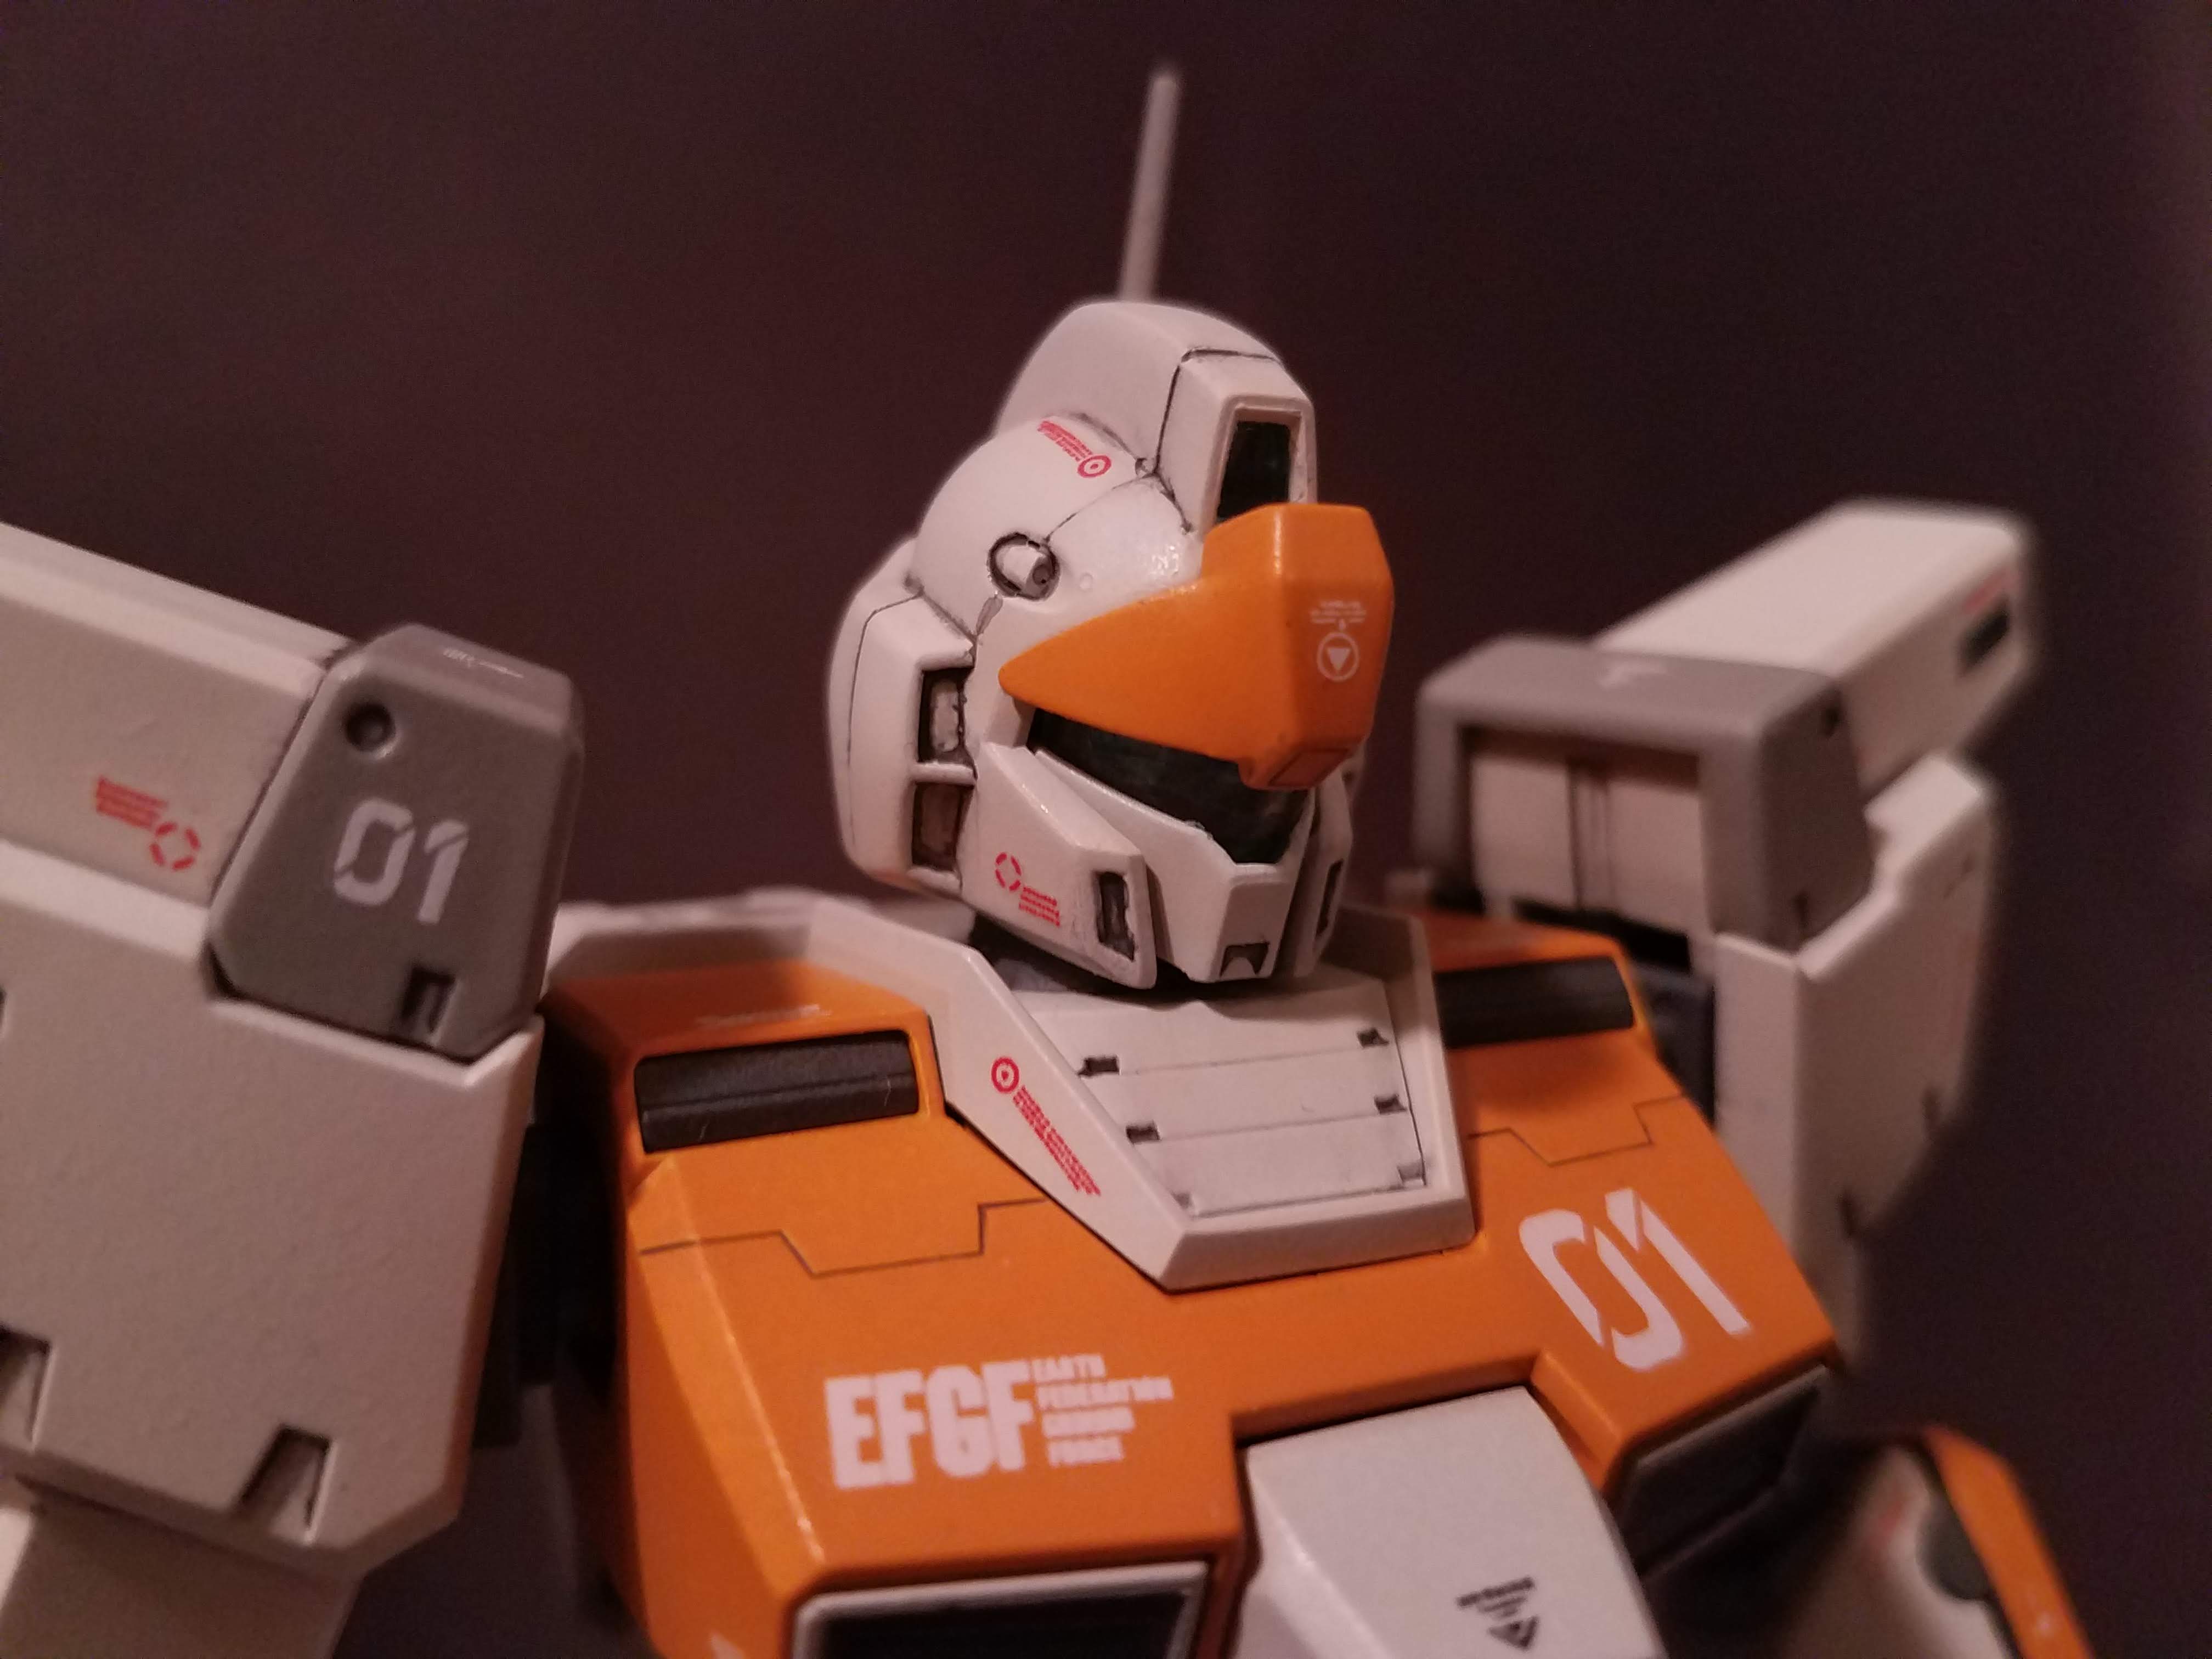
Even on modern kits, head modification is necessary when you clean up the seam lines; the face part is fixed in place between the front and back of the head, so to paint them both you have to have them apart, but if you use cement to remove the seam then that's impossible.
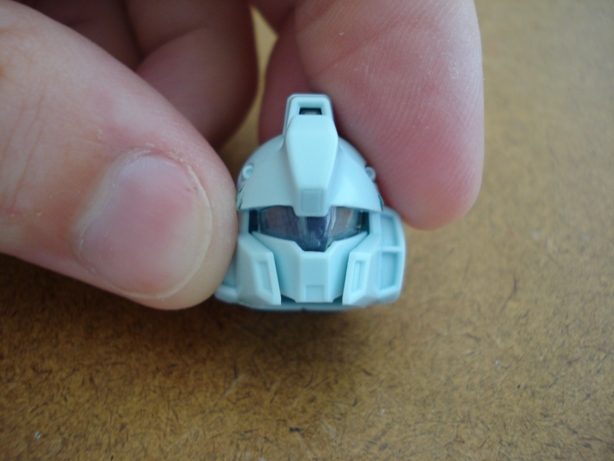
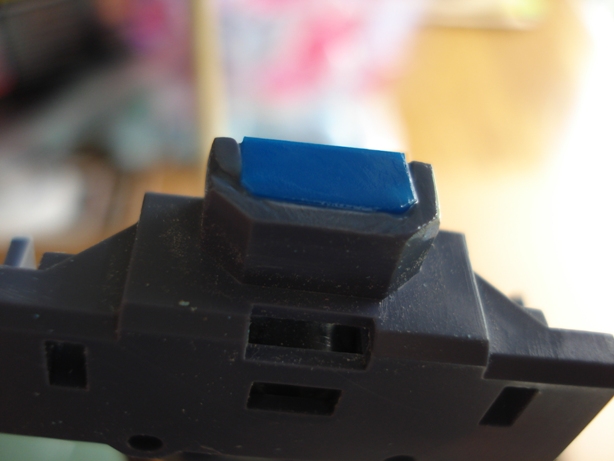
The way that I got around it was to pre-paint the area behind the head/forehead cameras silver (I plan to use a clear paint on the clear plastic parts that go over this), then cut the assembly at the score line on the picture. This fixes the forehead camera in the head, which I'll have to mask when painting. The face doesn't attach to anything now, but I can squeez it in through the bottom of the head after painting and it fits snugly enough to stay in. I'm pretty satisfied with how the paint dried (I'm awful at handpainting enamels) and it seems like this will work pretty well.
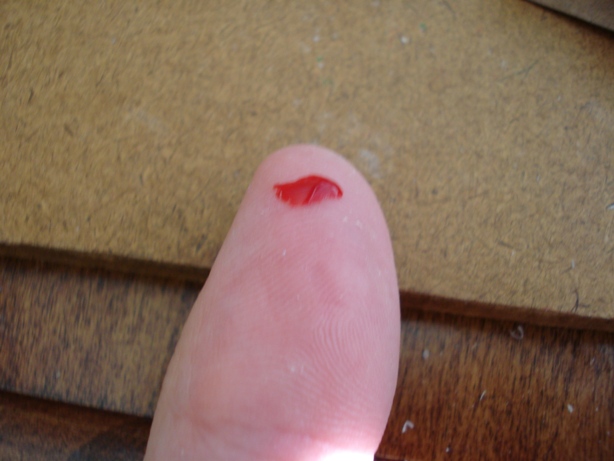
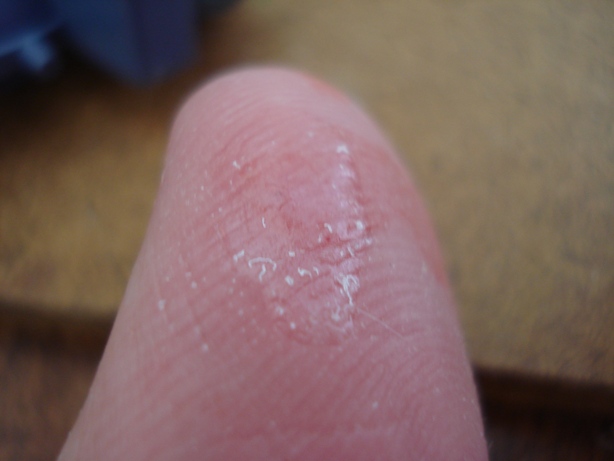
I also managed to stab myself with the hobby knife, which I've never done before. A little superglue fixed it right up, though.
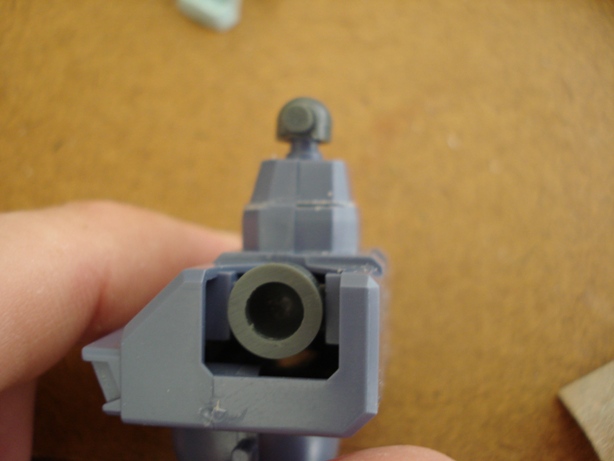
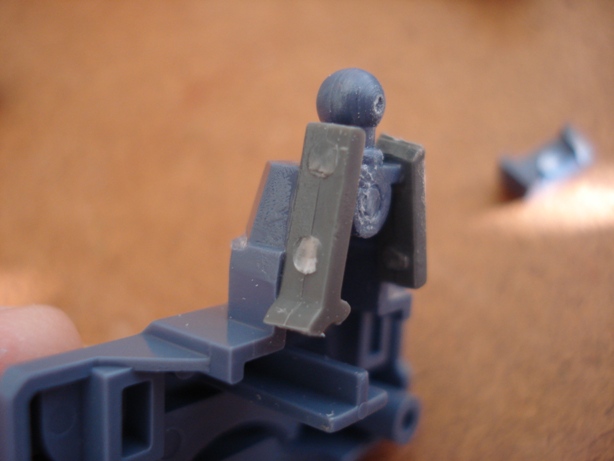
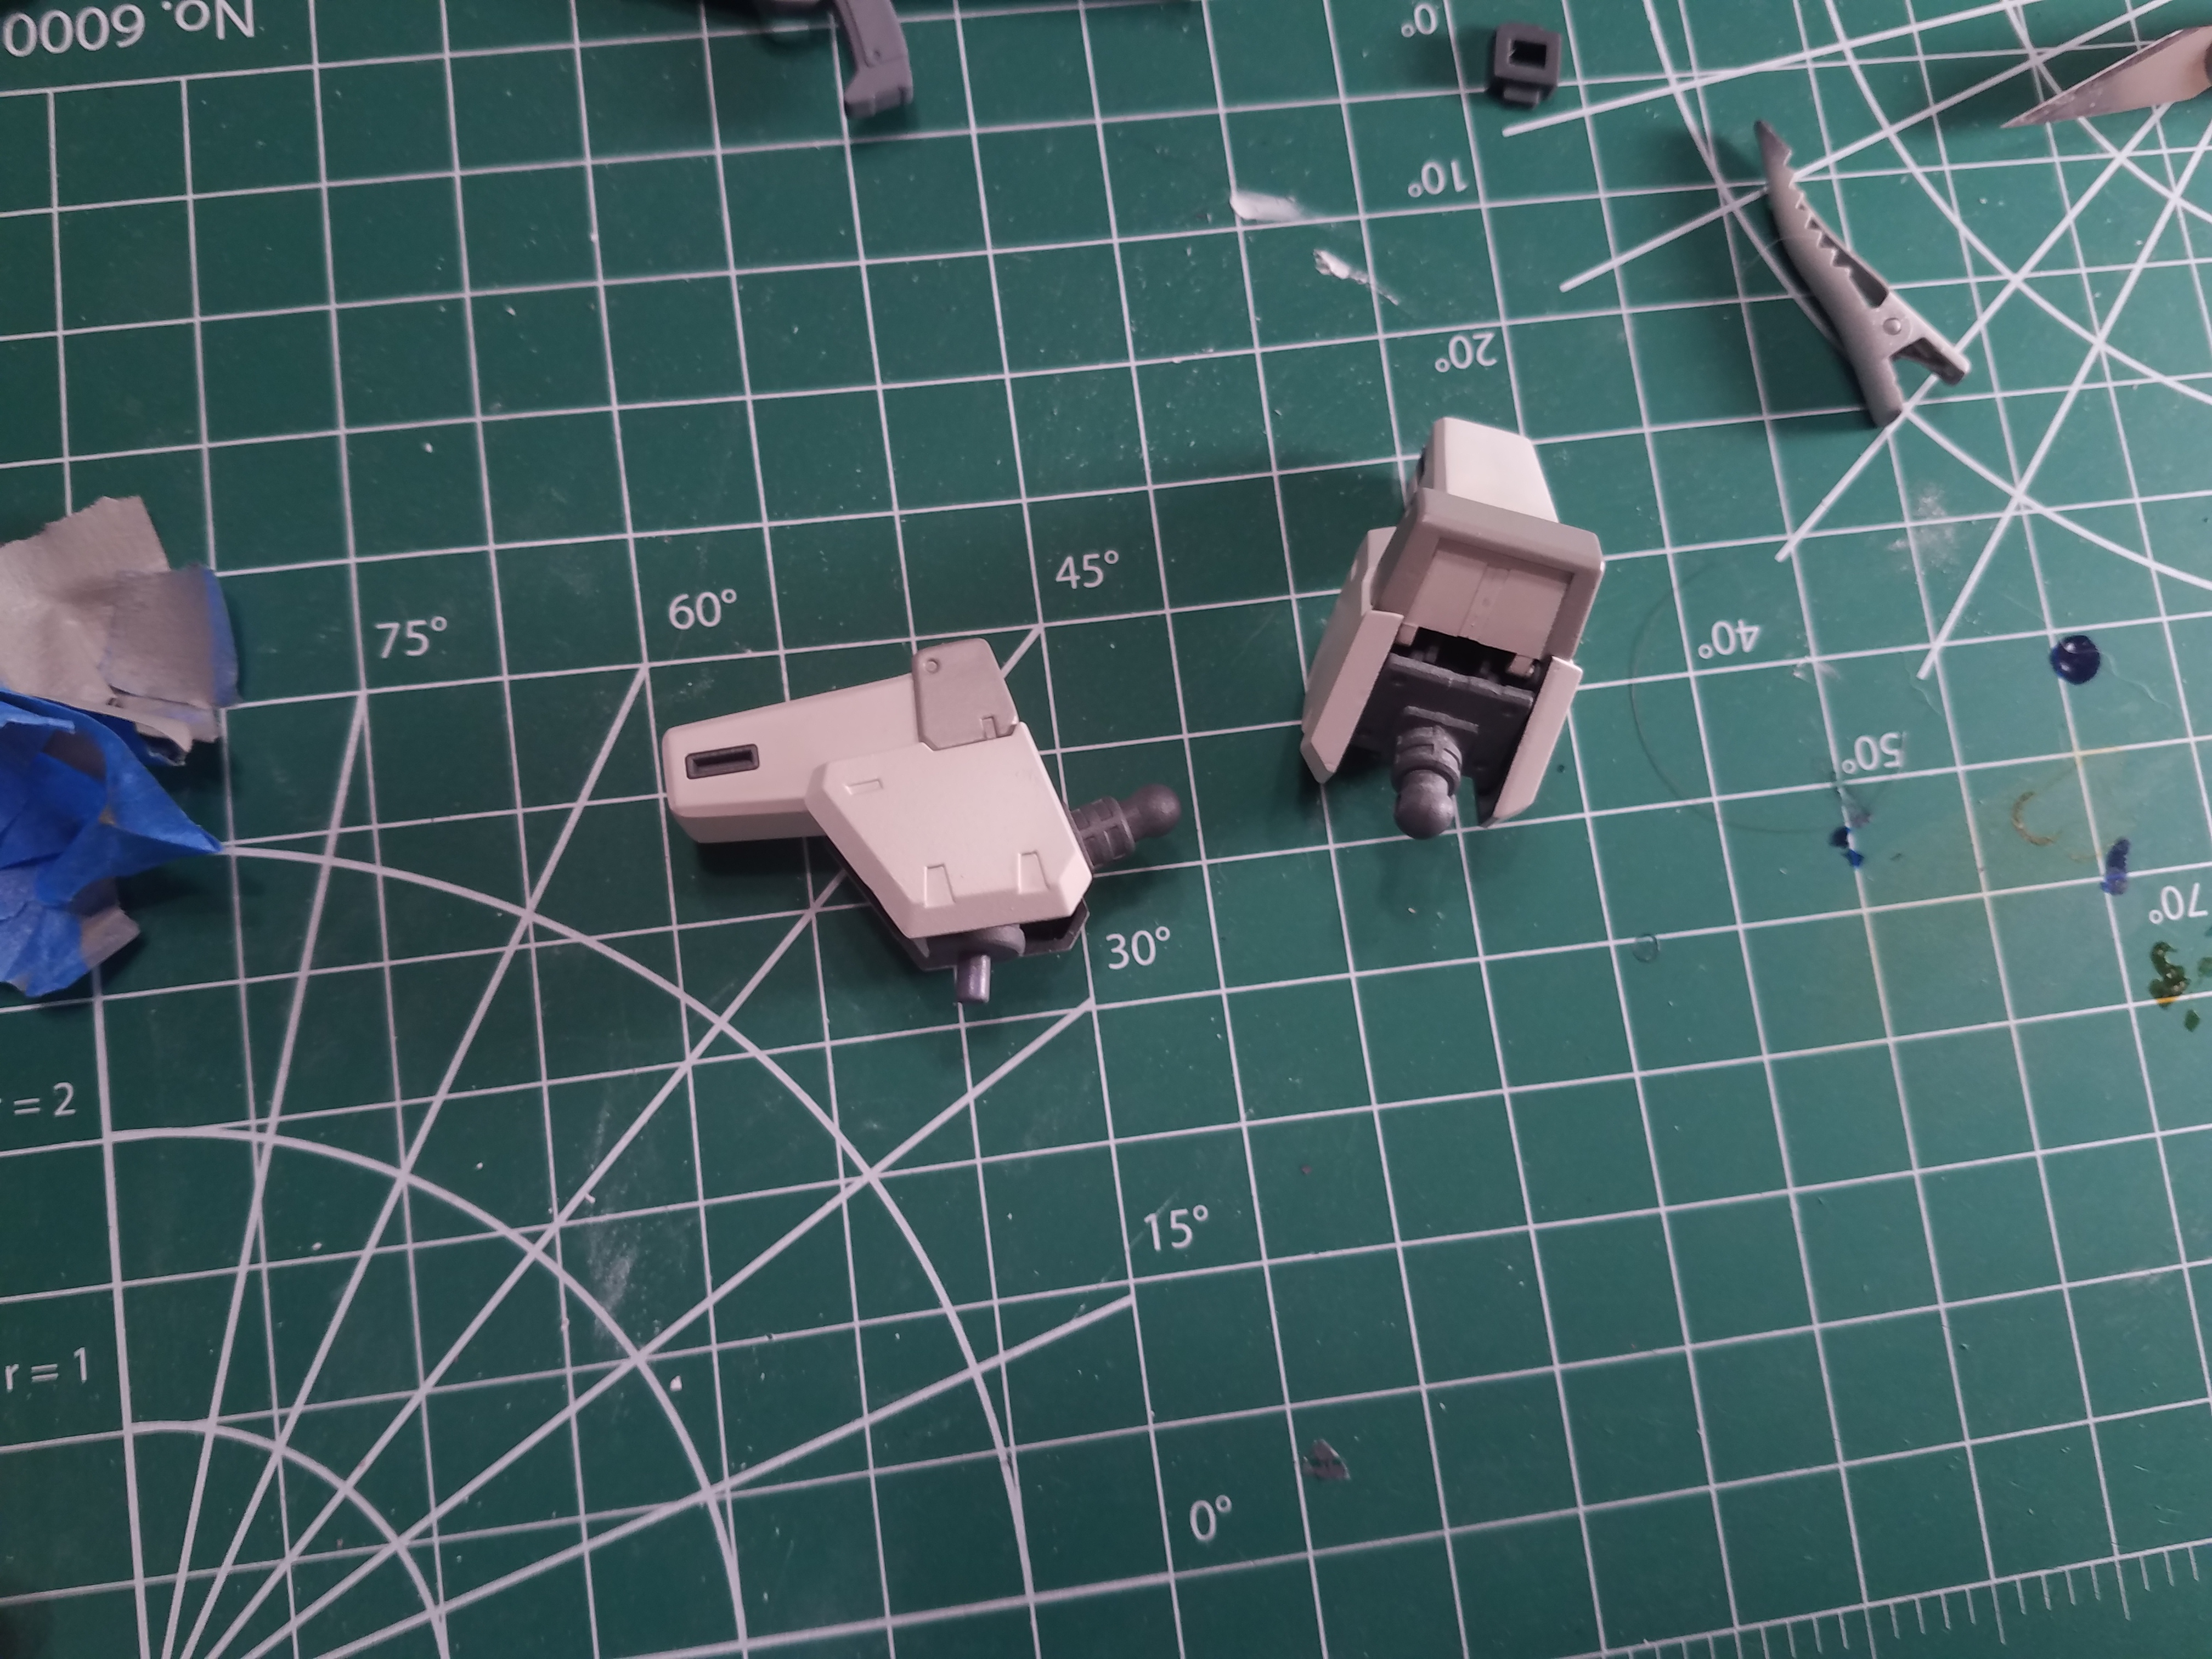
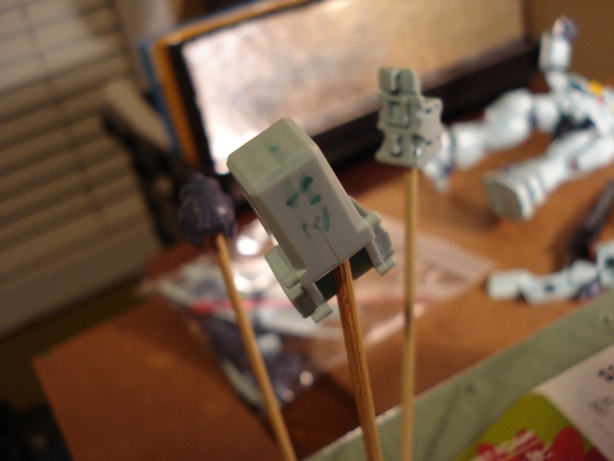
By far, my biggest concern was with the neck. The GM Custom has almost no forward or back motion on the head. At first, I thought that I would simply put the neck peg on a hinge or rotating joint to increase this, but as I examined the neck I realized that there were areas on the front of the neck and inside the chin that I could file off to increase downward tilt to a nice 30-40 degrees, which is more than acceptable. Then I realized that the only thing stopping the head from tilting backwards was the really thick neck; so if I could just cut the back part off...
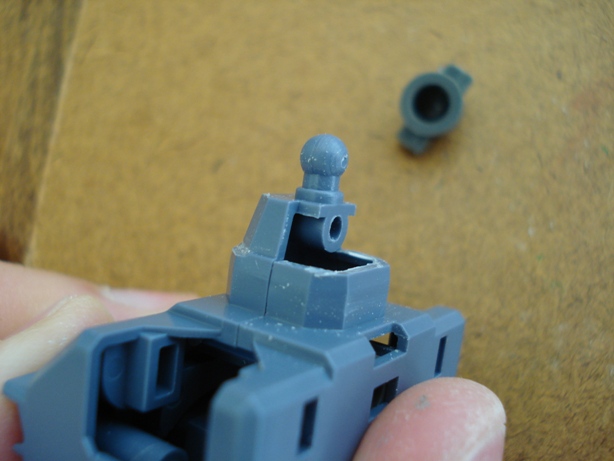
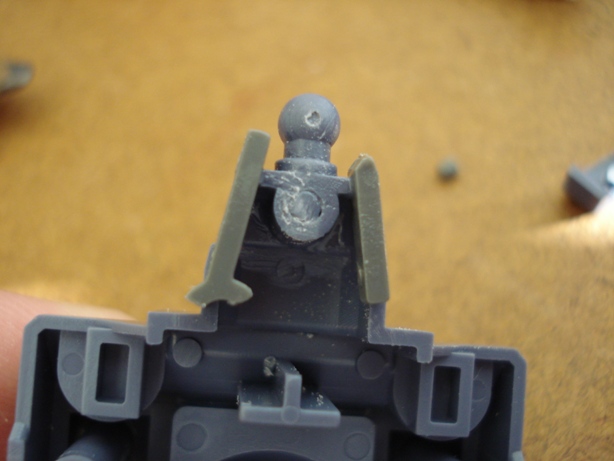
...I could get huge range of motion increase. This is a little bit more than it finally got (since I had to plate the back of the neck with a thin layer of plastic) but this is very good and will really make the flight poses a lot more dynamic.
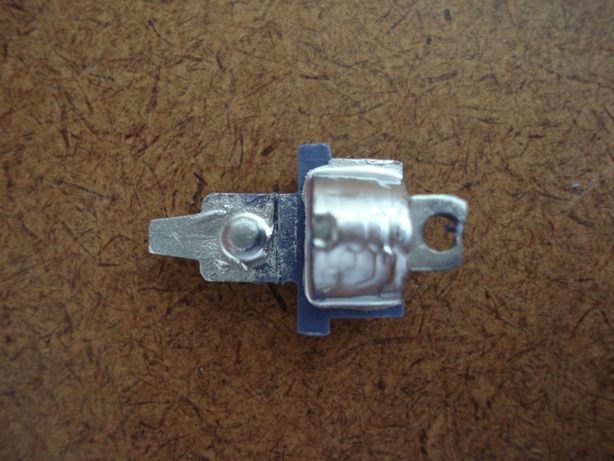
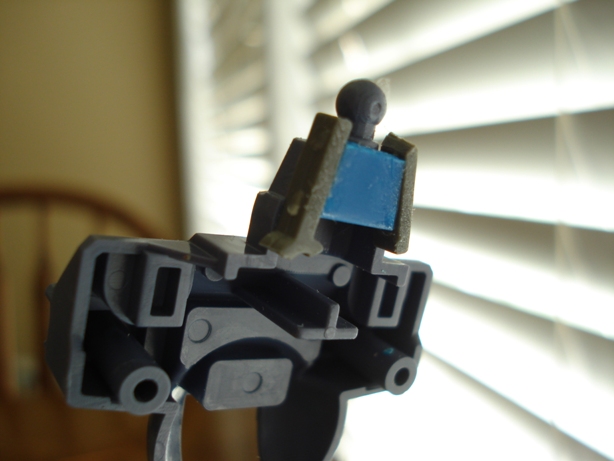
I used some parts from the shoulder vulcans of my unfinished 1/100 High Grade Burning Gundam to seal the sides of the neck. I used a ton of plastic cement to melt these together, but I waited 24 hours until I cleaned it up so that I made sure it cured evenly.
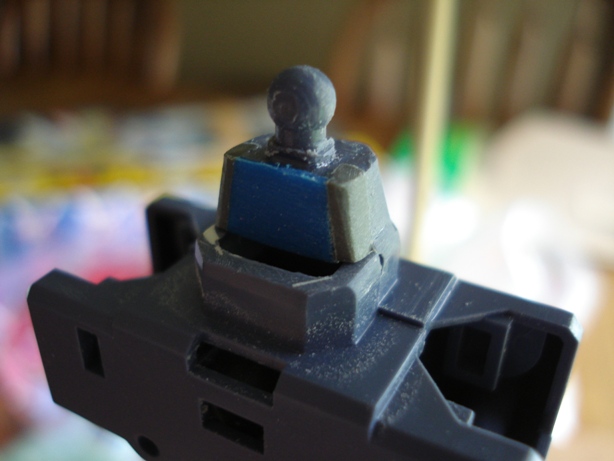
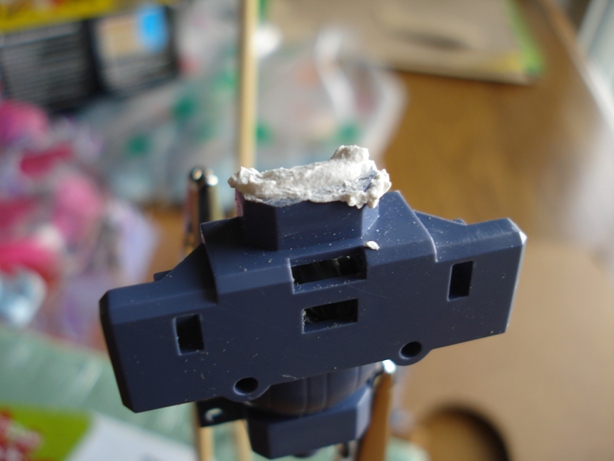
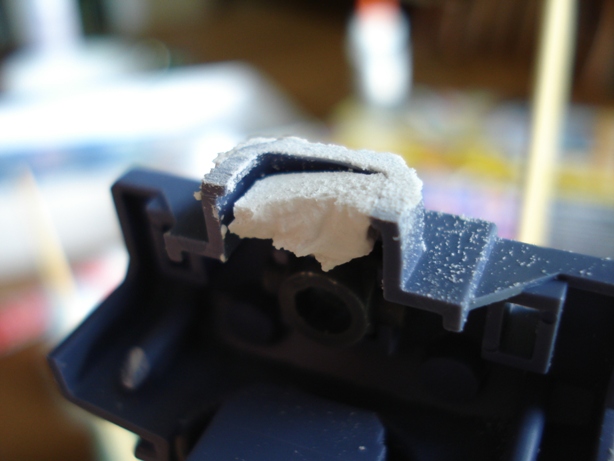
I then used some plastic from the Burning Gundam skirt to take care of the back. The right image is what it looks like filed and sanded; pretty good, I'd say, but I'll have to make sure that it's smooth when primed. I also forgot that there's another gap which has to be filled, so I had to decide how I was going to fill that as well.
I ended up using some drywall plaster because I couldn't find anything else, and as you can see... sanding didn't work out too well. In hindsight I don't know what I expected, this doesn't bond to the plastic like an actual putty would.
I just used some more skirt plastic and sanded it to the slightly curved shape of this piece, cemented, and left it. It seems to work fine, but there's not a whole lot of contact area between the plastic so I'll have to be careful when handling it. Other than this, the only part left is the right arm, then I'll be ready for the inital priming. Should be back pretty soon with a coloring update!
Date Posted: July 14, 2012
Progress Update 4: The Return
"Should be back pretty soon with a coloring update!"
Years have passed, people have died, our political consciousness has grown, and the world has moved on. As the onslaught of fresh new hells rains down on us each day, I have found solace in one thing - there was an incomplete GM Custom kit in a box in my closet. And now, in my most radical act of self-destruction to date, I am working on completing it once more.
The big thing that put a pause on this kit was going back for my last year of college; a dorm isn't a great place for spray cans so I had to pack it in for the year. But I never quite got back to making it, even after I graduated. After moving the box through multiple living arrangements, I finally decided to give it another go.
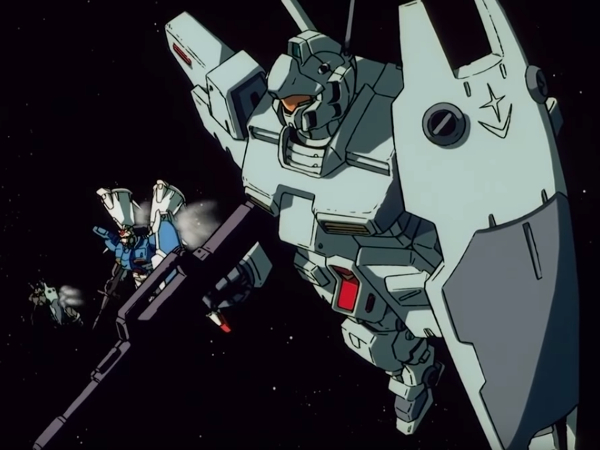
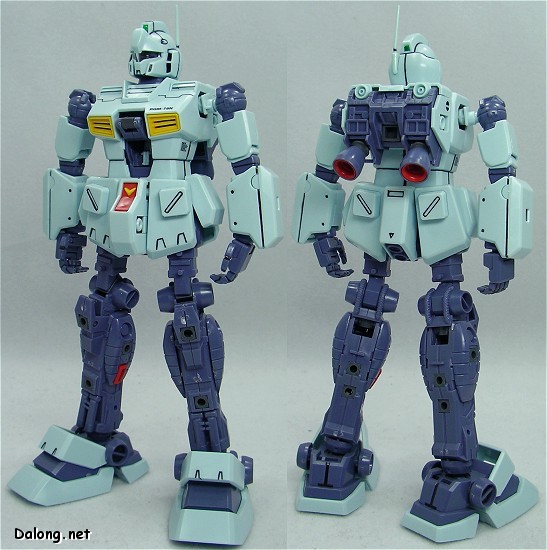
The cast colors on this kit are not very good, as I've mentioned in the intro post. The anime has the suit in desaturated teals; in a lot of shots, it's almost gray. But the plastic colors (credit to
dalong.net for the shot) are much bluer, giving it a plastic, toylike look. I mean, it is a toy, but the point of scale modeling is that it doesn't look like one...
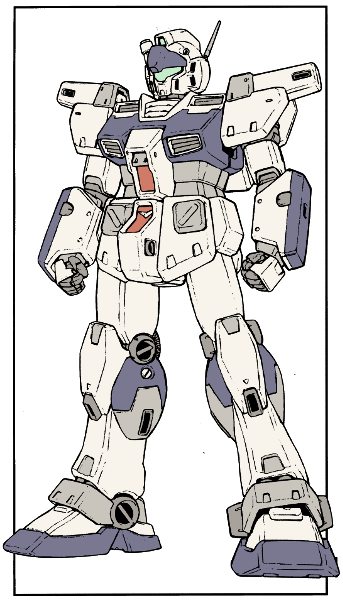
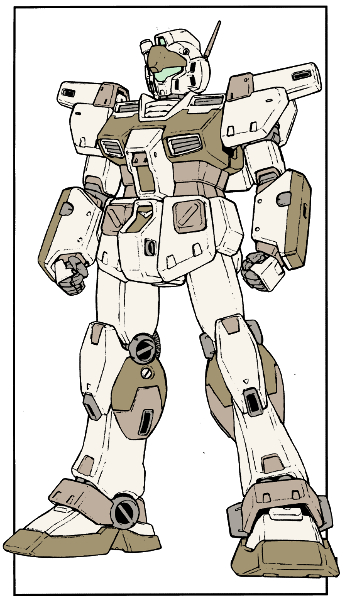
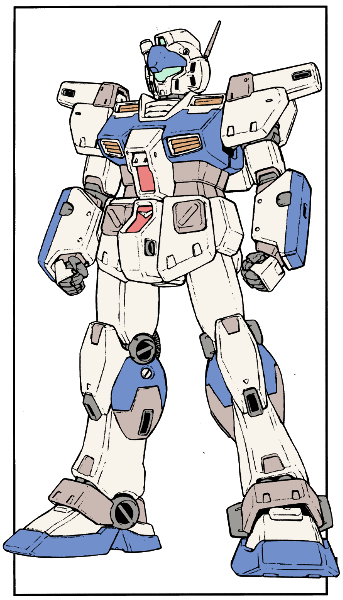
I used some lineart to mock up some other schemes. My first attempts focused on a dark desert look, but I ultimately moved away from this concept.
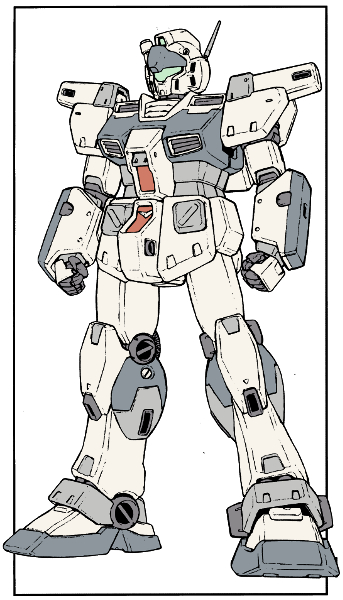
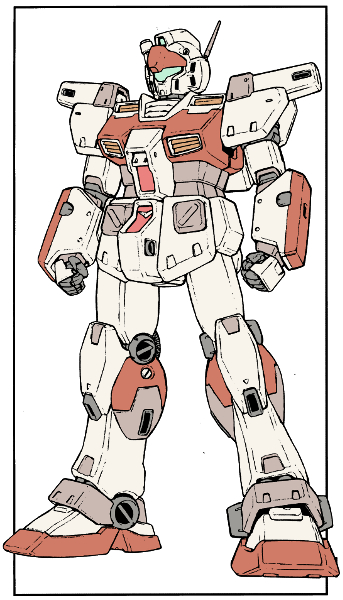
Subsequent attempts formed around a white base with bold accent colors.
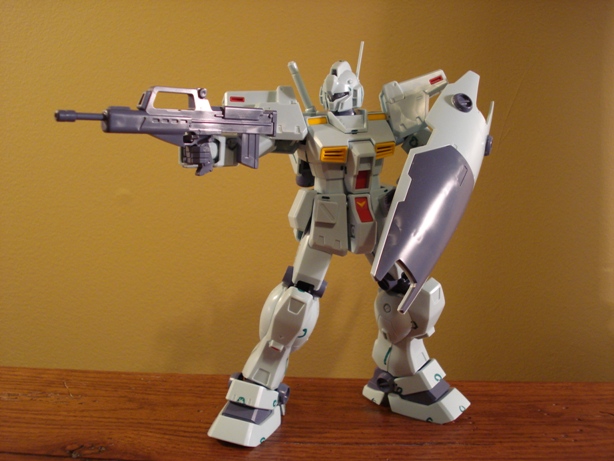
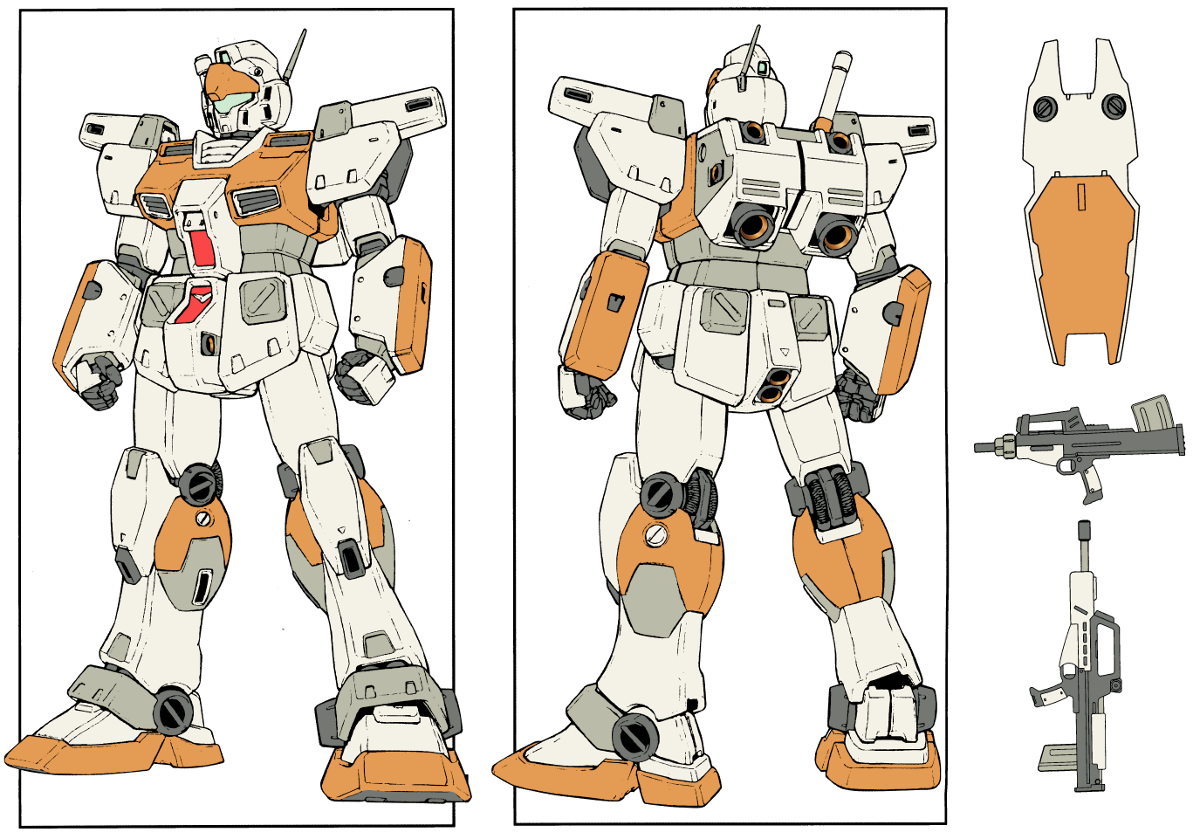
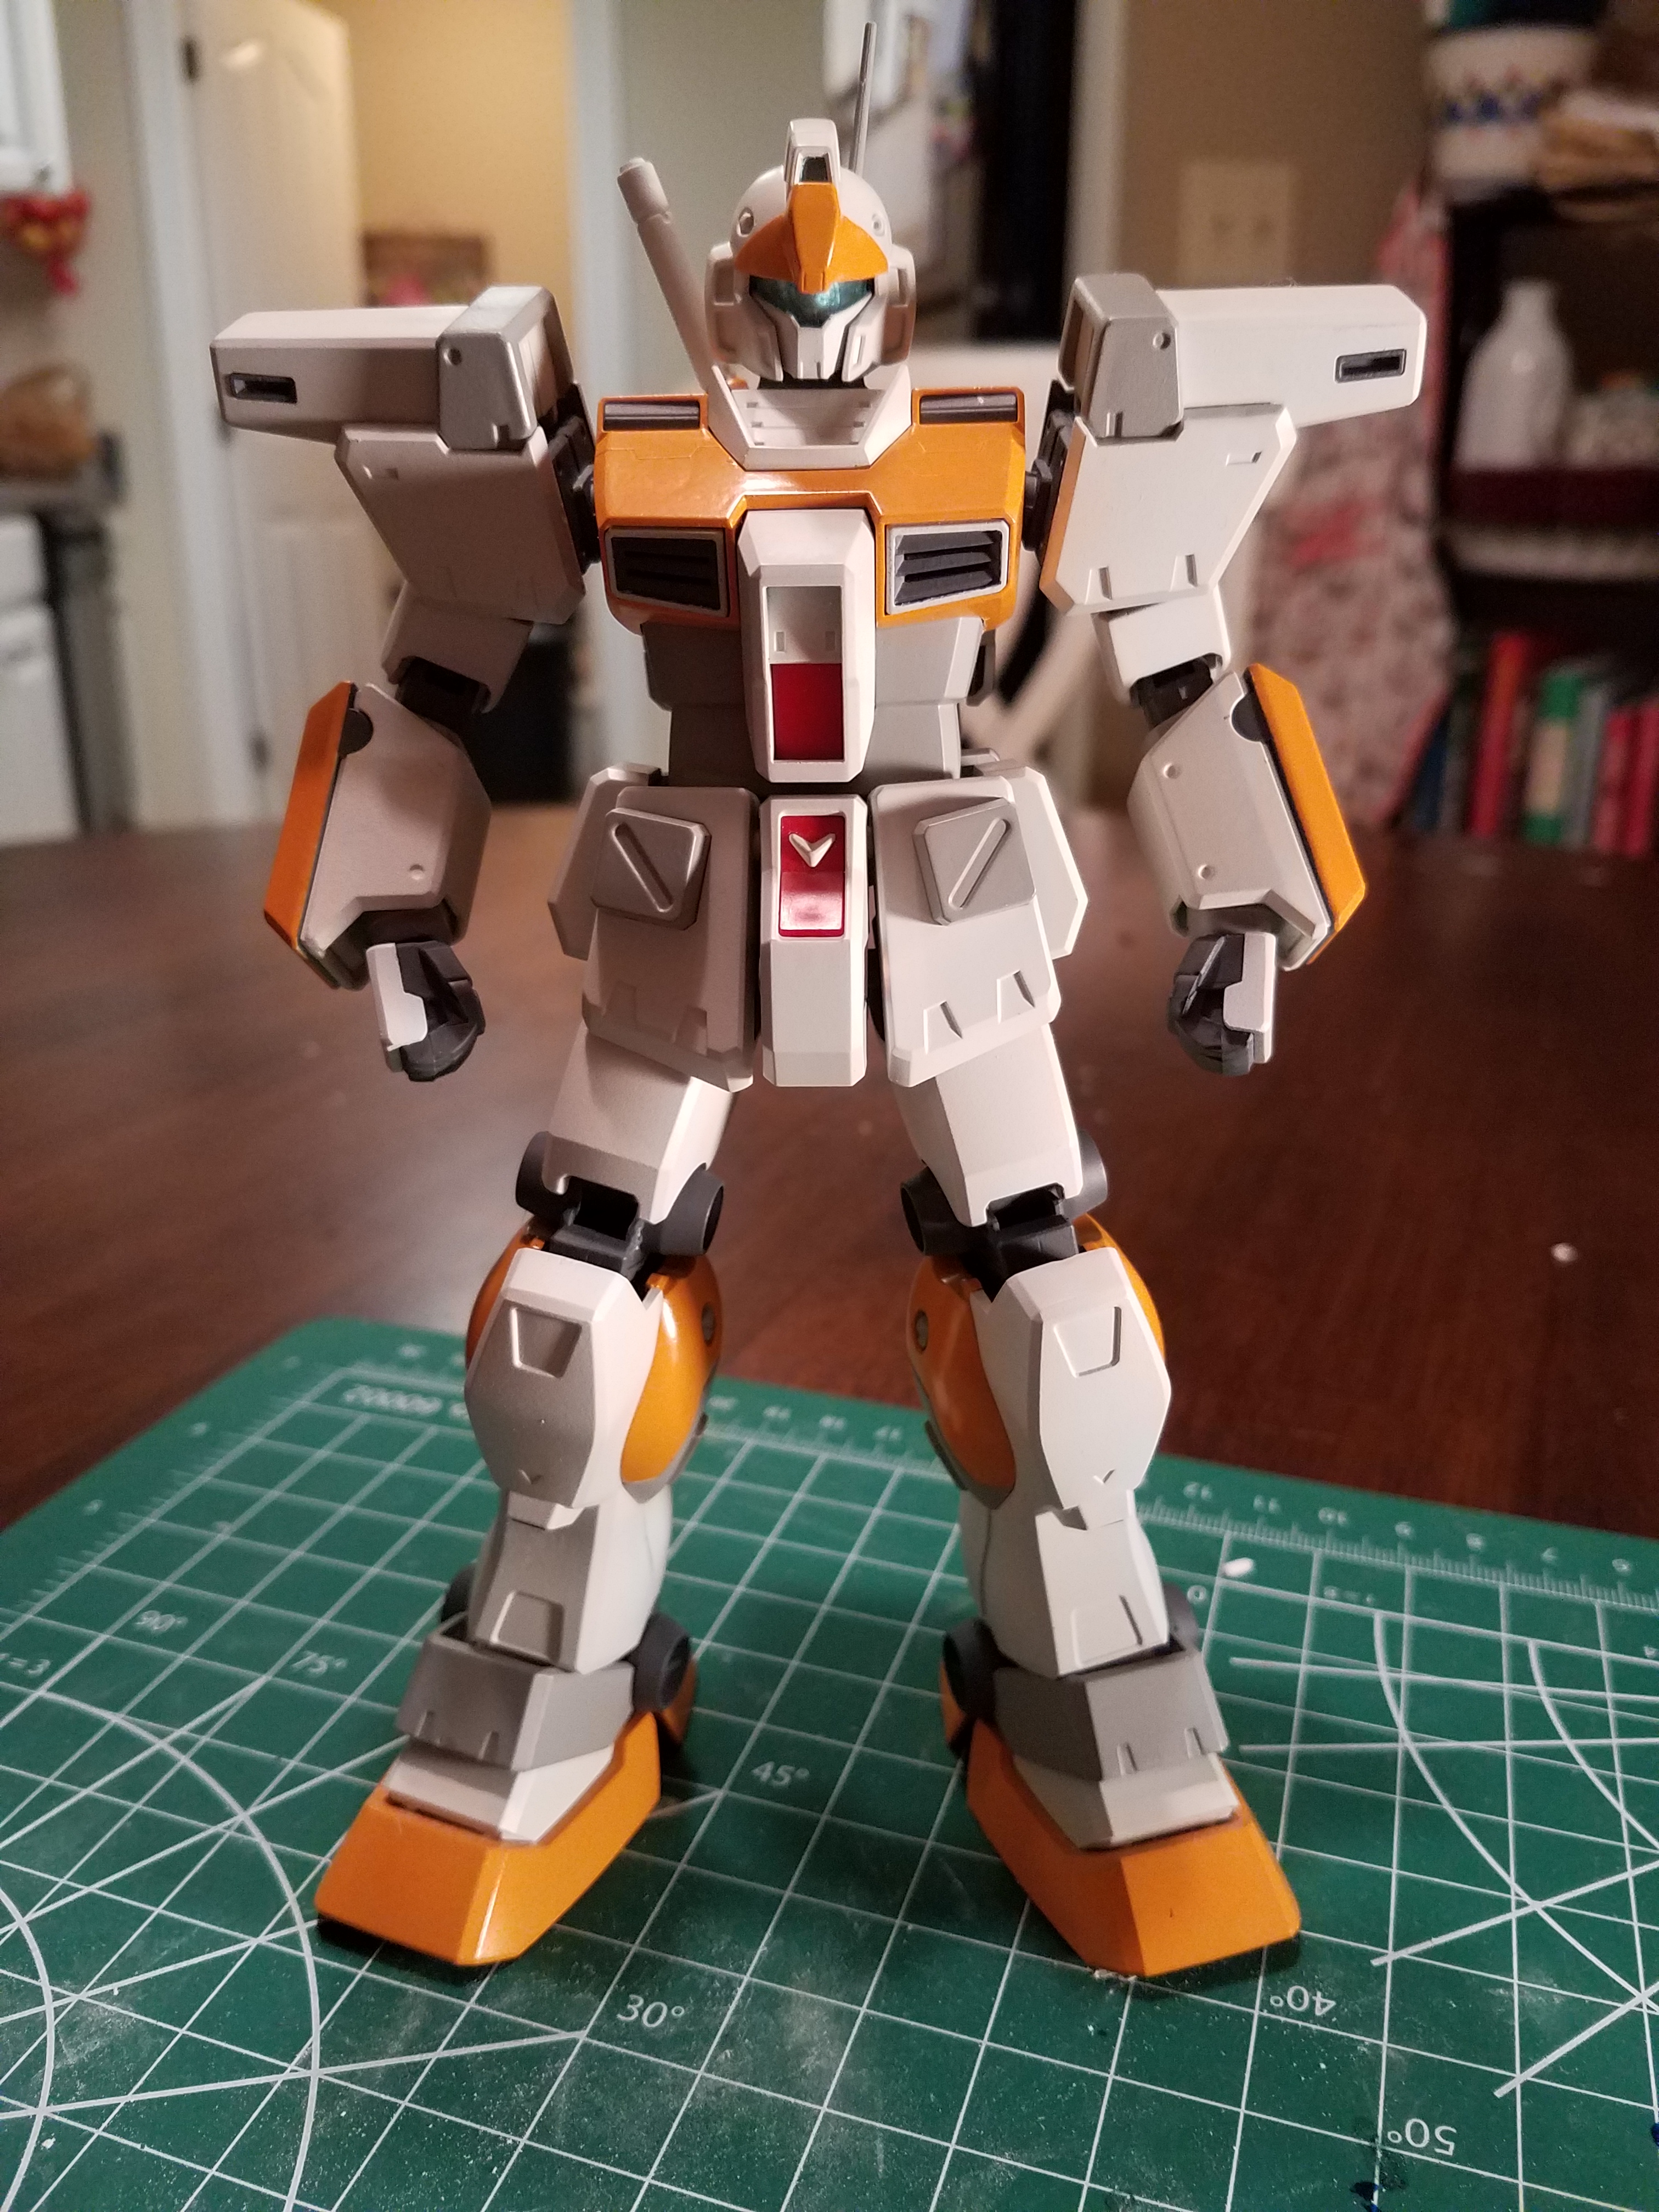
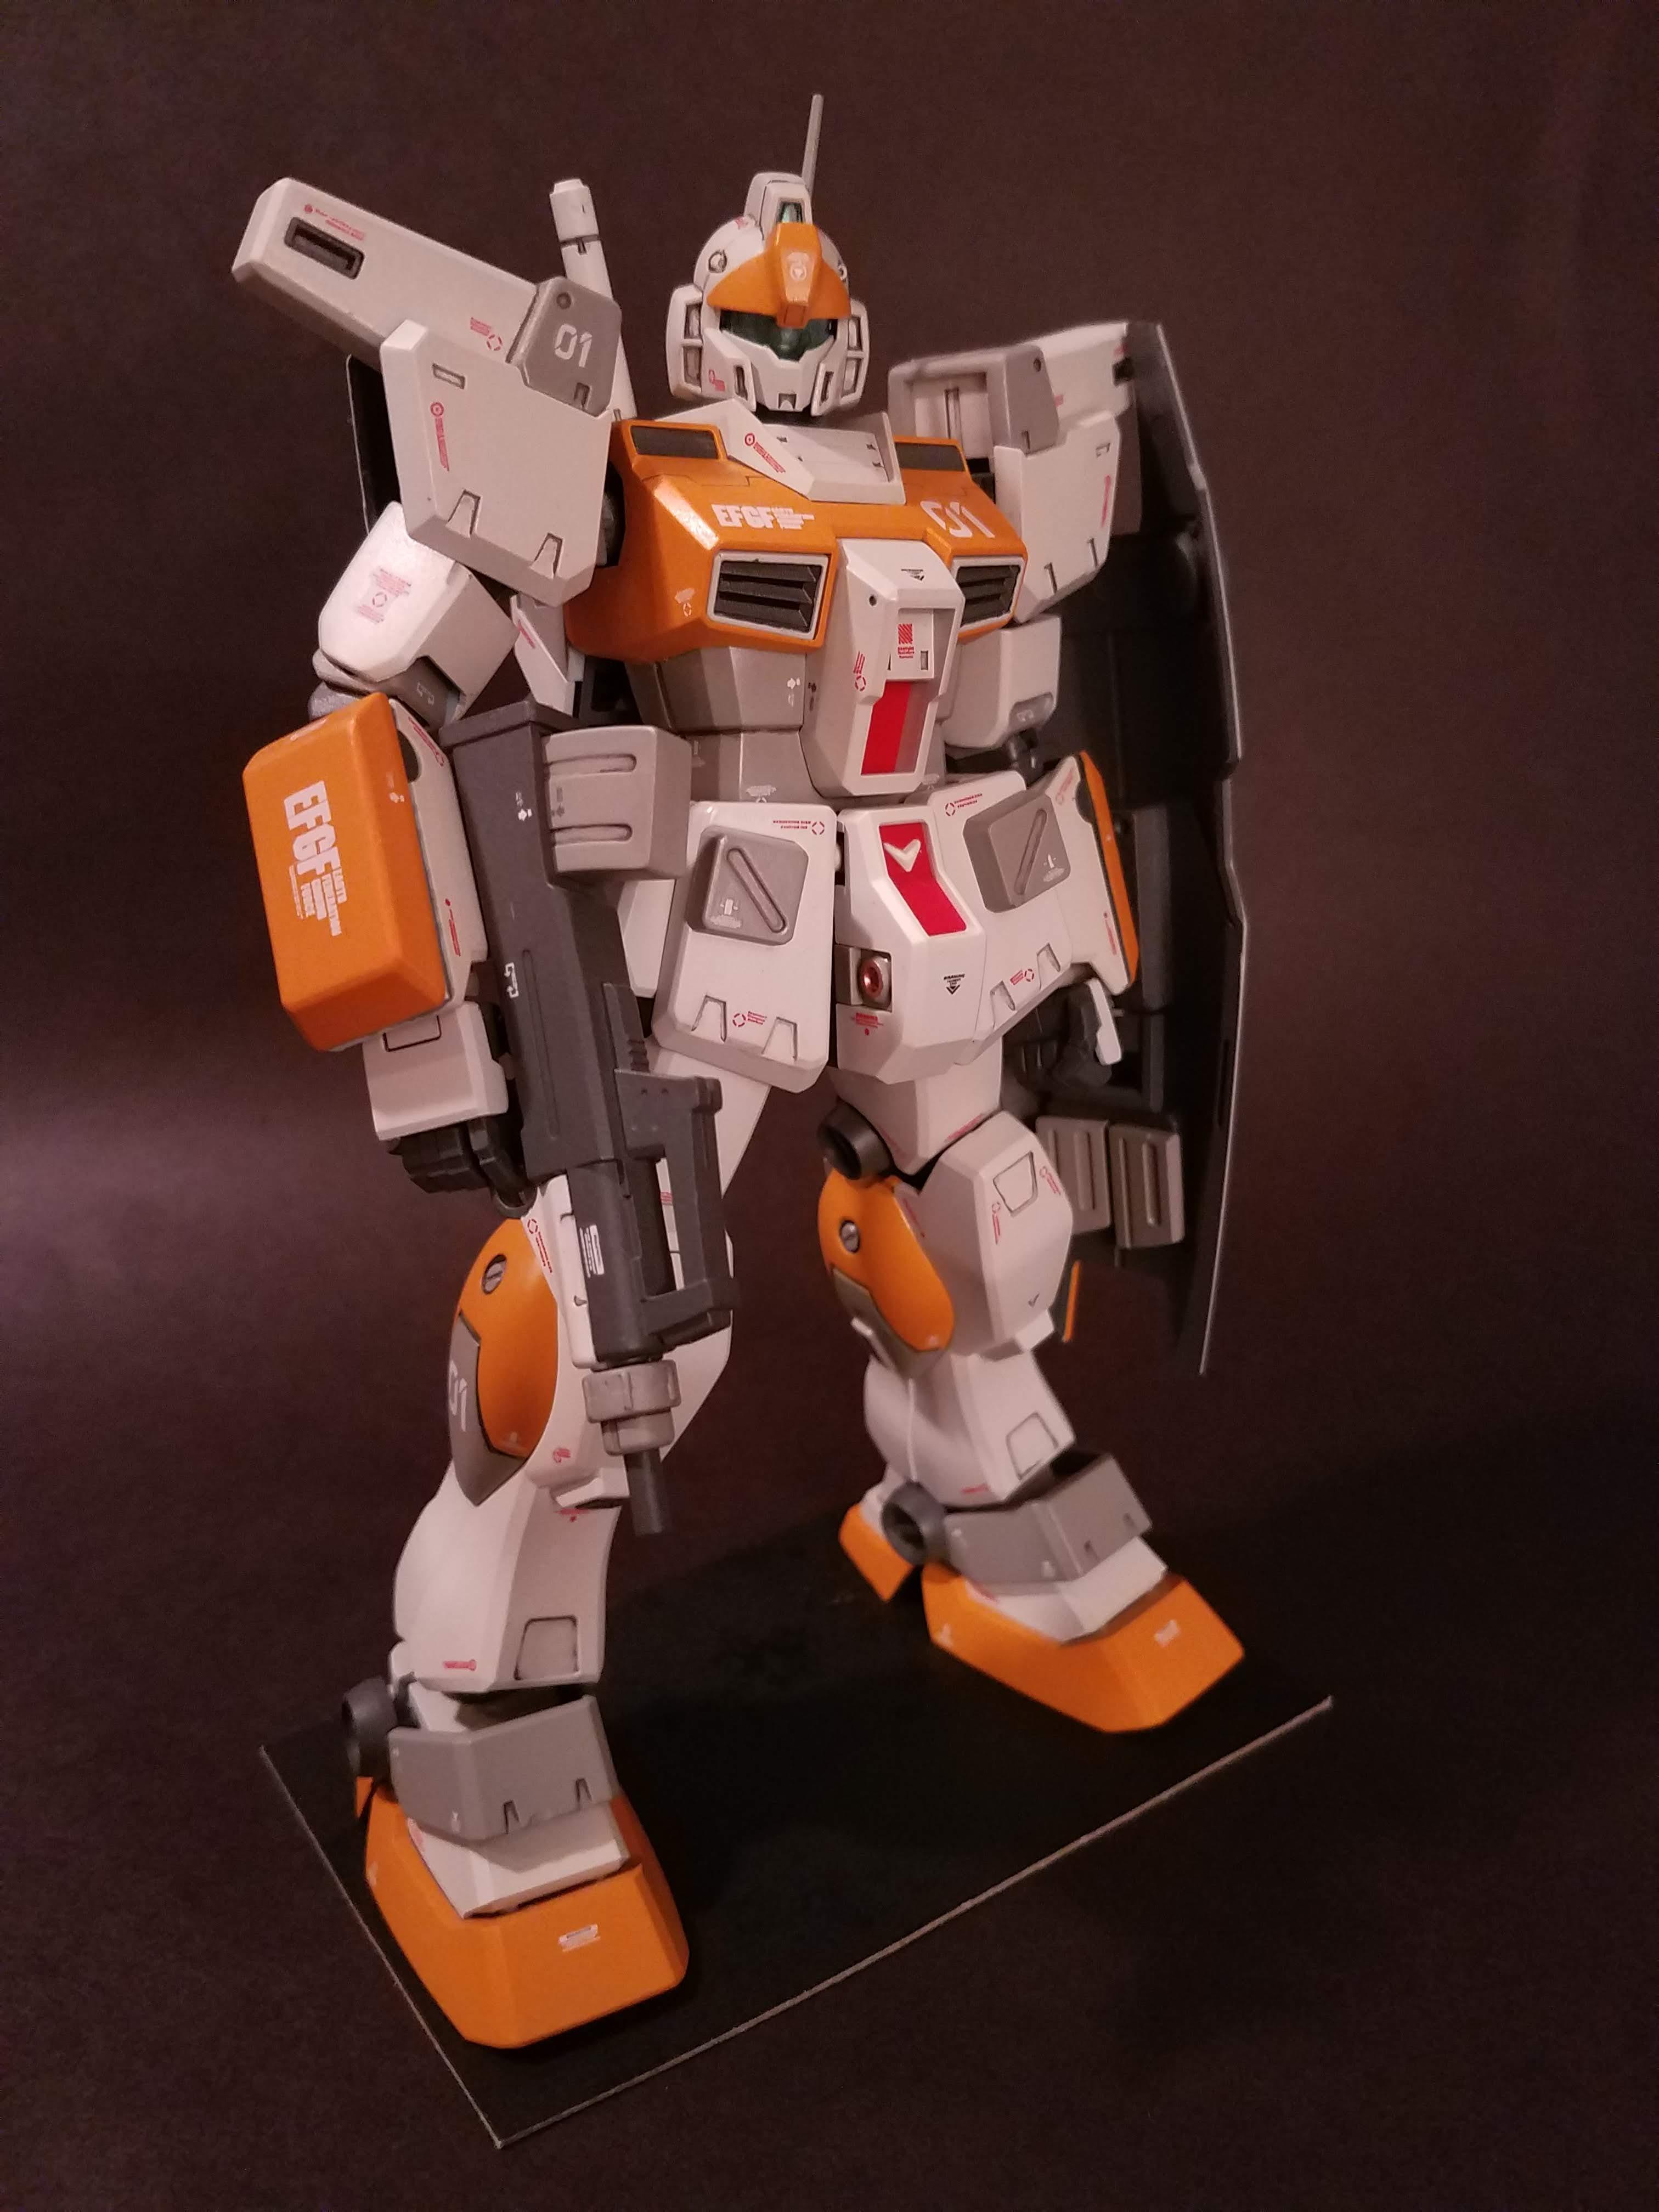
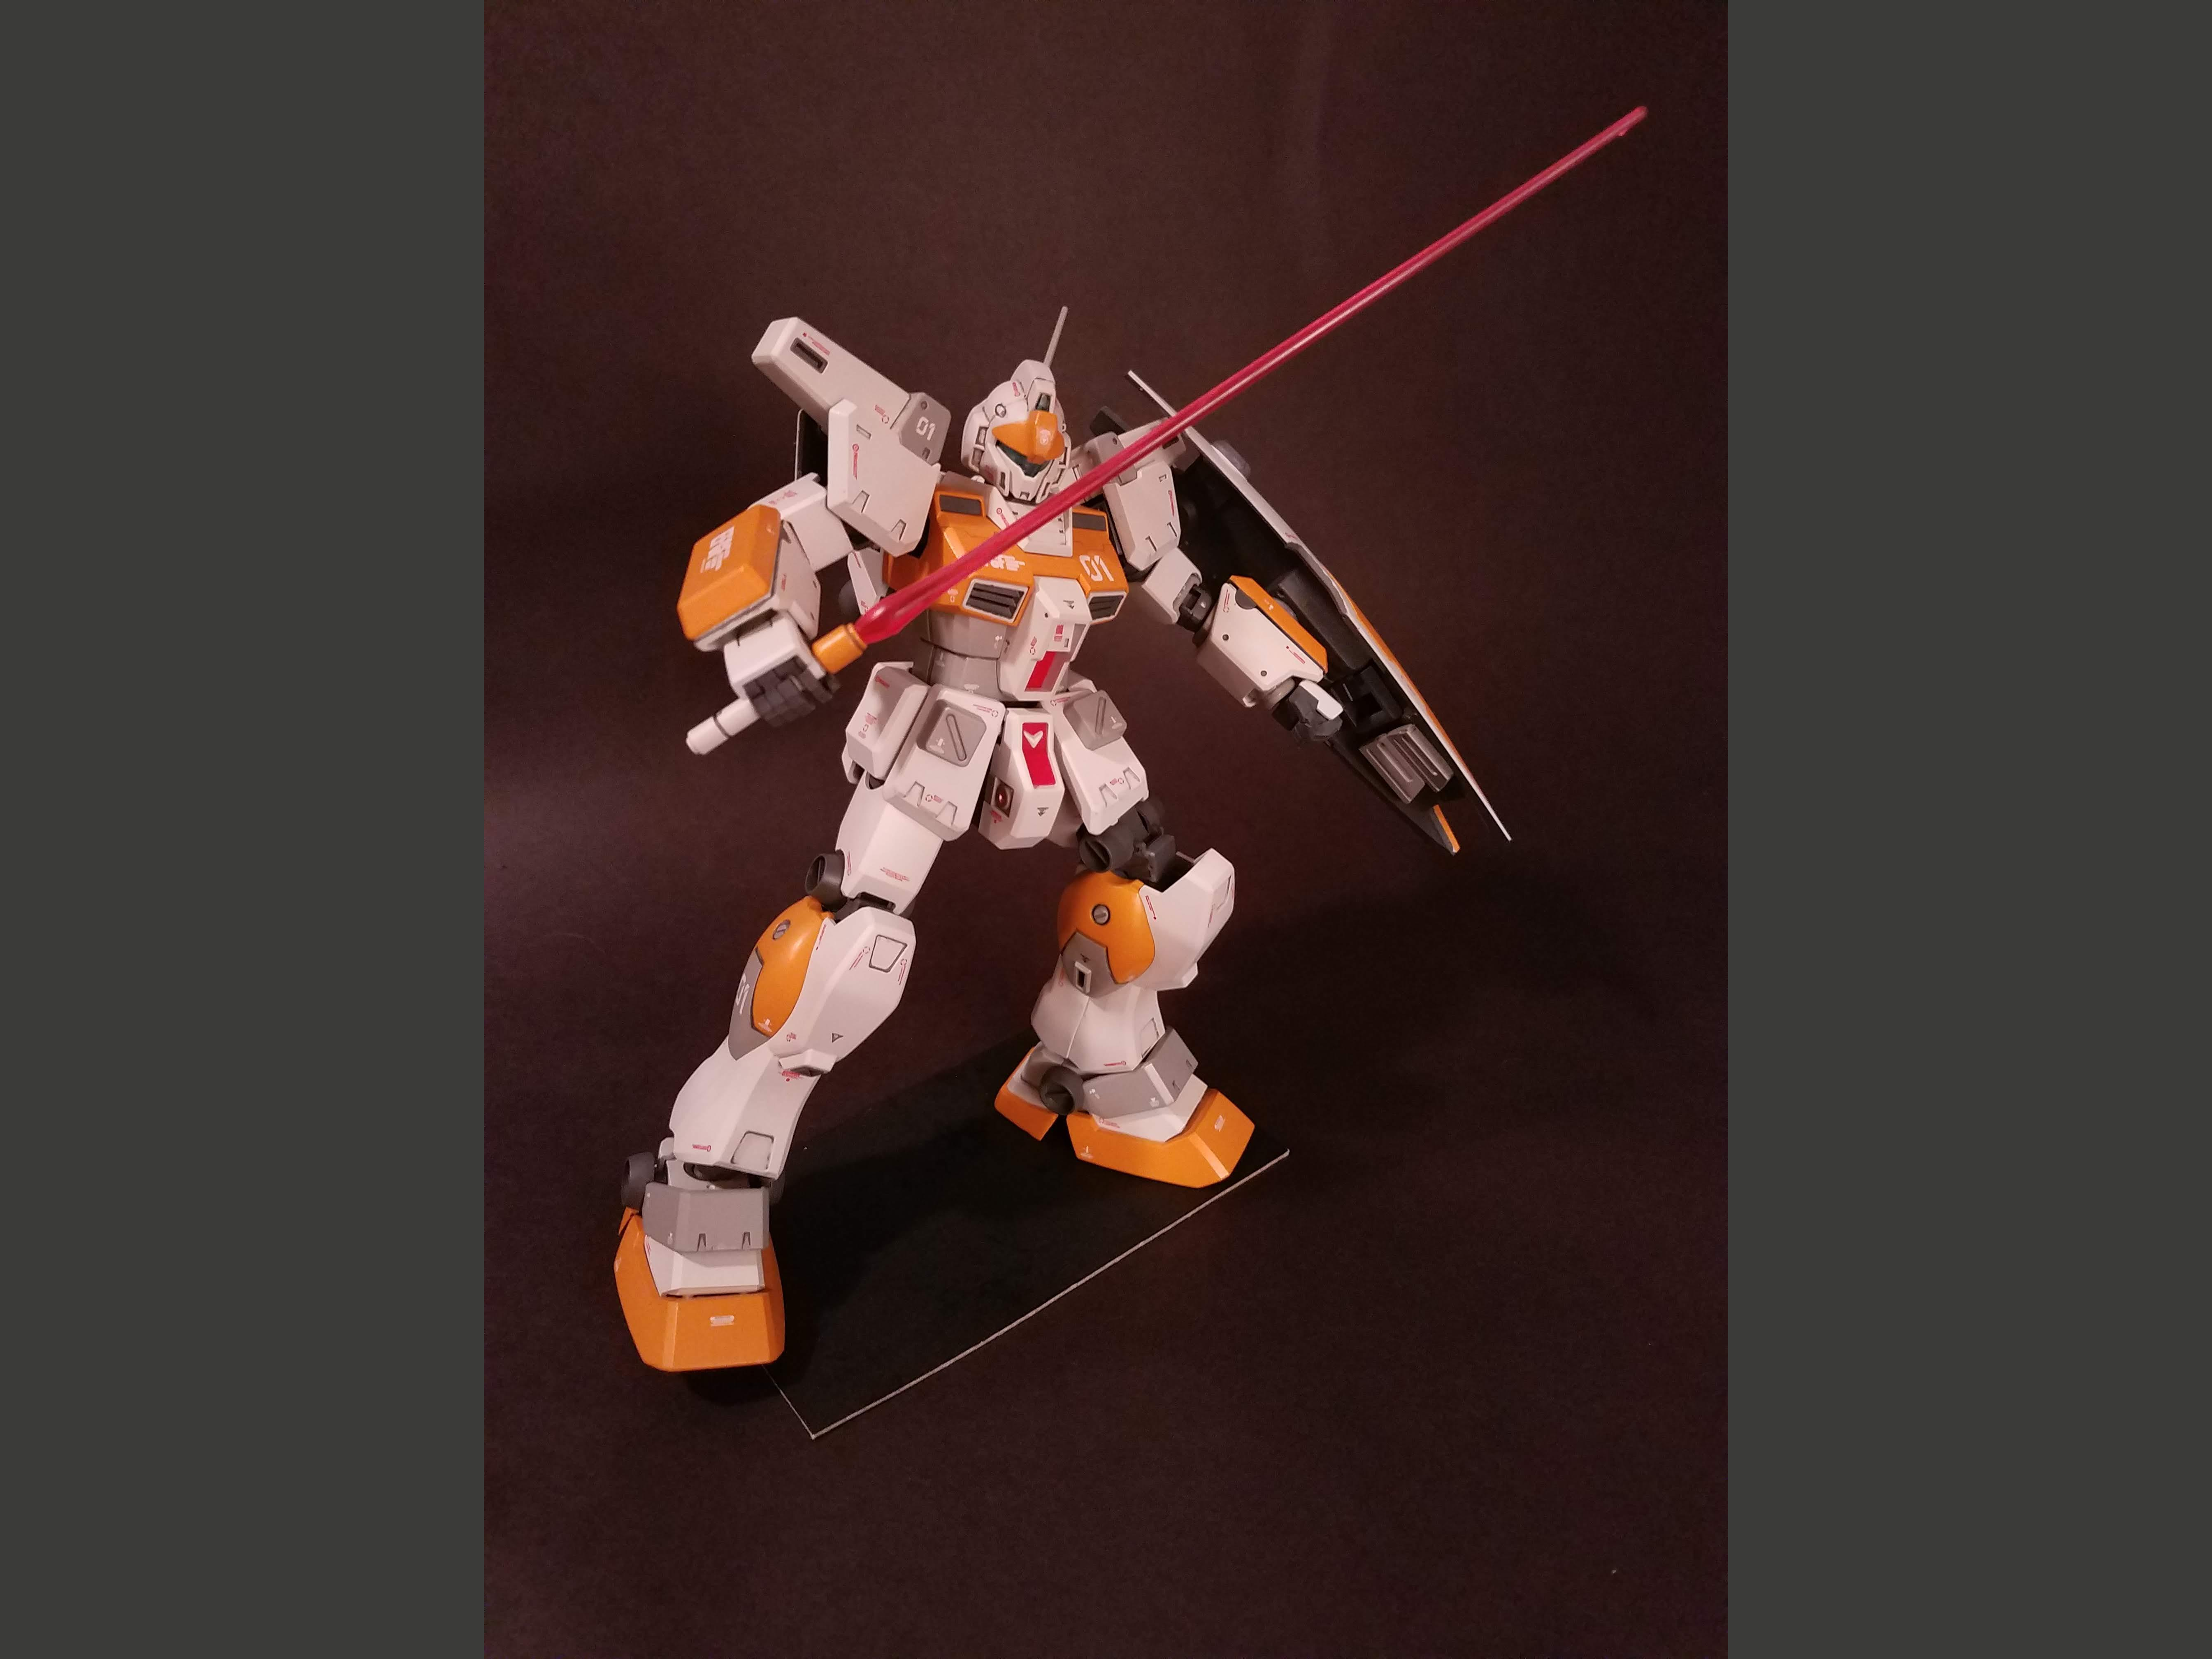
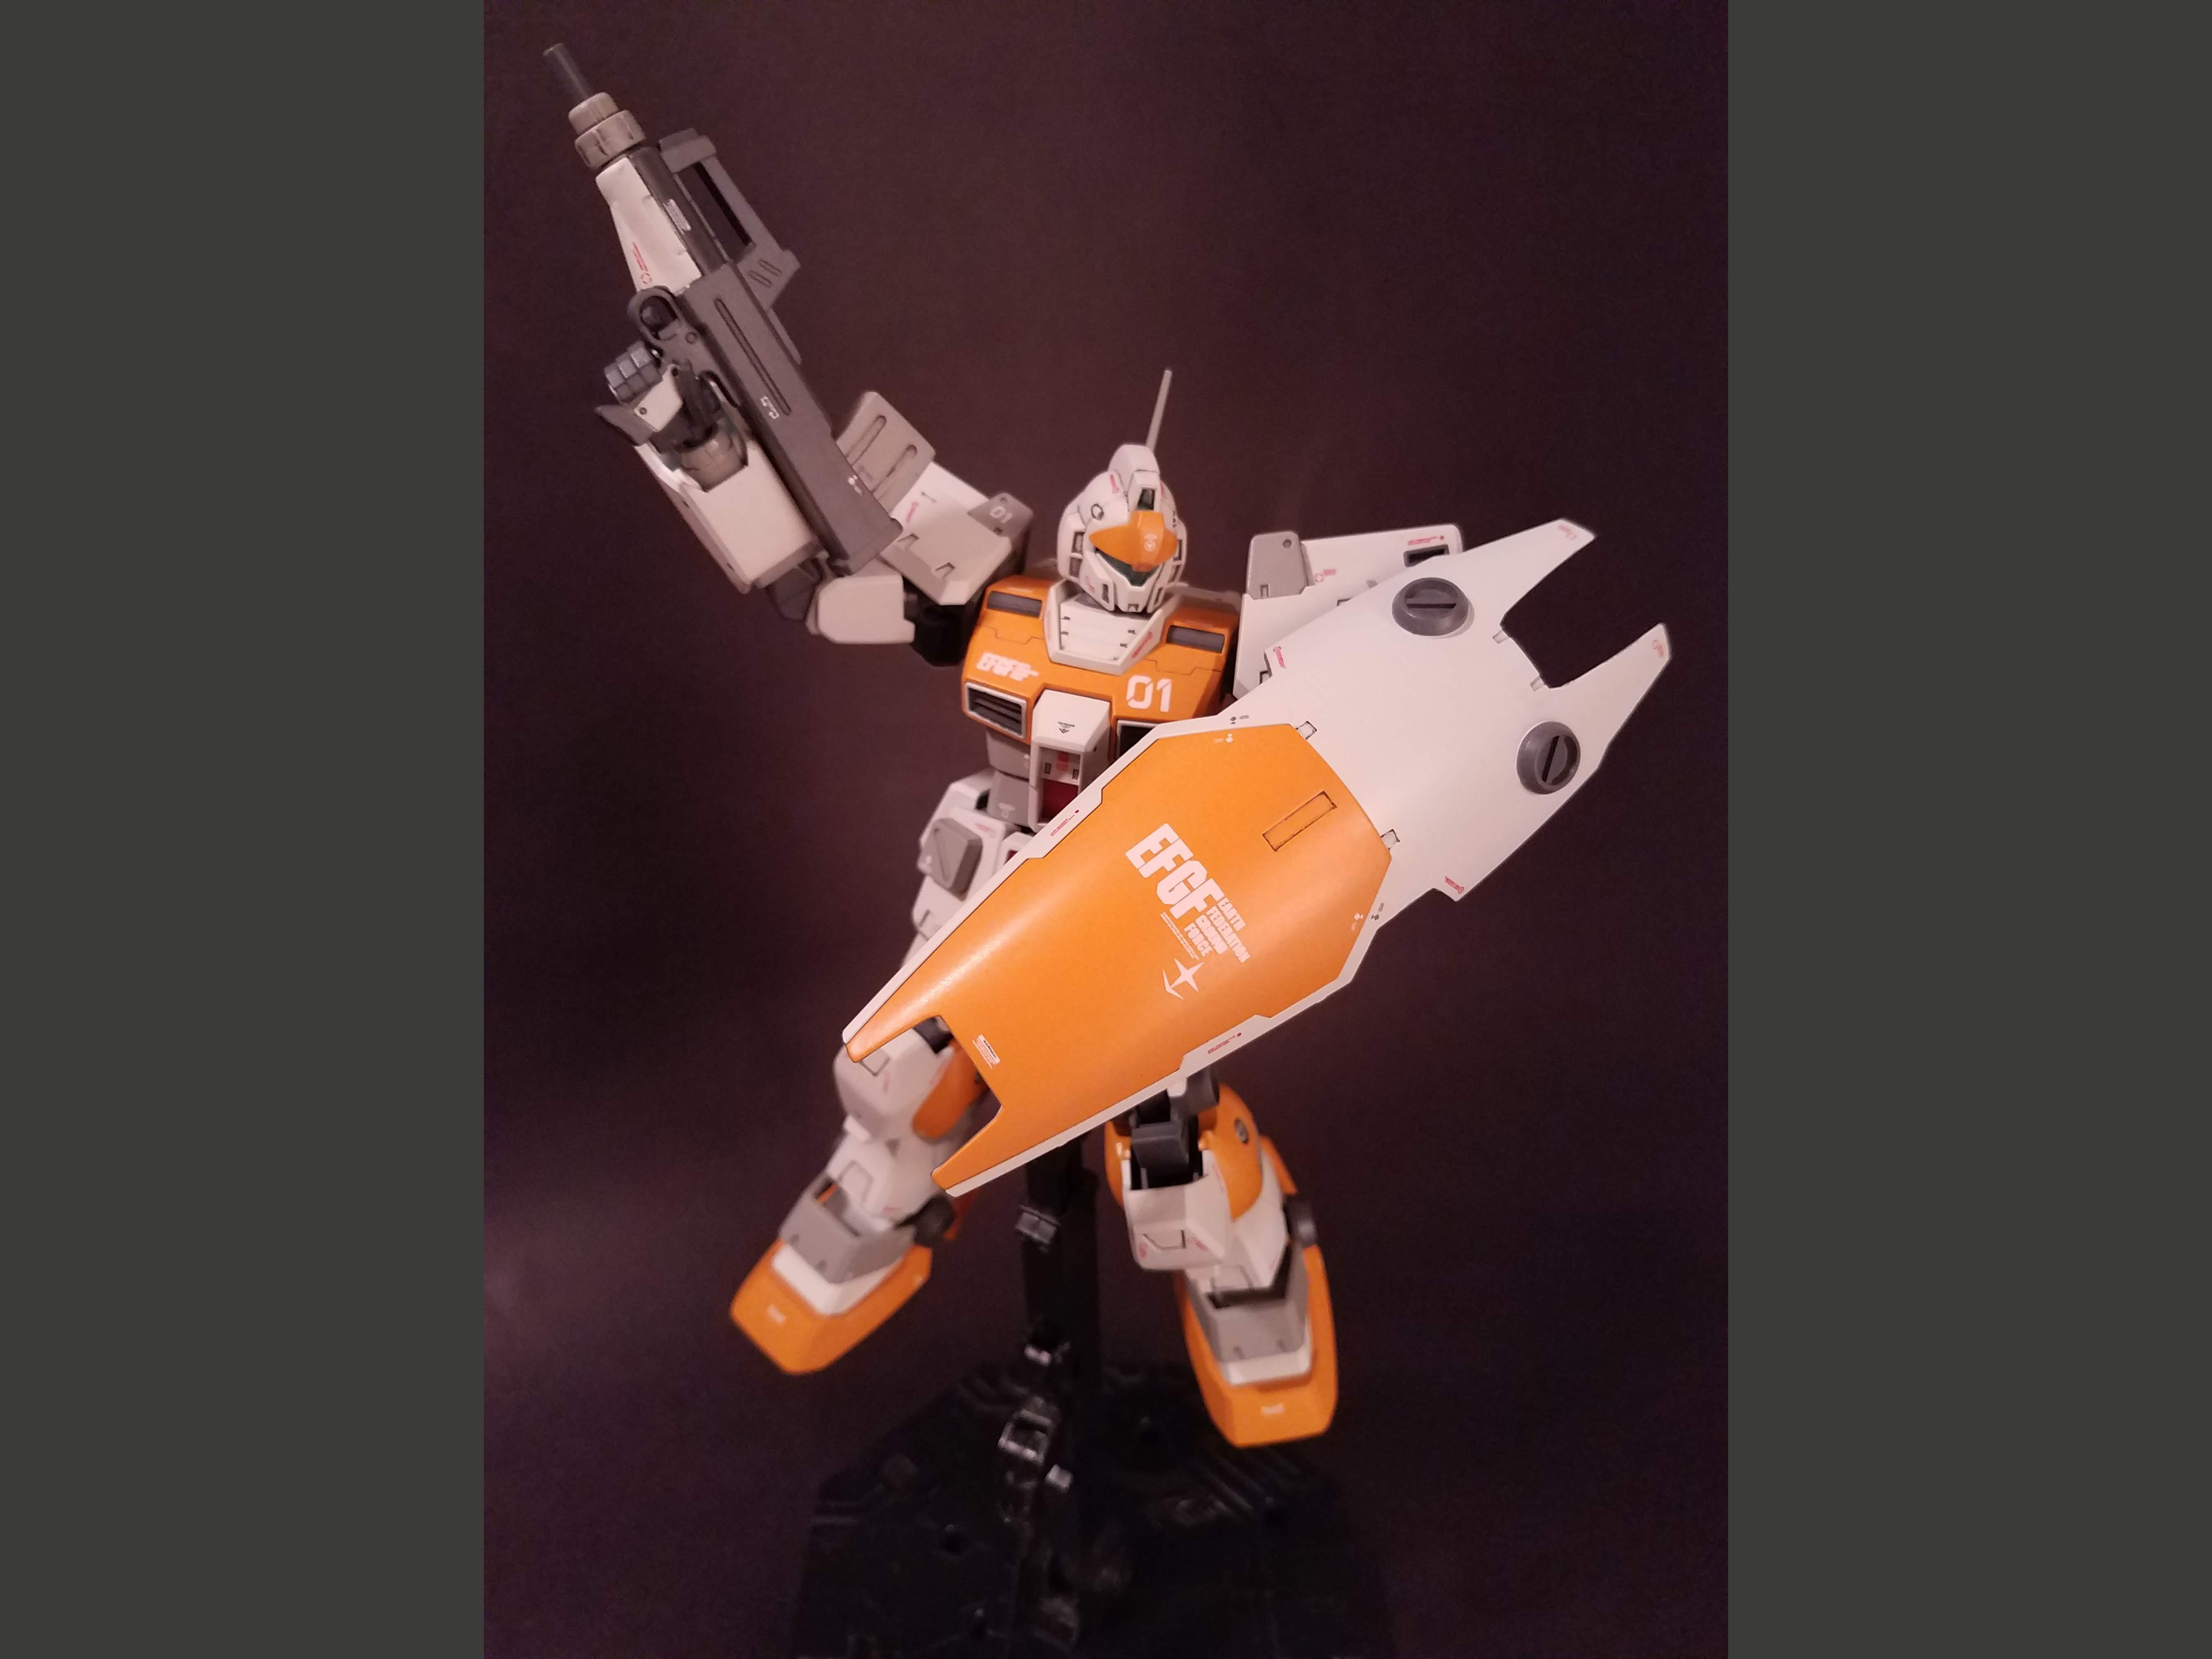
Finally, this is what I decided on. It's a scheme that has the traditional Gundam style - dominating whites with sharp accents - but has a bright yellow-orange as its primary color, which is pretty rare for the series. A couple of parts - particularly the rifles and the calves - will require handpainting or somewhat complex masking, but it shouldn't be too bad.
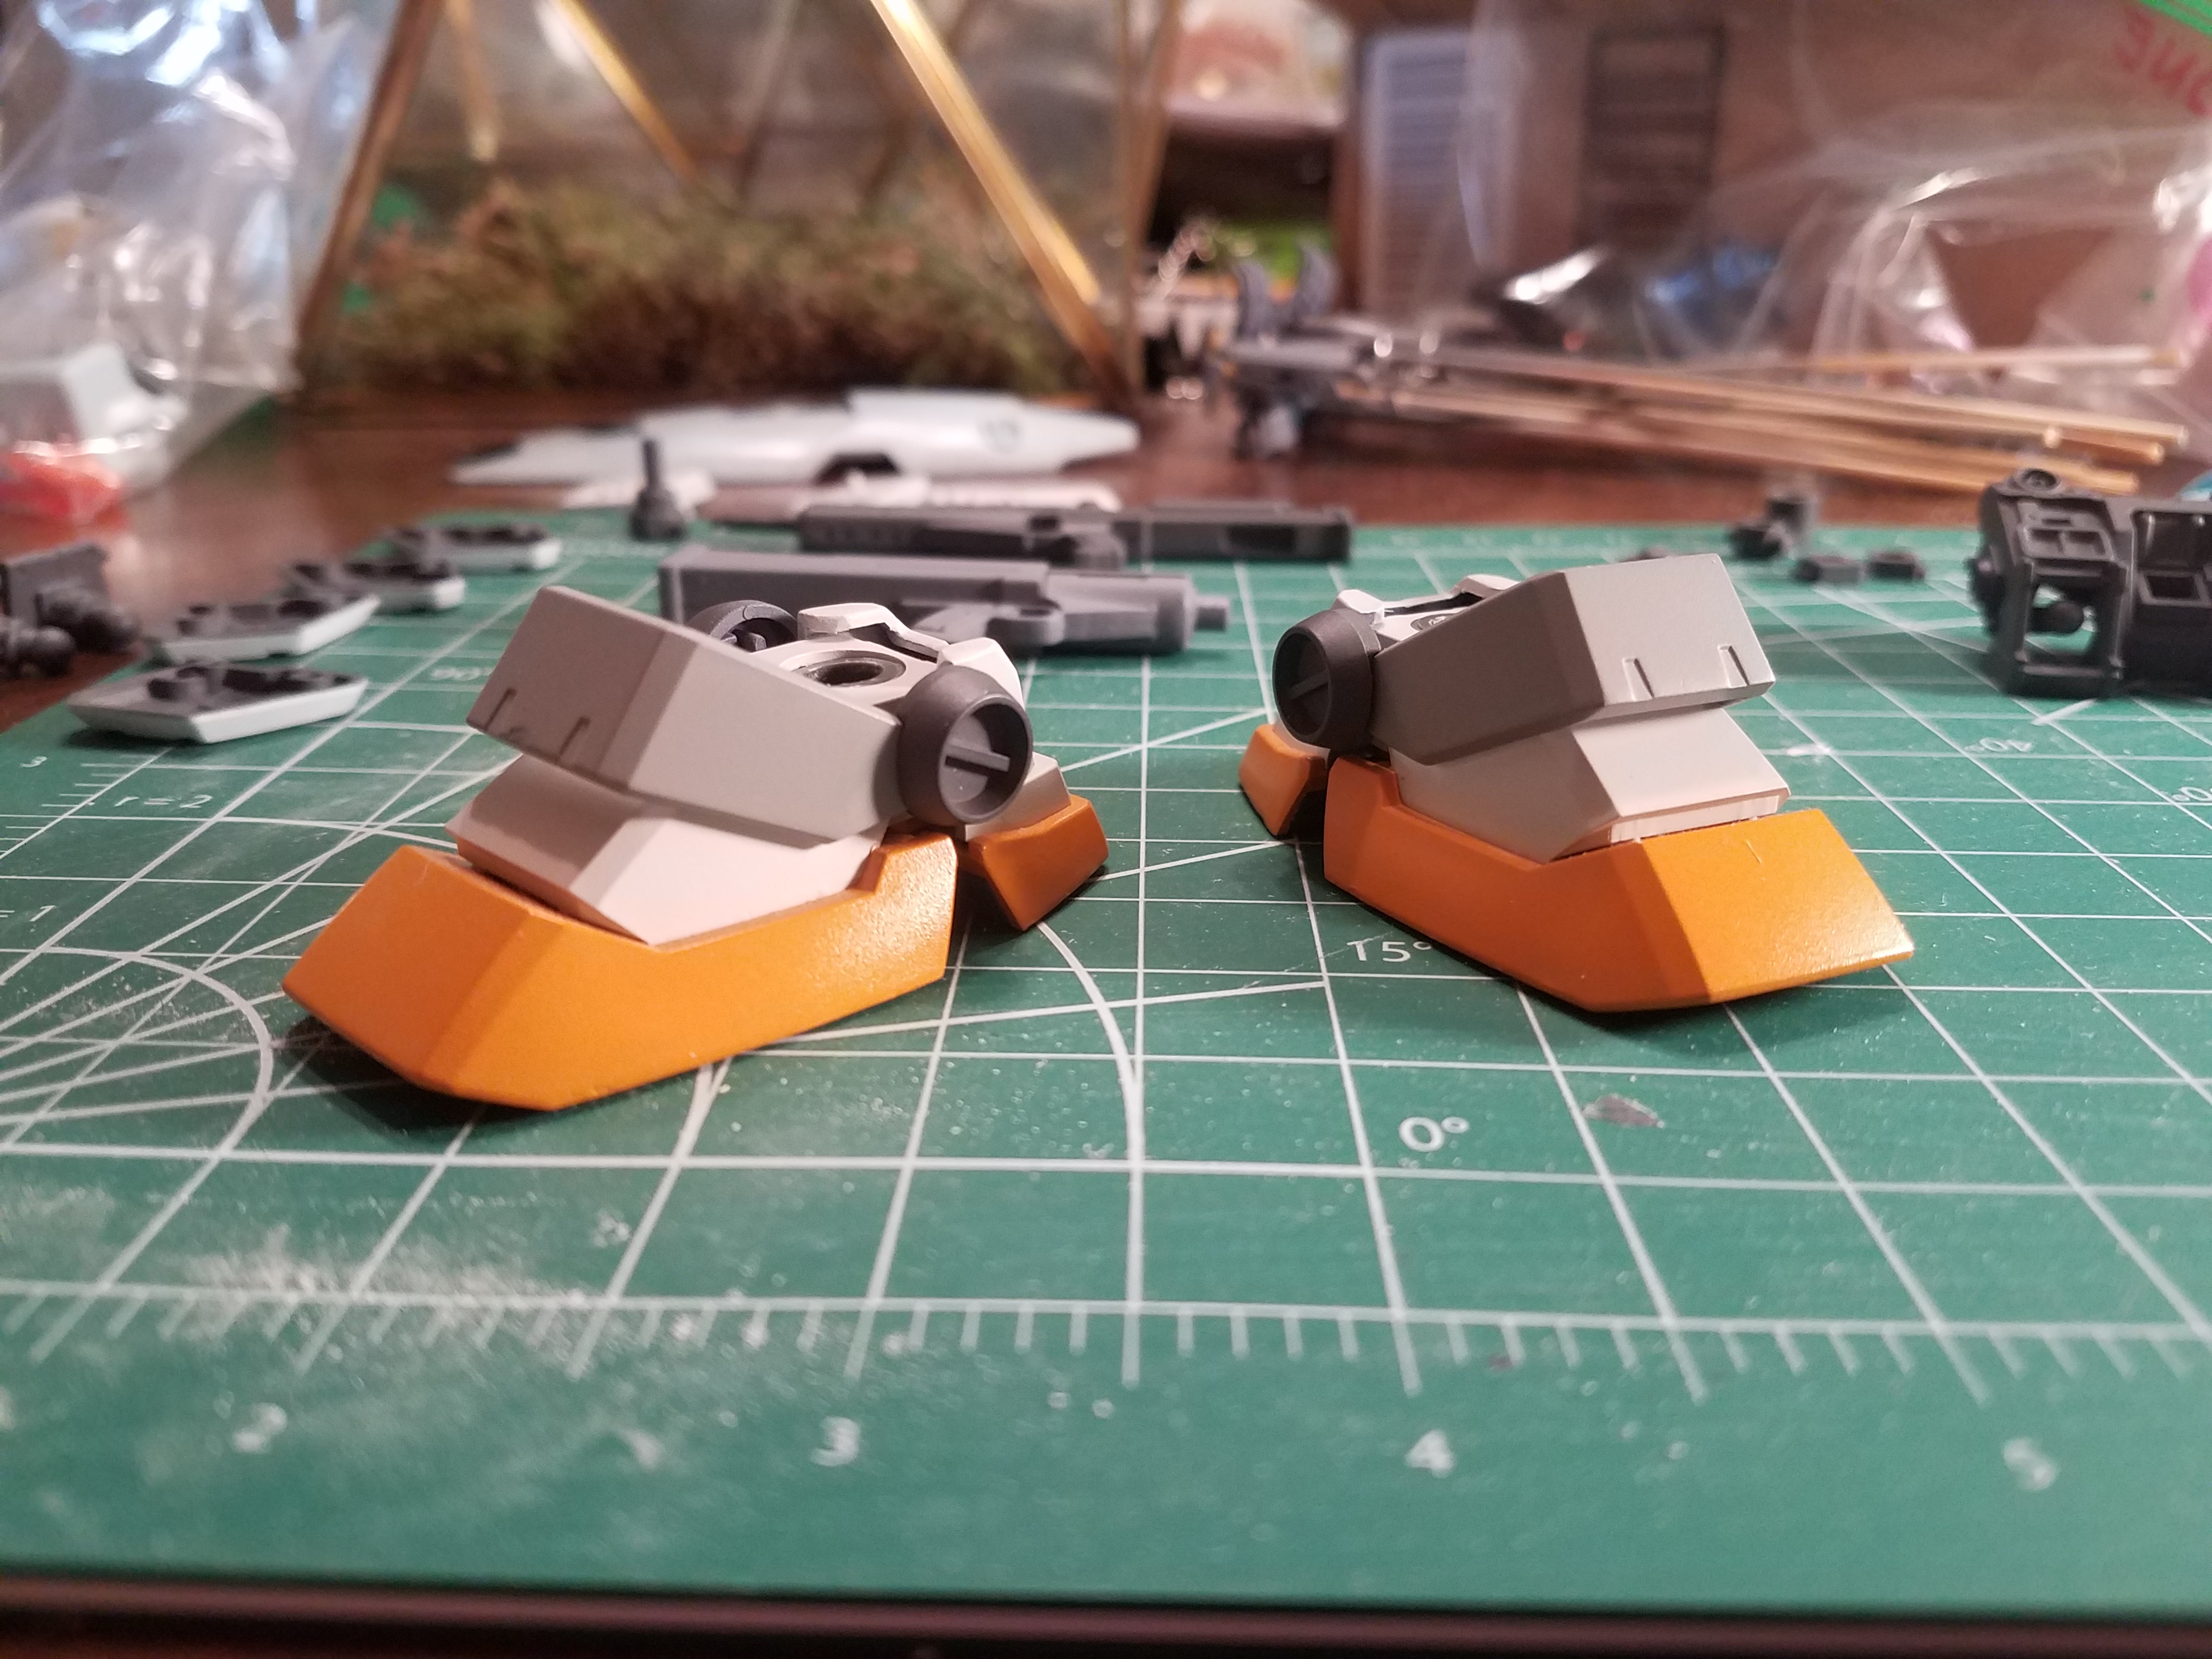
I tested out the color scheme by completing the feet back in 2012. The colors used are:
- Tamiya AS-20 Insignia White
- Tamiya AS-2 Light Gray
- Tamiya TS-4 German Gray
- Model Master 1970 3659 (U) Grabber Orange
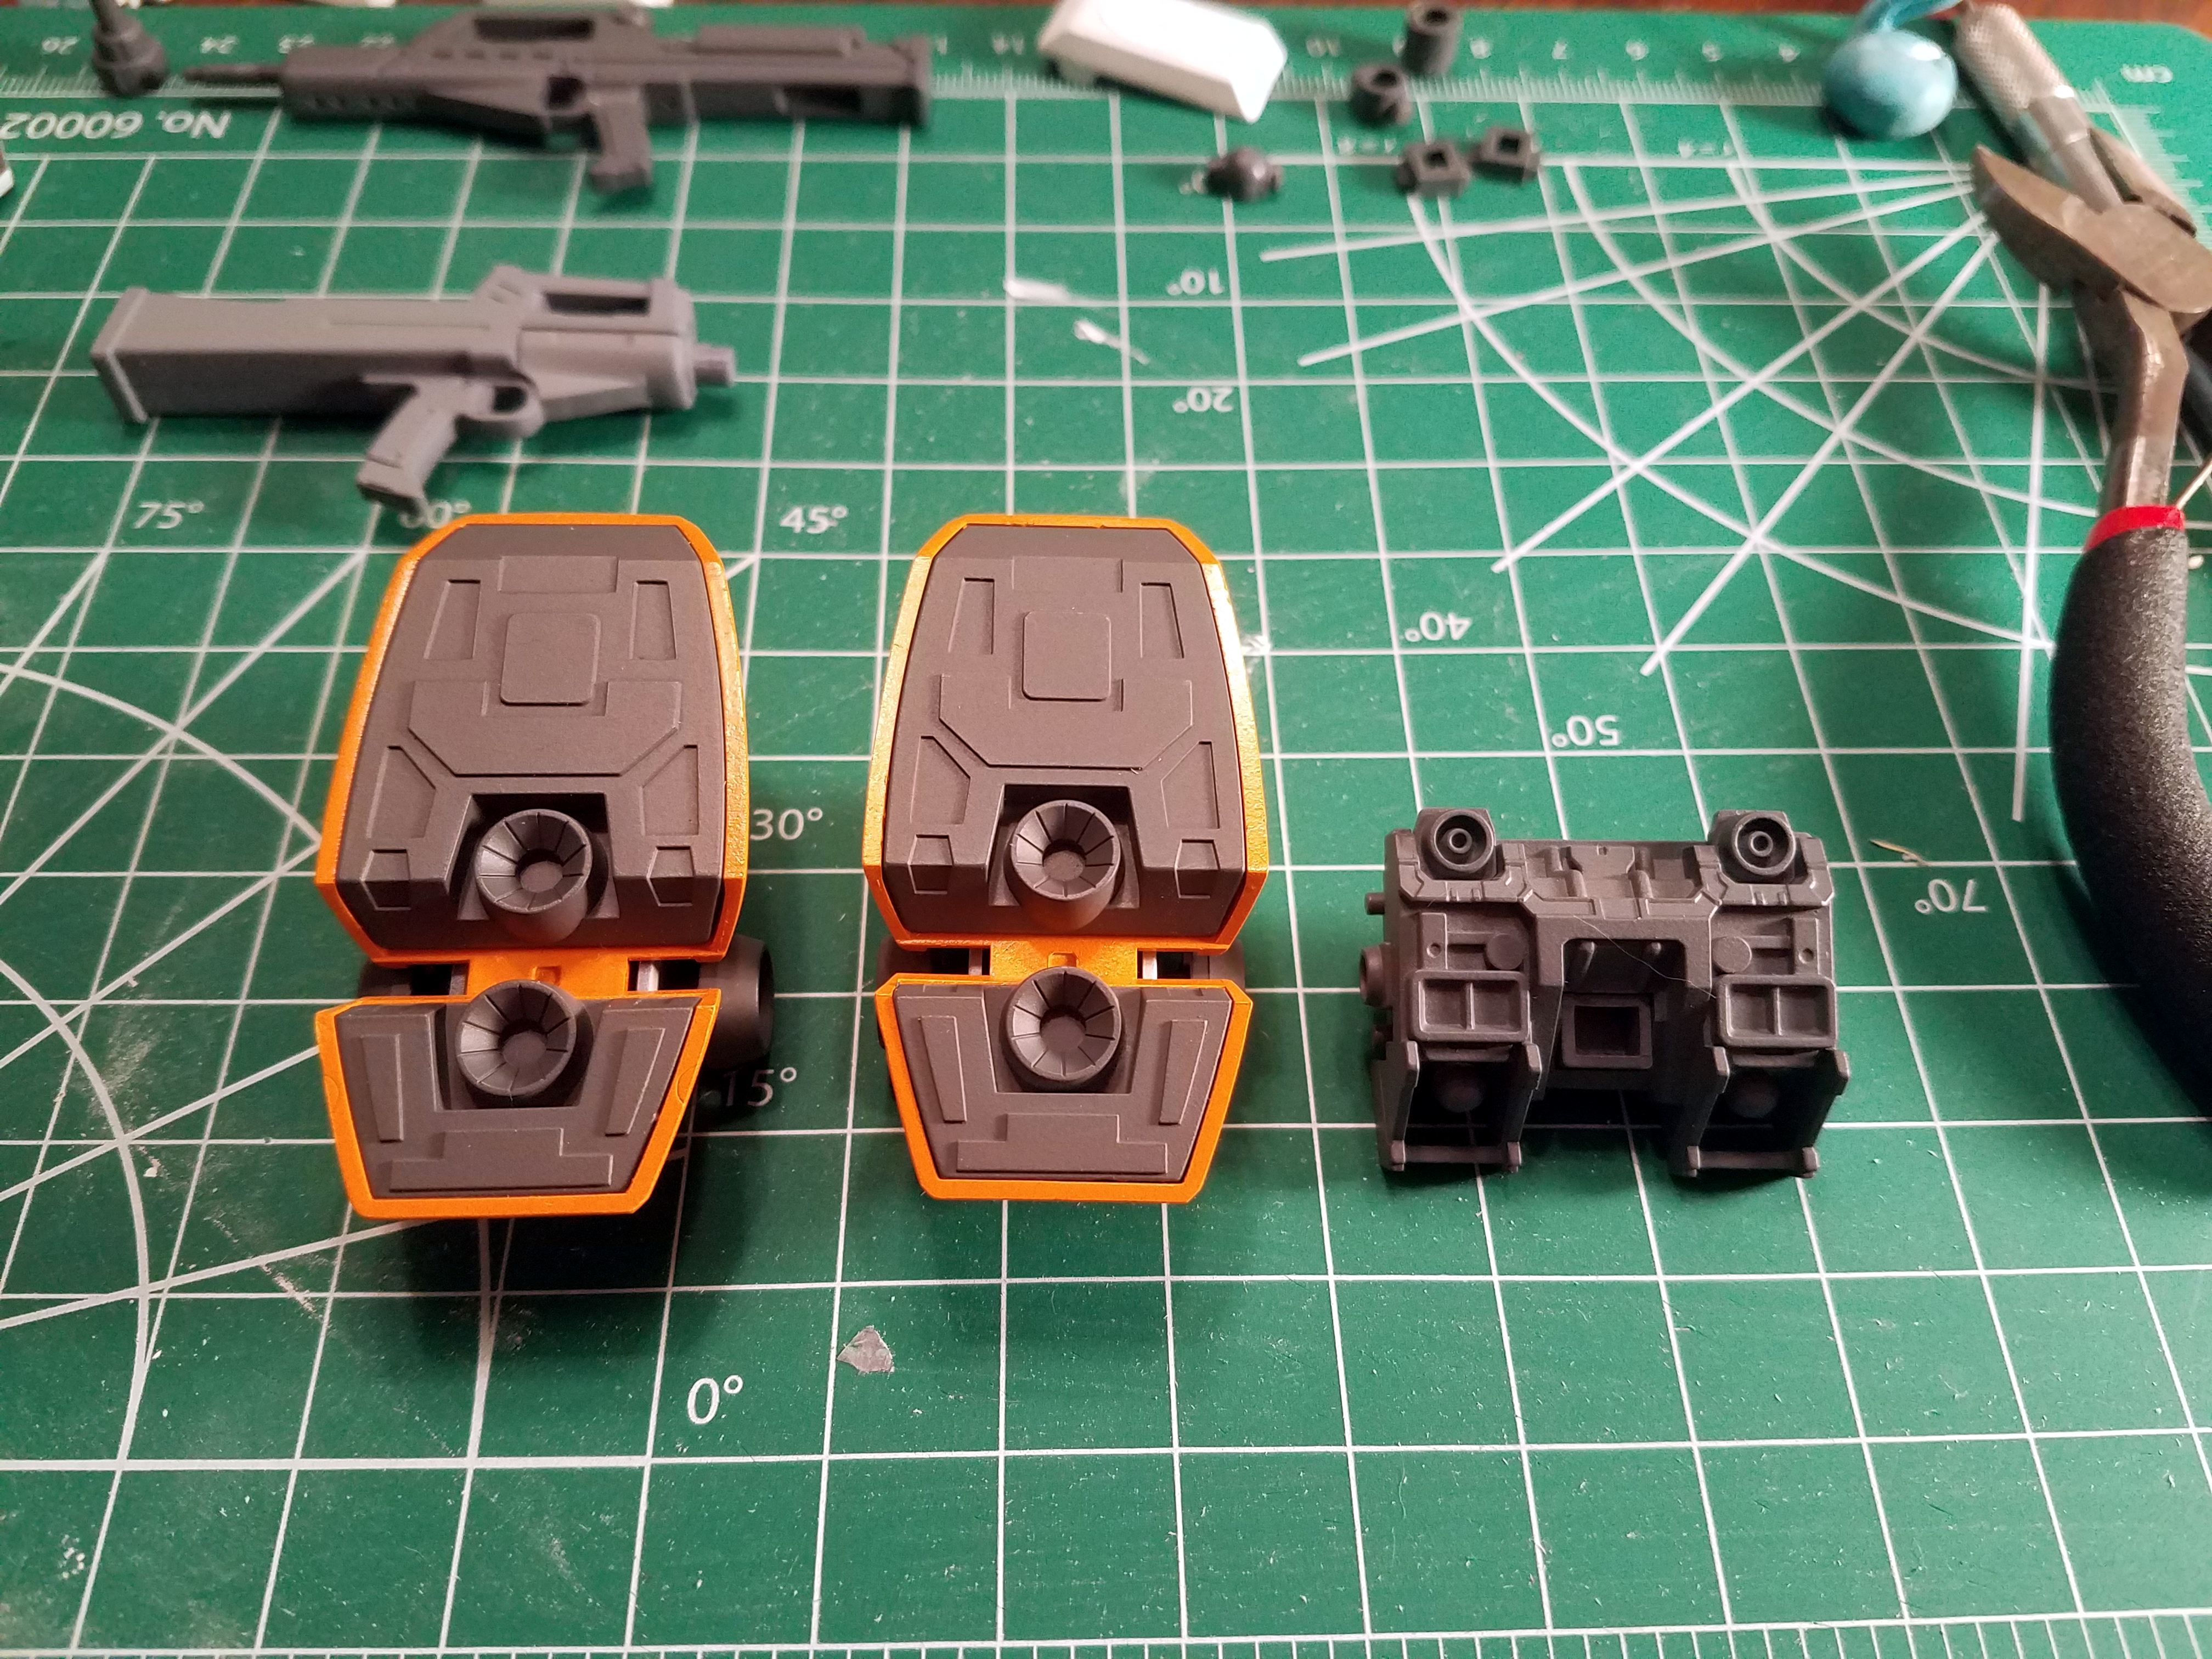
I used Tamiya Fine Surface Primer White to prime the white, light gray, and orange pieces, and Model Master Gray Primer to prime the dark gray pieces. I'm really happy with this result; the Insignia White is perfect for off-white and Grabber Orange is very close to the tone I used in the mockup.
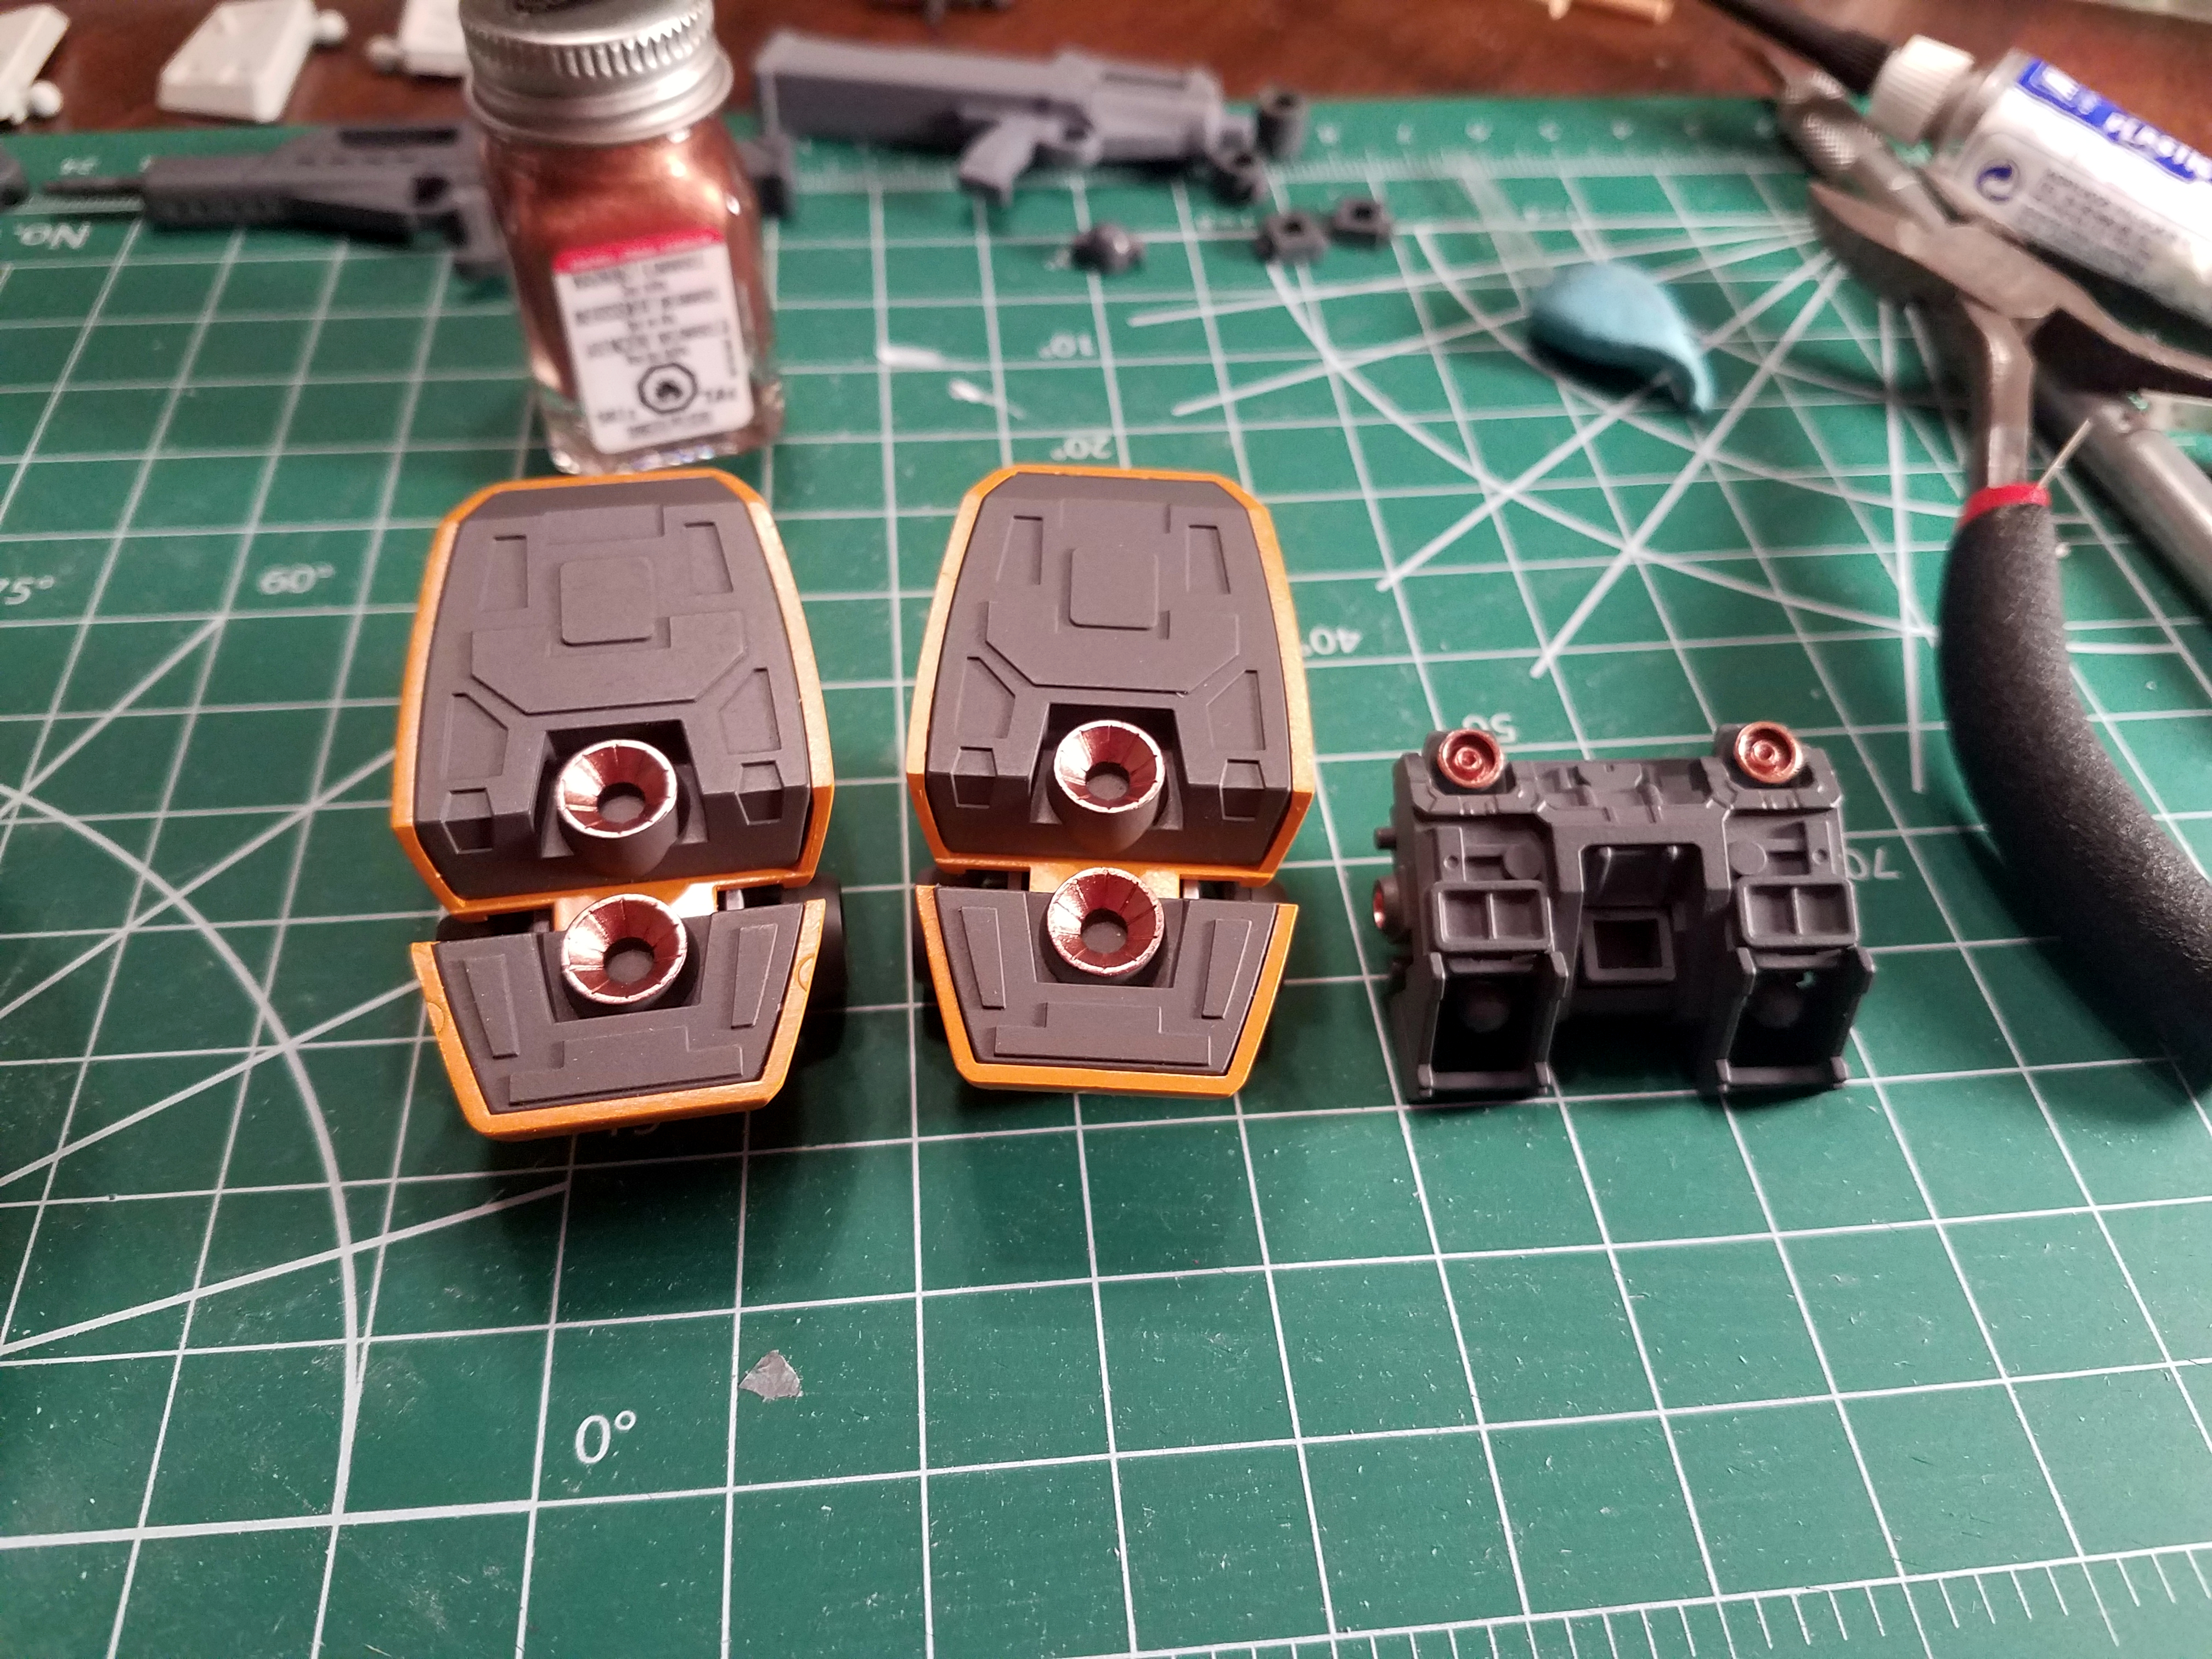
These pieces are the orange backs of the arms; the hole is meant to secure the shield, but both arms have it. I filled the right arm's piece with a scrap piece of plastic from my ancient 1/100 Burning Gundam and filled in the gaps with putty.
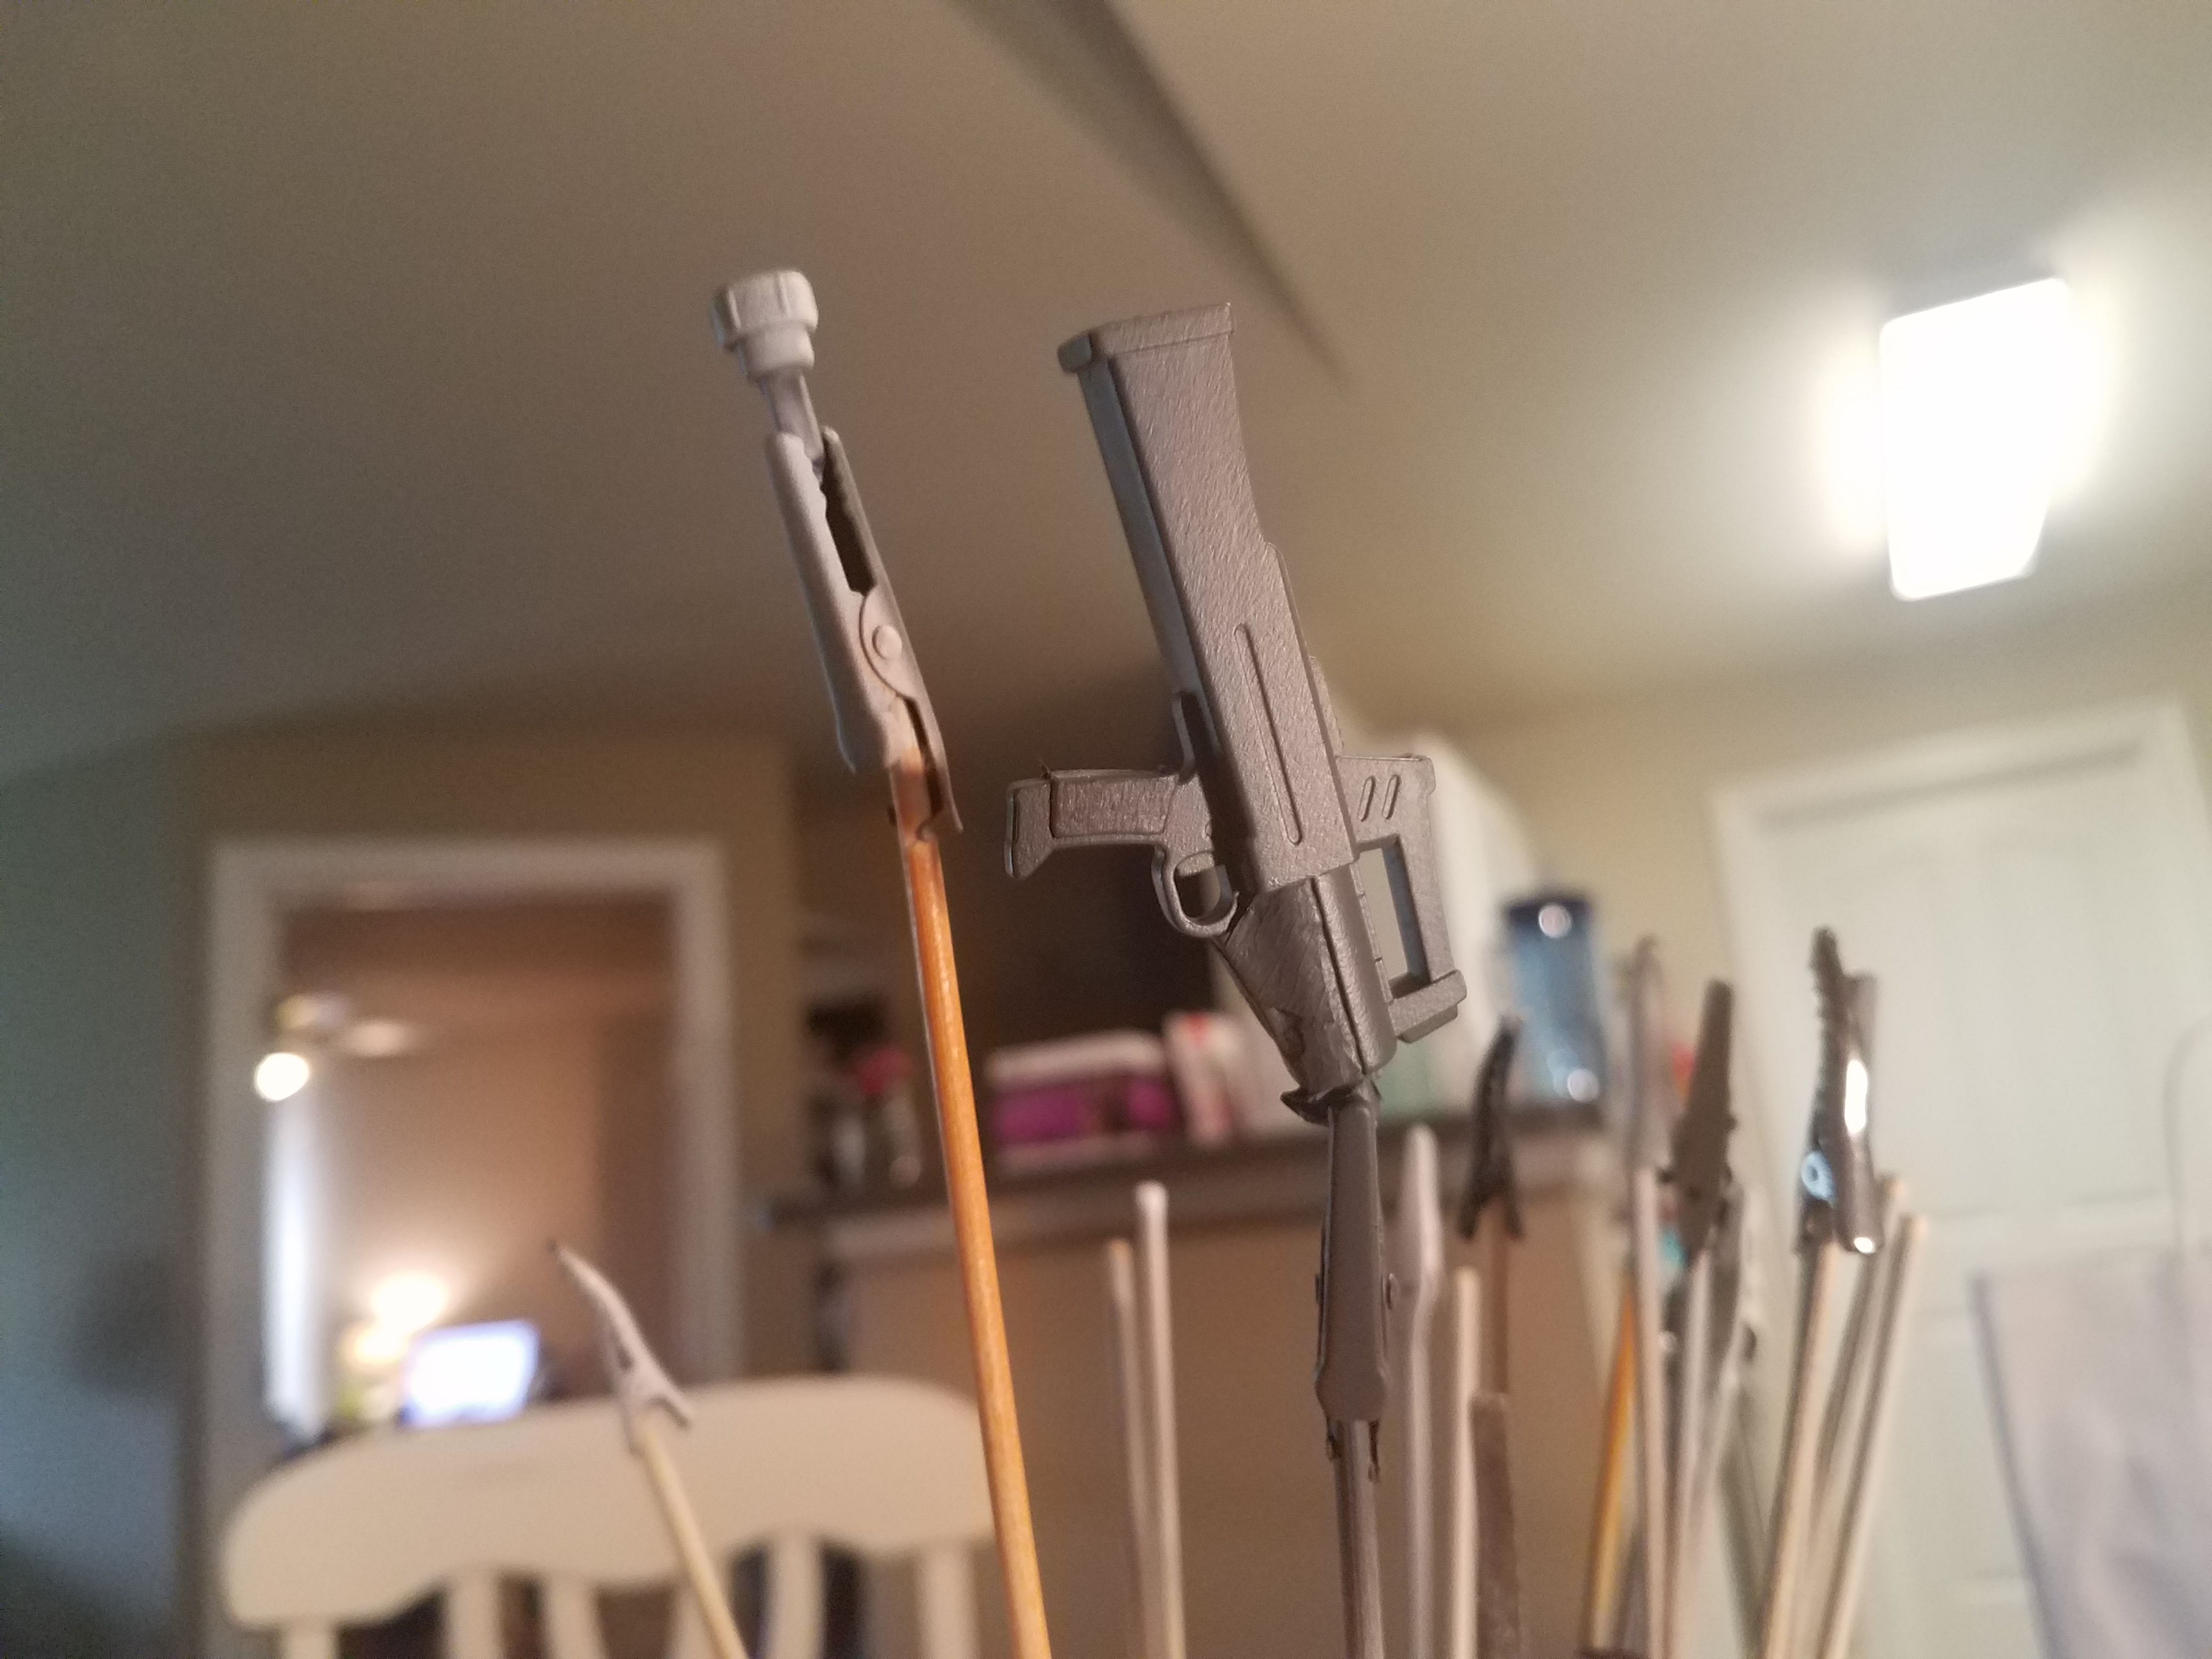
I've decided to paint all of the verniers and thrusters (which are mainly on the backpack) in metallic copper, which I did for the
HGAC Leo and quite liked.
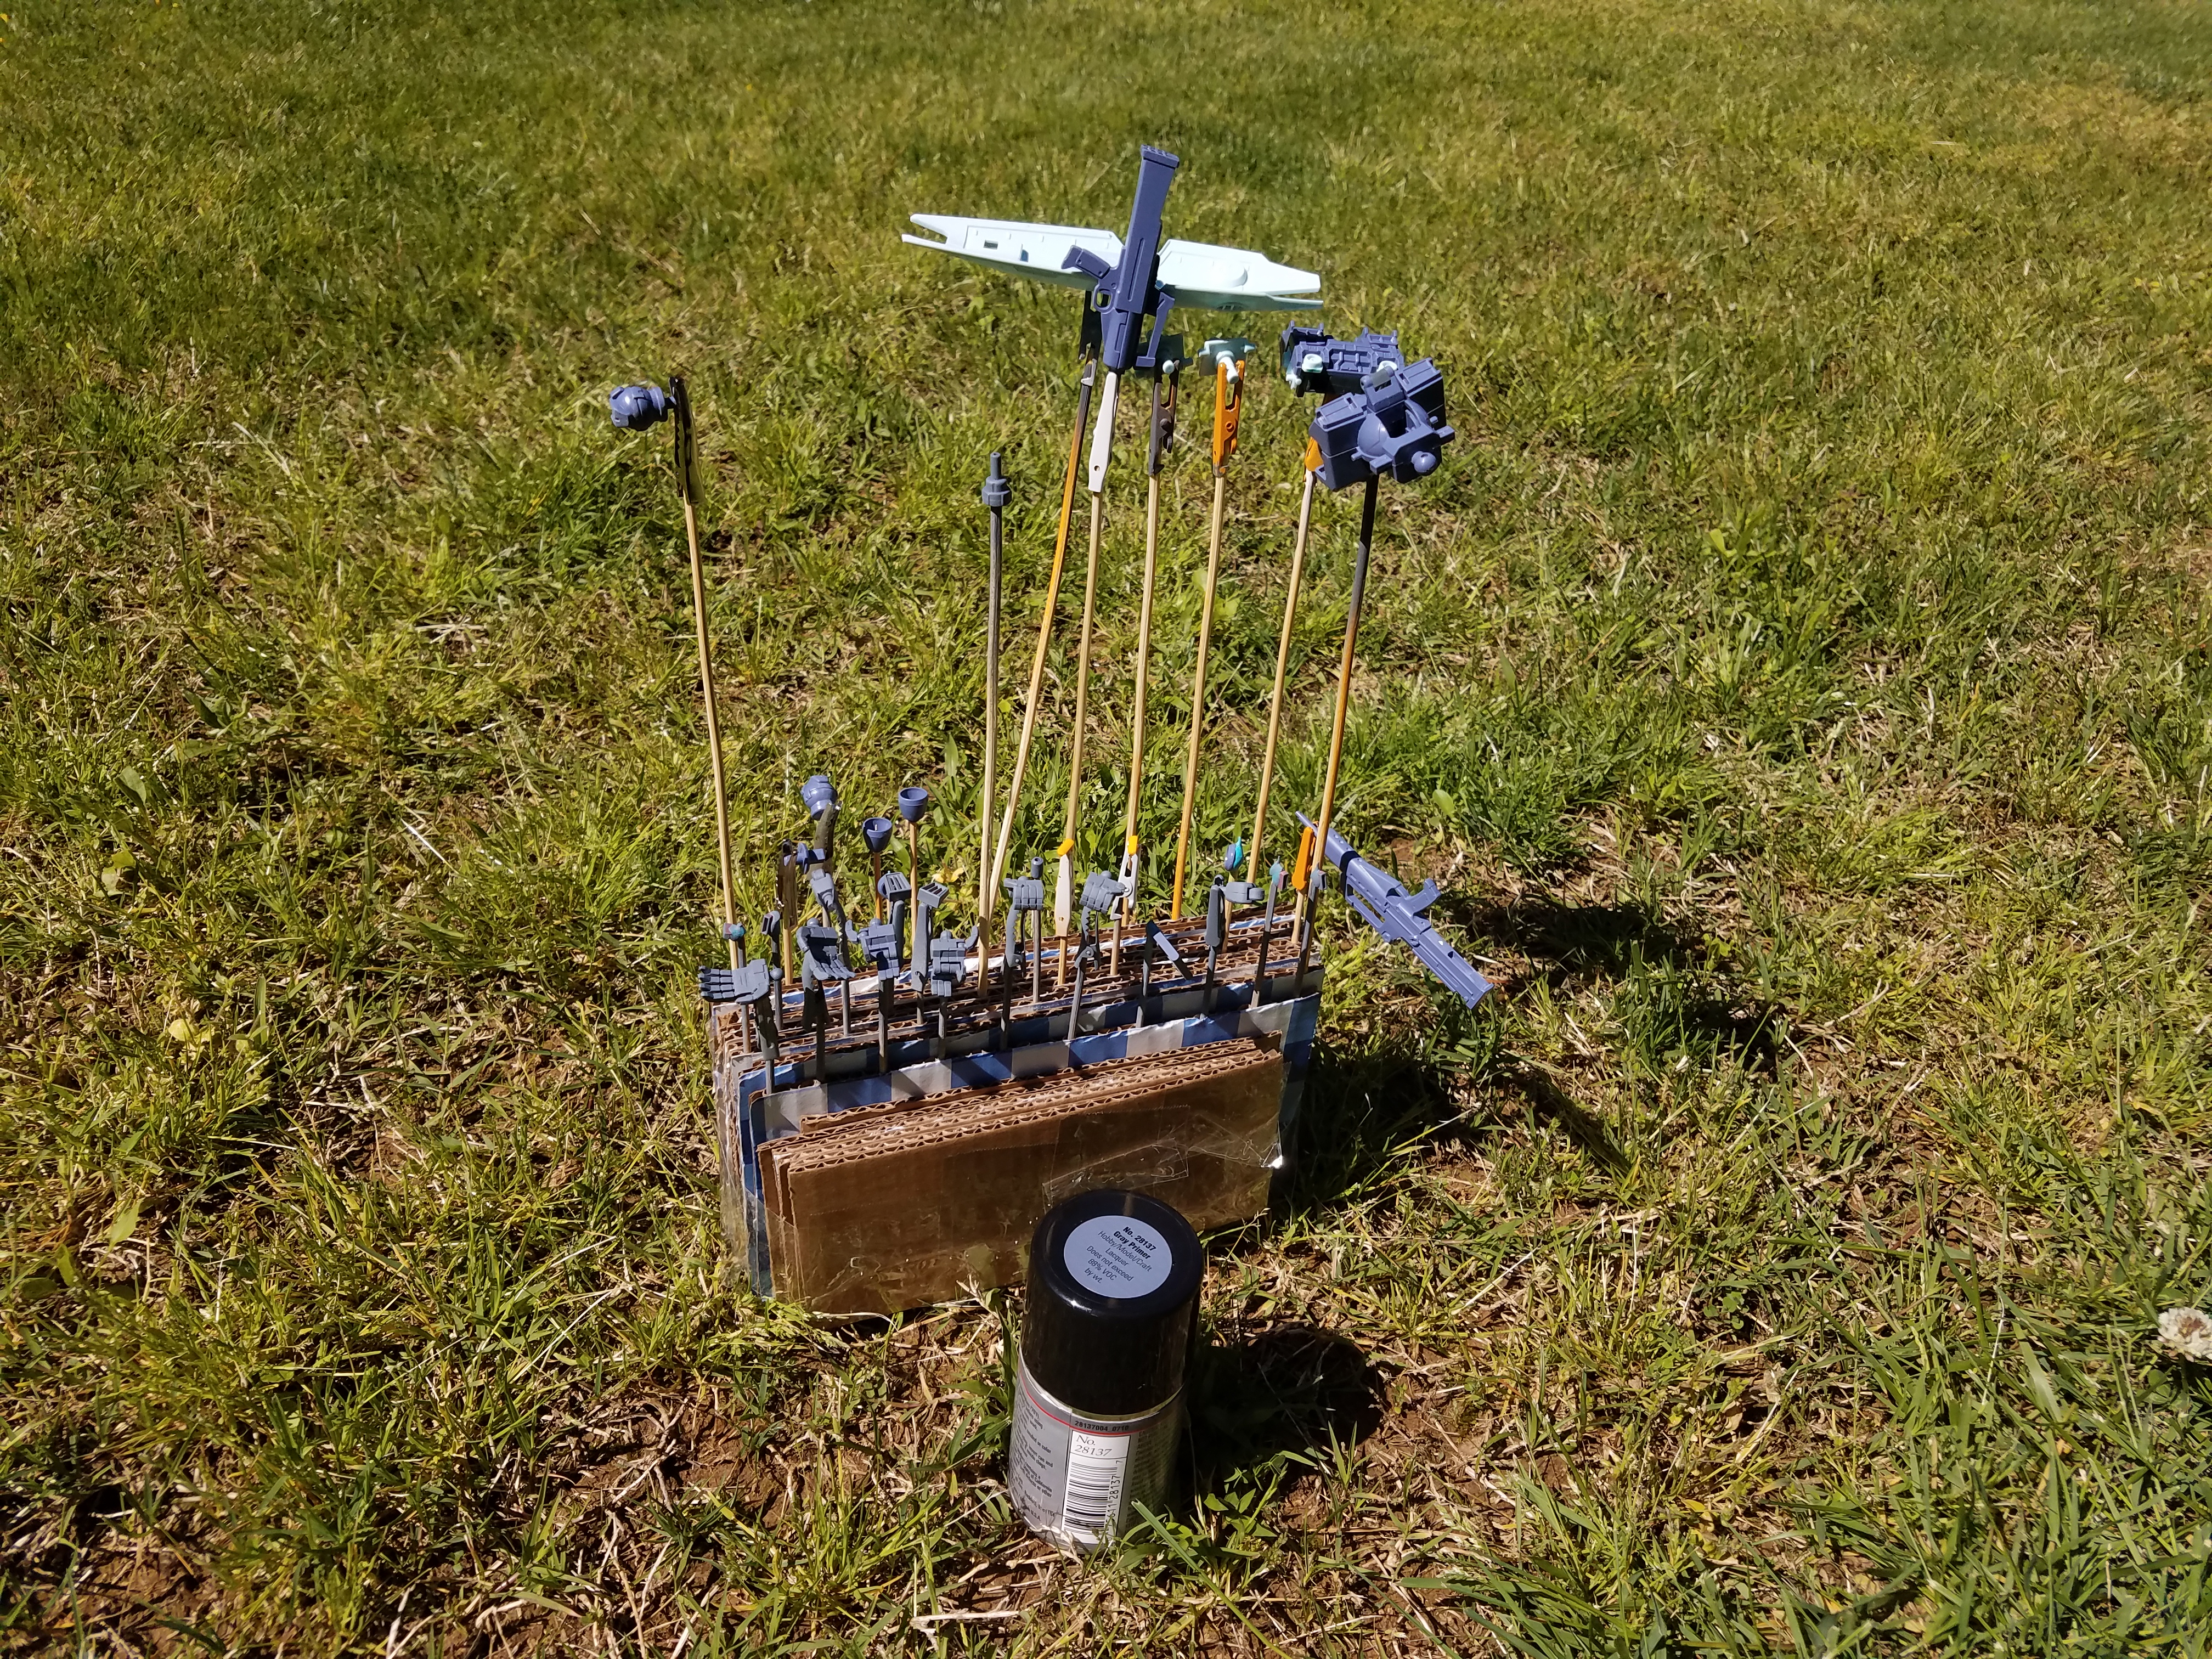
Finally, a shot of my spray skewers. I'm trying to fit in a batch of parts each evening after dinner since we've got plenty of daylight now. Hopefully it'll be less time until the next update.
Date Posted: April 29, 2019
Progress Update 5
More painting progress!
One of the biggest masking jobs that I had on this build was the shield. The back and front of the shield are both the same part, but I figured it would look better if the back was painted in gray. I used sticky tack to mask some of the edges so that they would stay dark. In a modern Master Grade kit, they would absolutely have molded the back and front of the shield in separate colors - but at this point that level of color separation wasn't a priority yet.
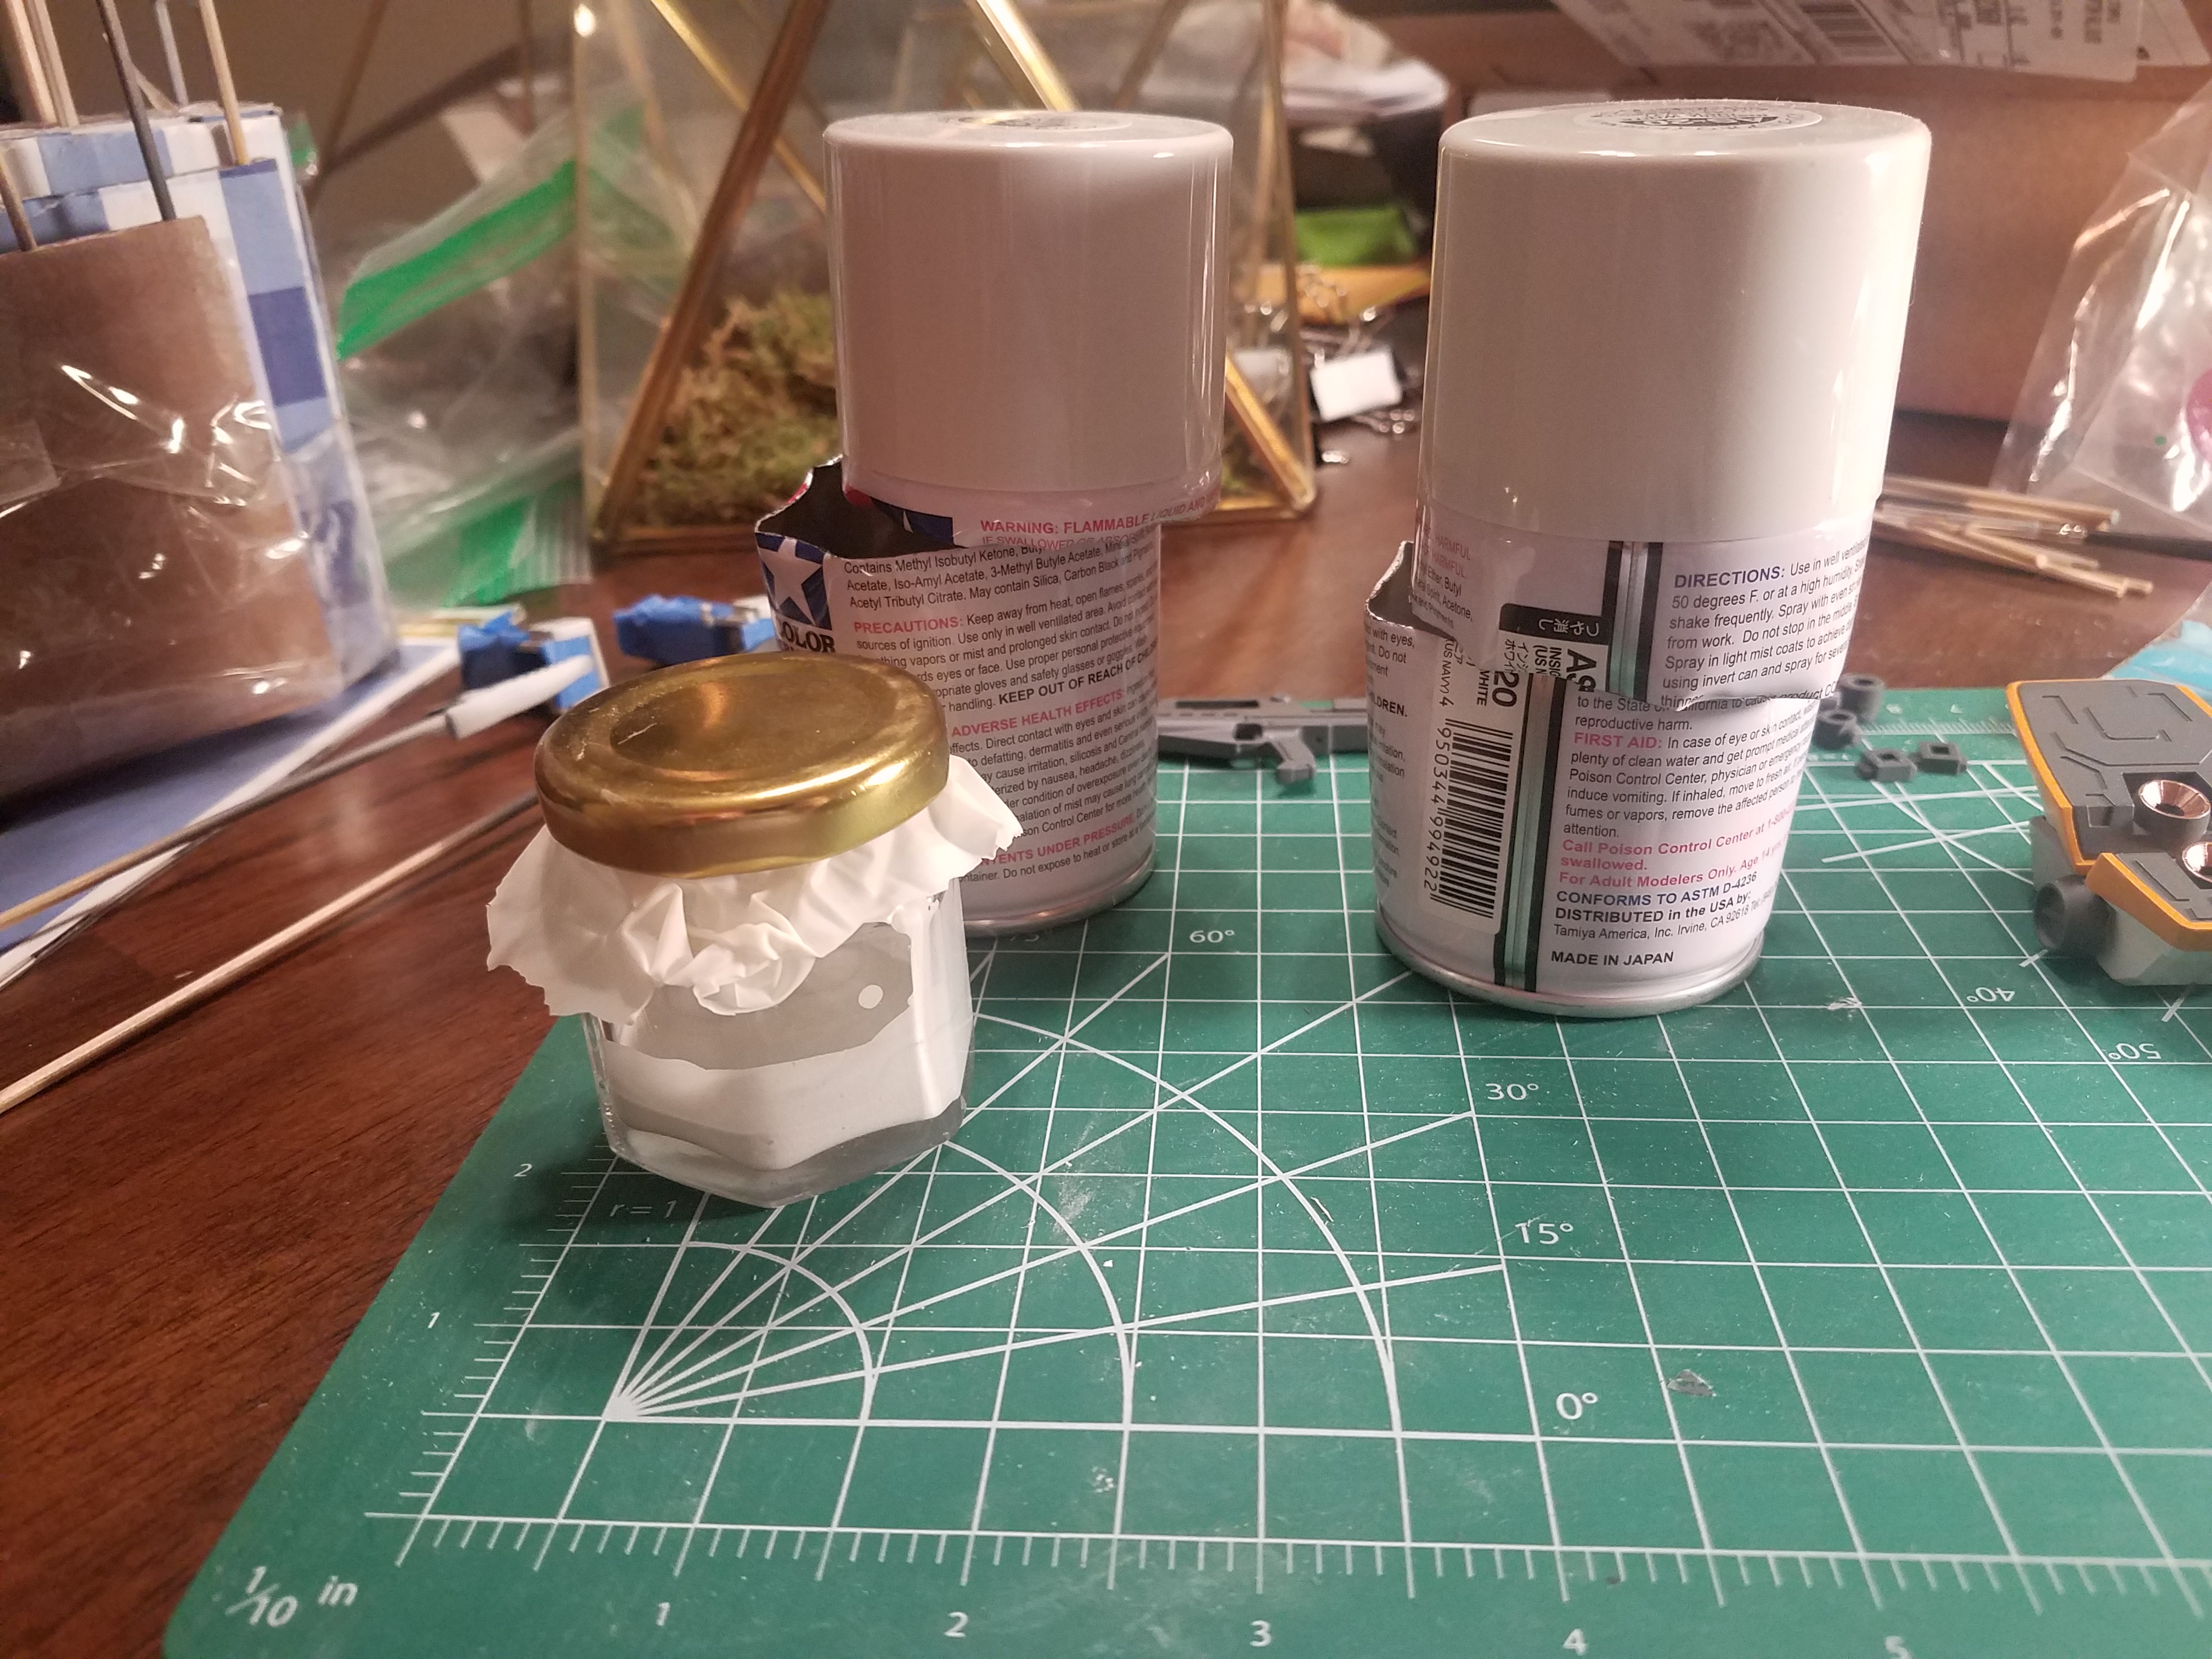
For hand-painting, I decanted from the used cans. I used a sharp knife to pierce and ccut them open ad the top, then poured into a glass container. I wasn't super confident in the seal, so I used a bit of latex glove to really make the jar top airtight.
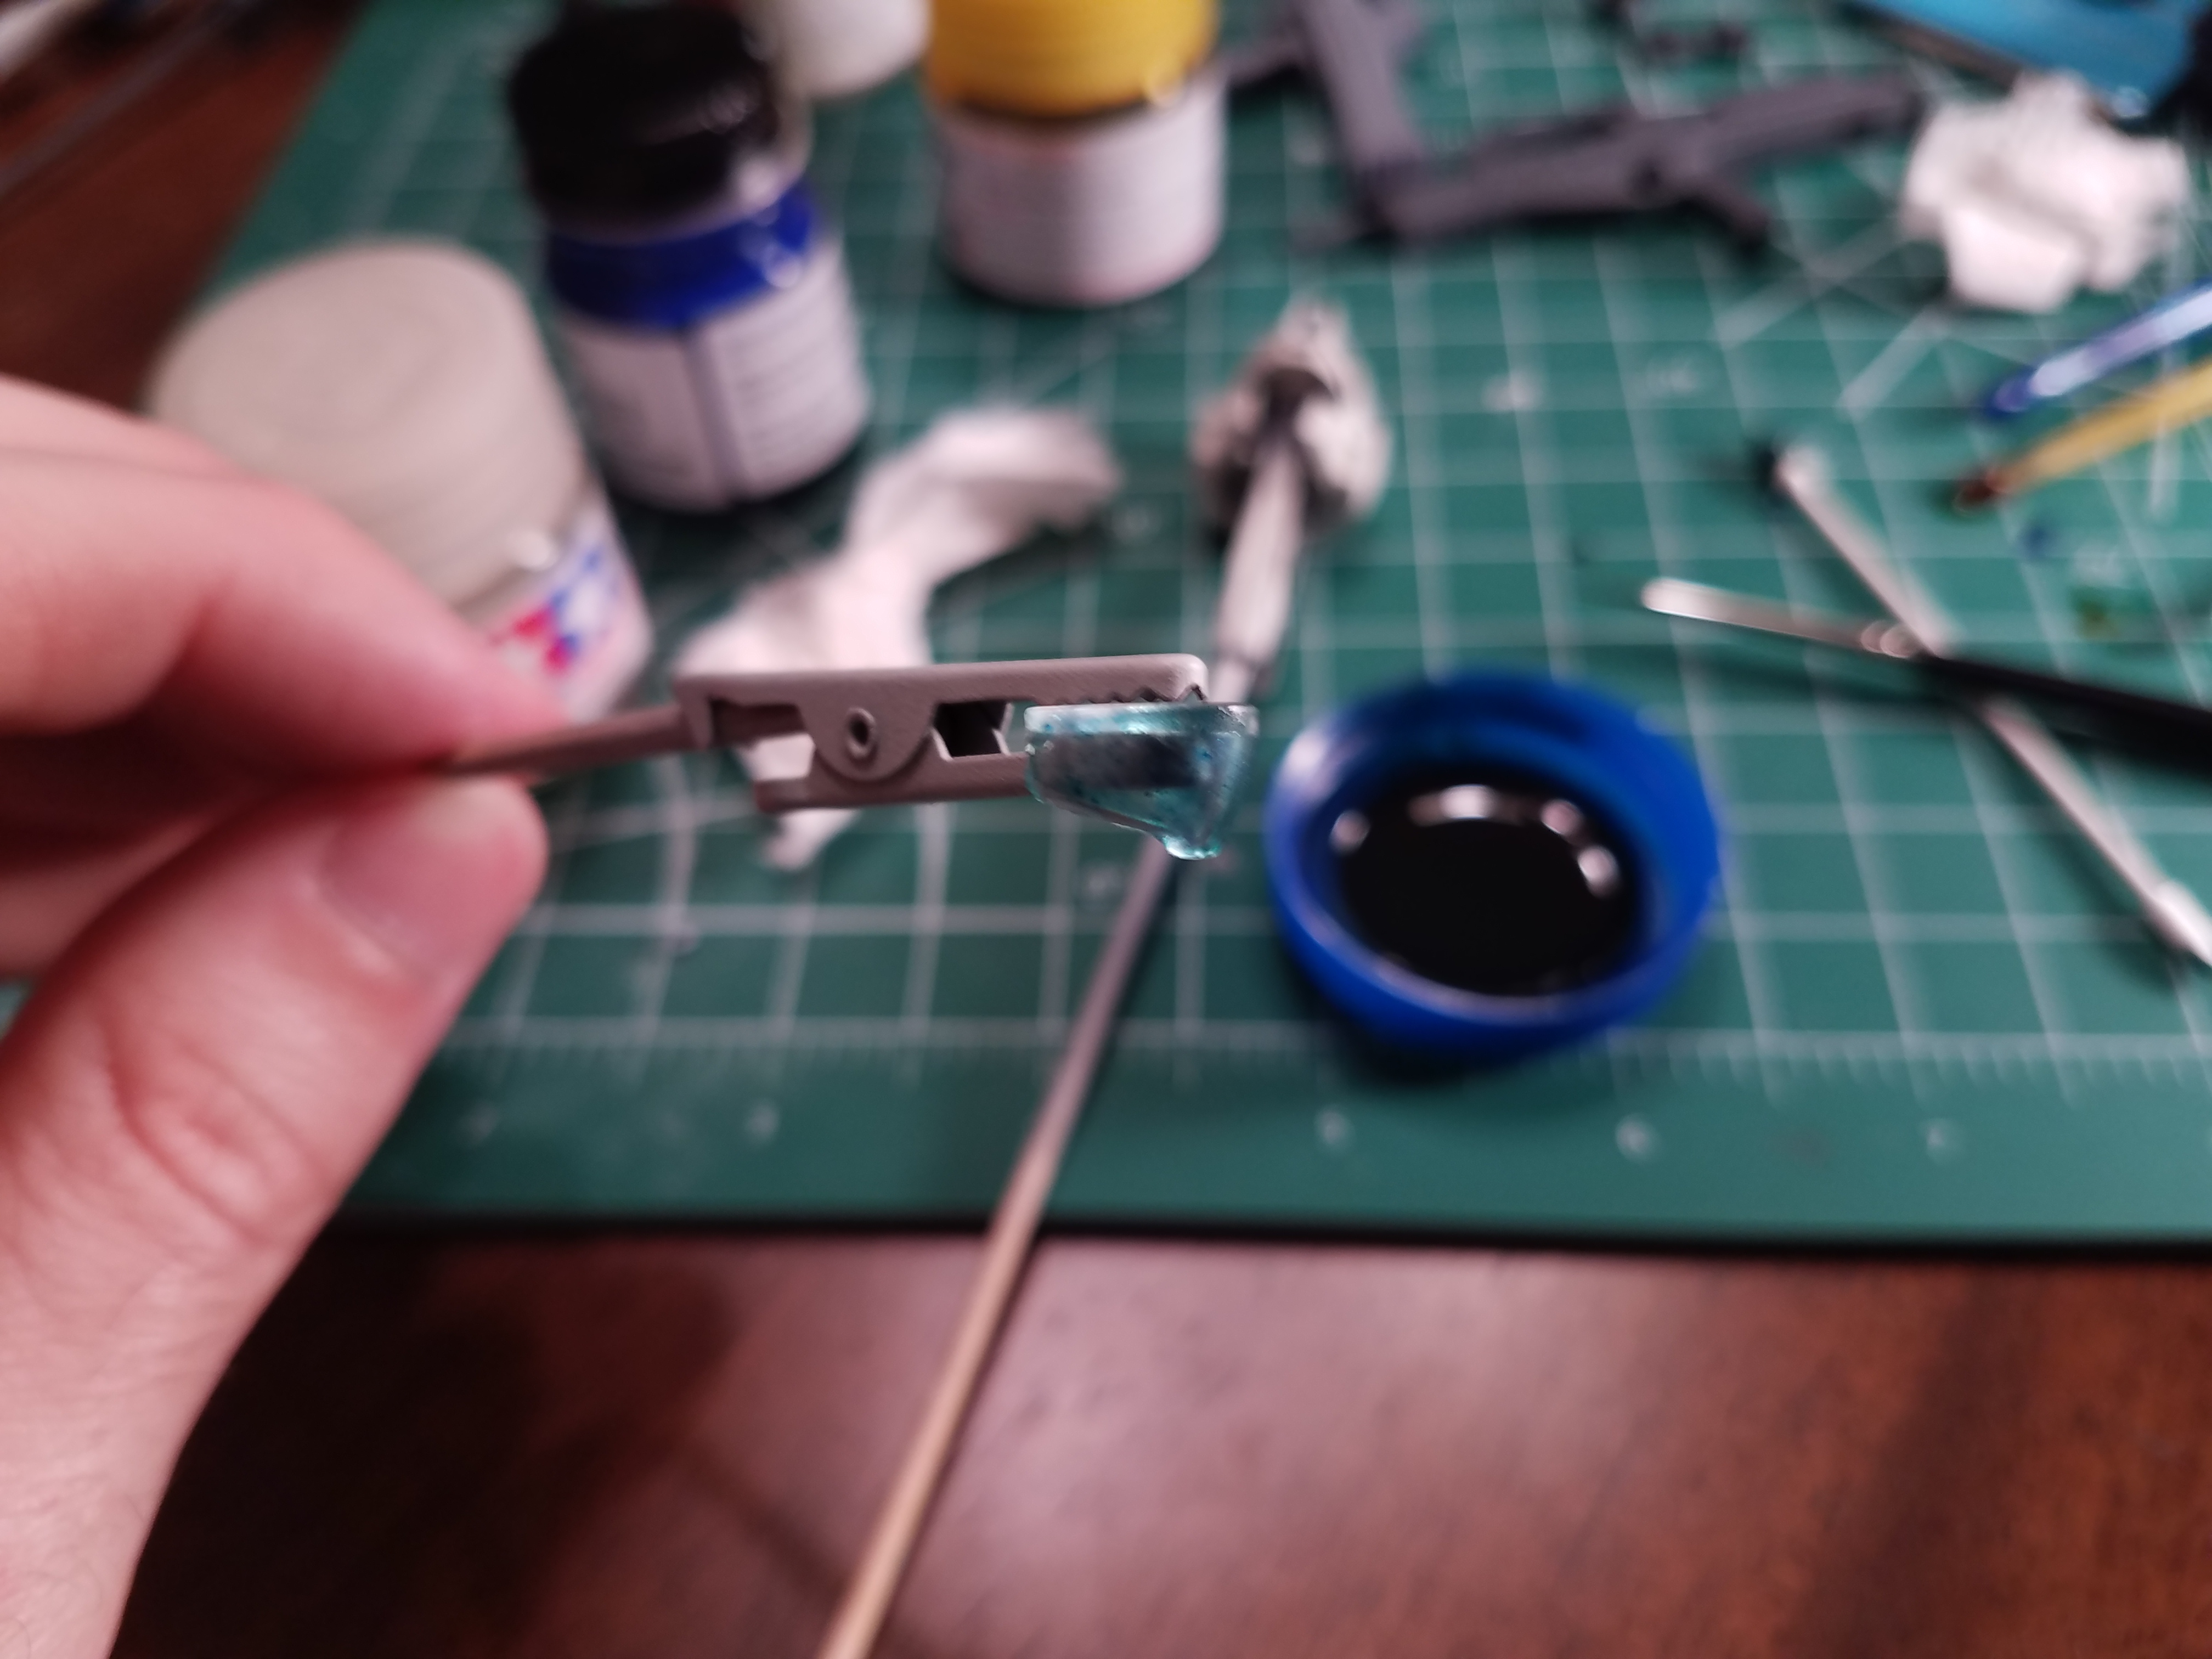
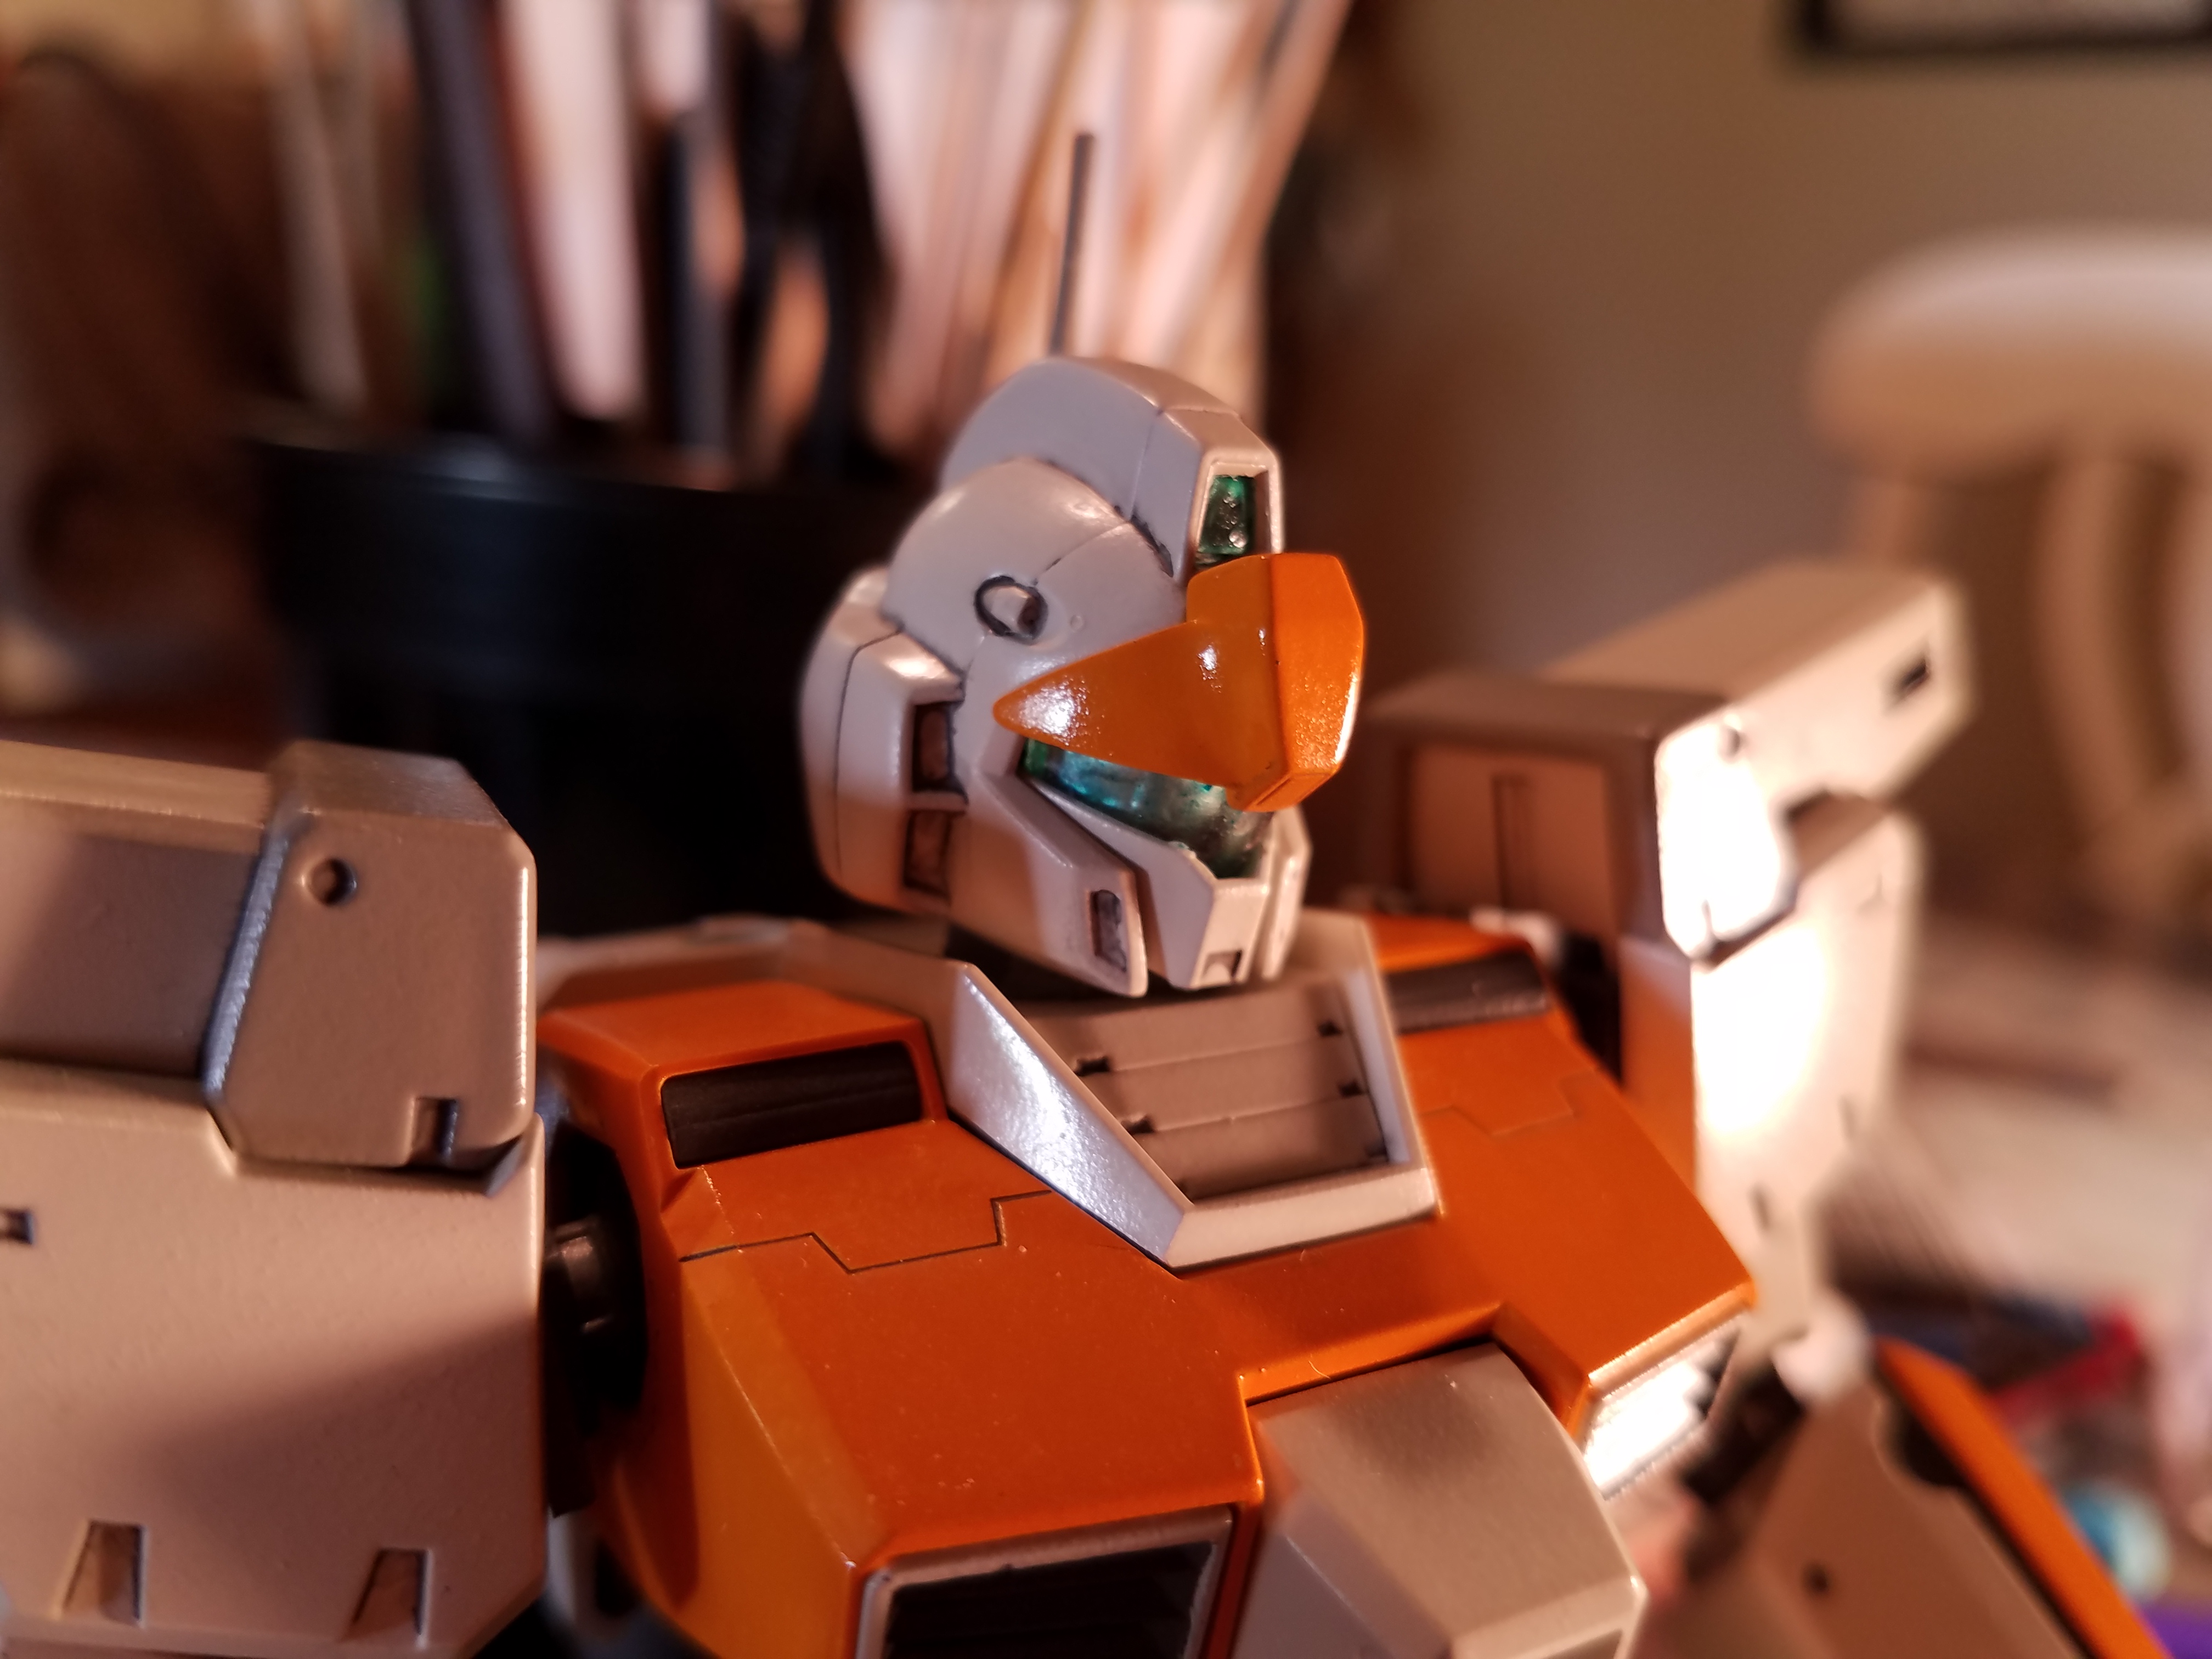
I used some clear blue and yellow acrylic paints (mixed with water for thinning) to paint the tint on the head camera and visor. This was not quite as clean as I'd like, but it's only noticeable from very close. Once it's on the head and hit with a flat coat, it'll blend out completely from any reasonable viewing distance. Still, there's gotta be a cleaner way to apply this - maybe even a way to do a true dye, but it probably wouldn't be worth the time to experiment on a piece this small.
The shoulders were one of the easier parts to mask, and you can see here that the result is pretty clean. You can also see the lower shoulder pieces above, which I used the same masking that I used on the shield to get the inside surfaces nice and dark.
And here are the completed shoulders. Since the larger lower shoulder pieces are separate parts, it would have been easier to do them in gray than the area I ended up painting, but in all the mock-ups I tried I felt that it threw off the white balance.
Finally, I had a lot of pieces finishing at this point, so I decided to put a few of them together to get a sense for the overall scheme. Unfortunately I didn't spray the lower torso pieces super well, so they'll require another coat when I can go out and get another can of light gray, and there are no orange pieces to show yet - but I really, really like the look of this so far. It's easy to get bogged down in this phase of building, since you really aren't actually building at all - without the visual progress, you can lose steam pretty hard. I always find that snapping parts together can really help with momentum, even if you know you'll have to disassemble it later.
Date Posted: May 4, 2019
Progress Update 6
In which I had my first setback - but we kept forging onward.
My plan was to use the spray paint I decanted earlier - along with additional colors that I would decant later - to paint the fine details on the rifle and submachine gun, along with a few spots on the actual suit. However, I neglected to consider that the chemical solvents in the decanted lacquer would eat into the base coat of paint, which resulted in both coats melting together. I ended up sanding this off and repainting the dark gray.
This was a pretty big bummer, since it meant that the weapons wouldn't be able to be detailed at all - they're both just two right and left half parts with no actual parts separation for the different weapon components. I also had to slightly adjust my plans for certain pieces - most notably the calves - so you'll see some differences between my scheme above and the final product. Overall, the mobile suit itself still looks great, but the weapons are just a bit plain.
The obvious solution to this is to use an enamel or acrylic paint, since these use different solvents that won't melt the lacquer base coat. However, I didn't want to deal with the hassle of matching colors, and I couldn't really justify the expense in this case.
I finally got around to the last color of paints - orange. Here's the shield, fully assembled.
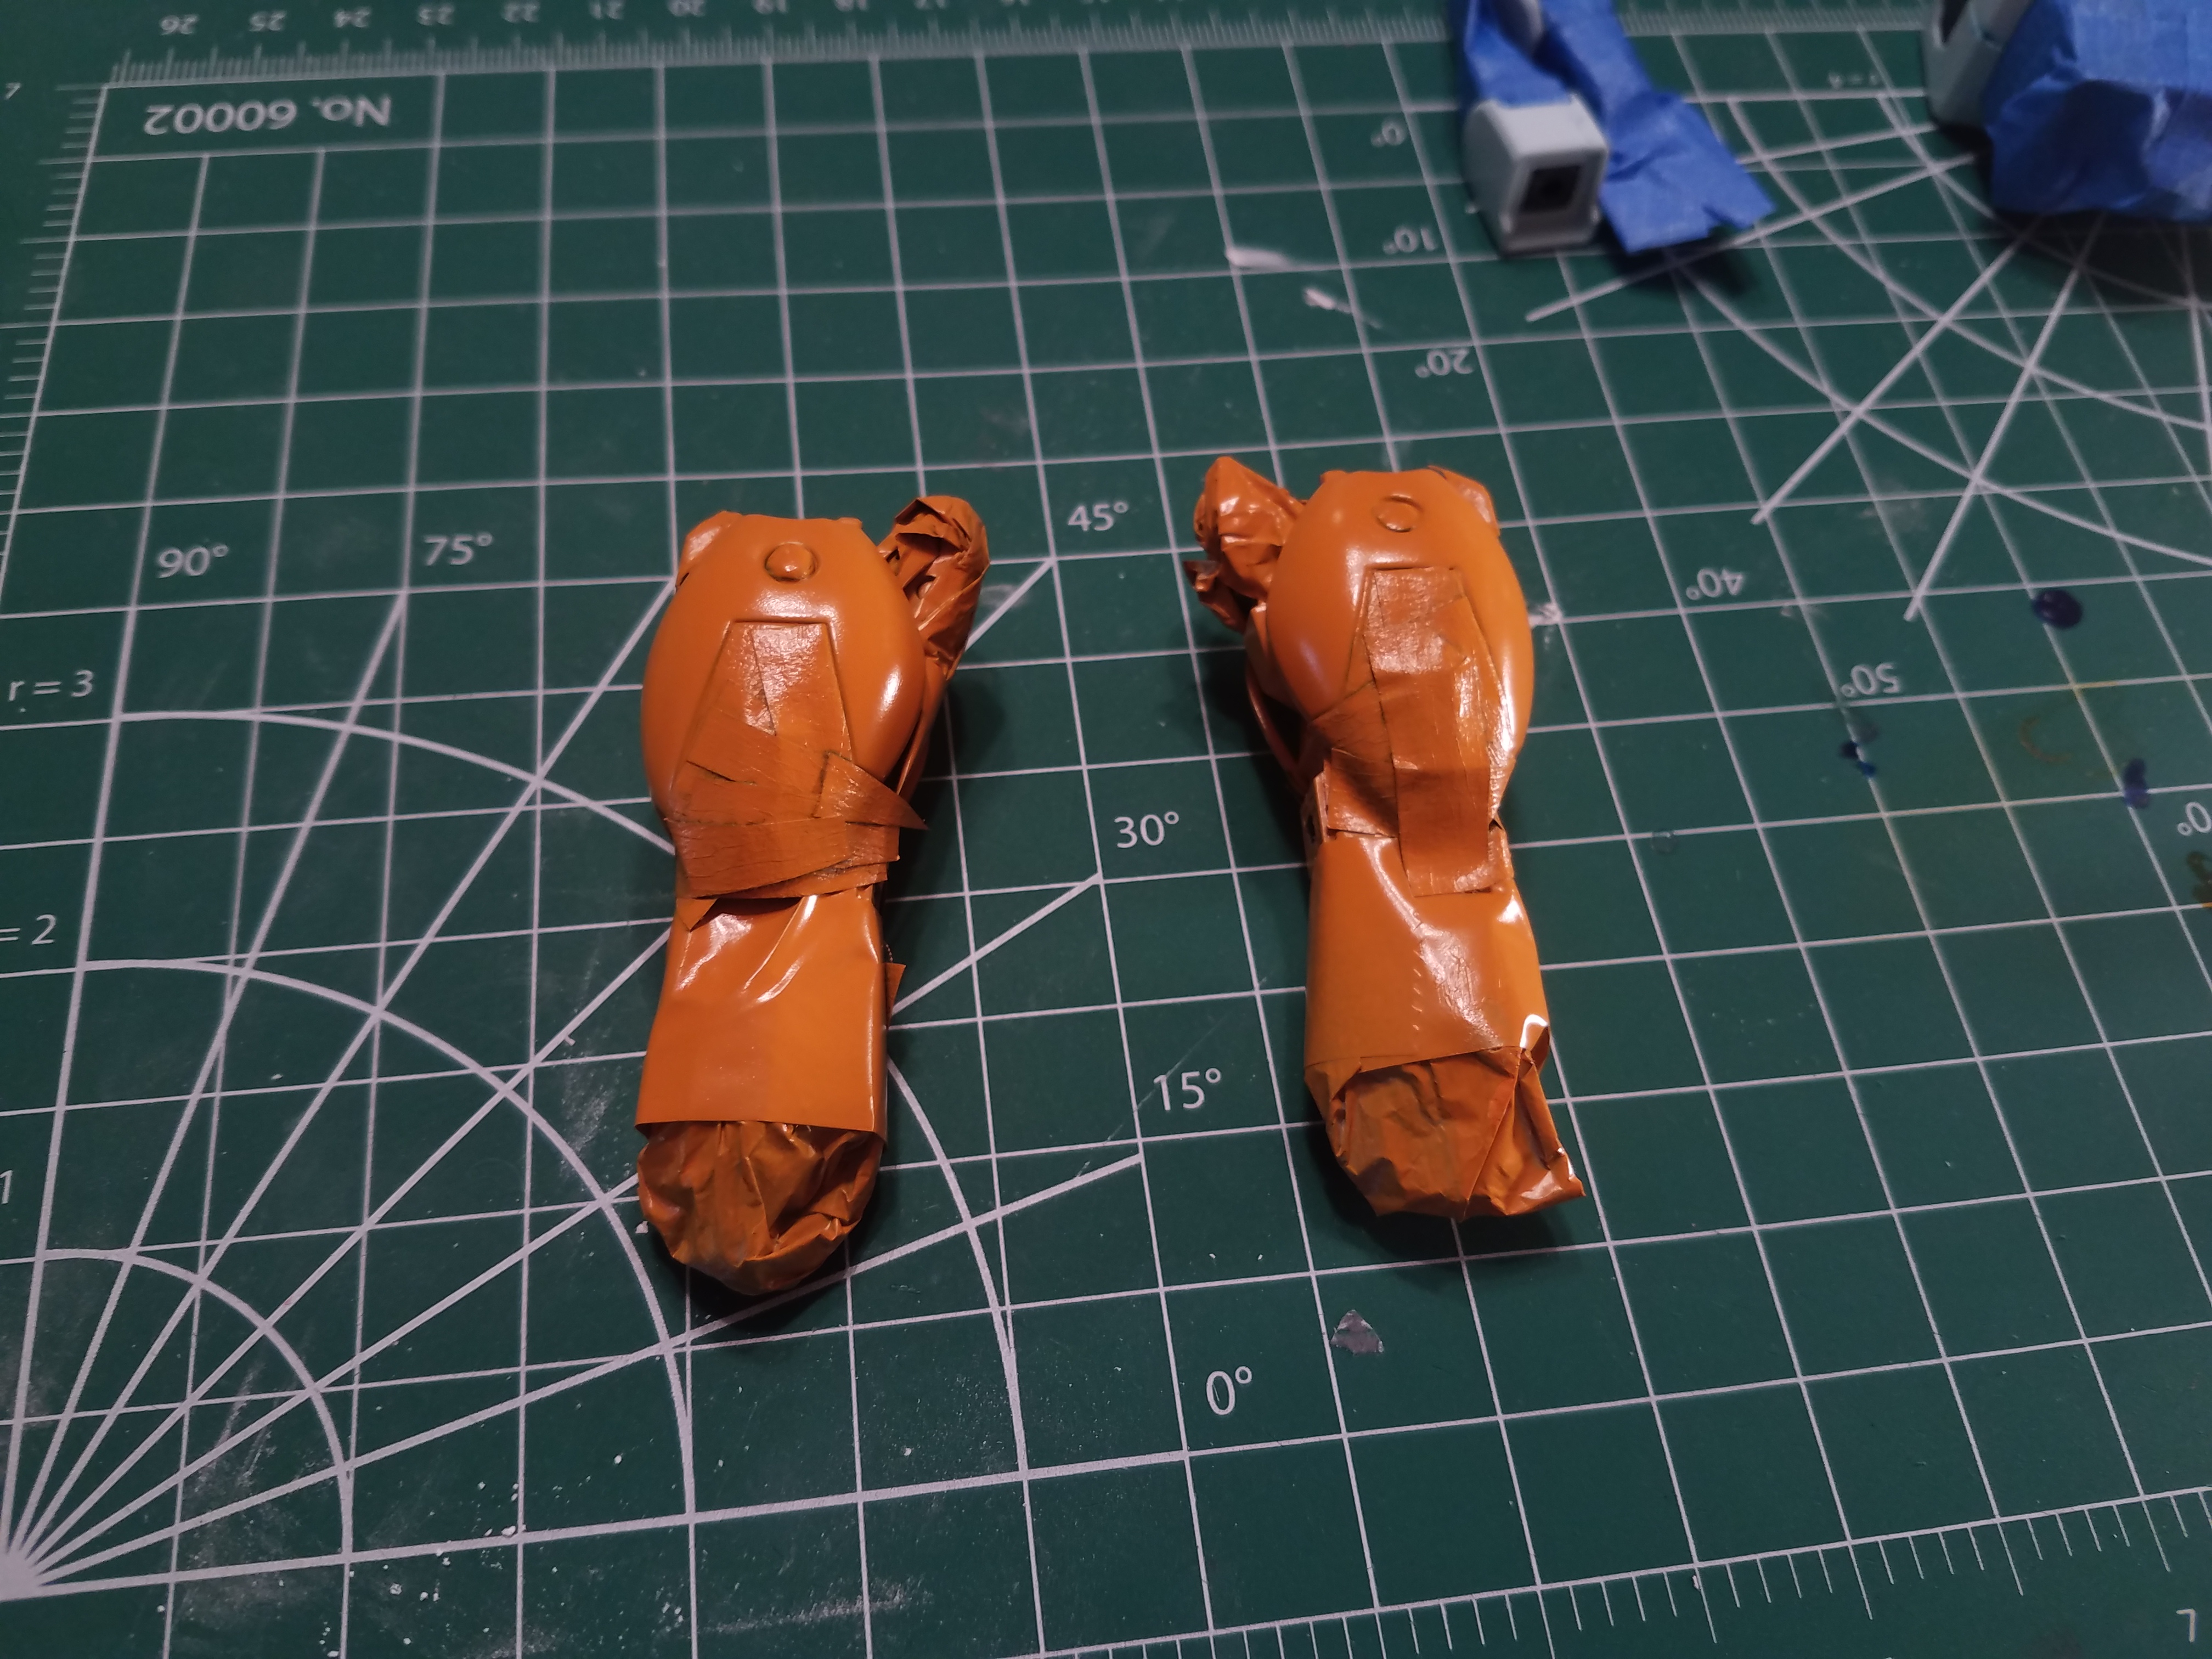
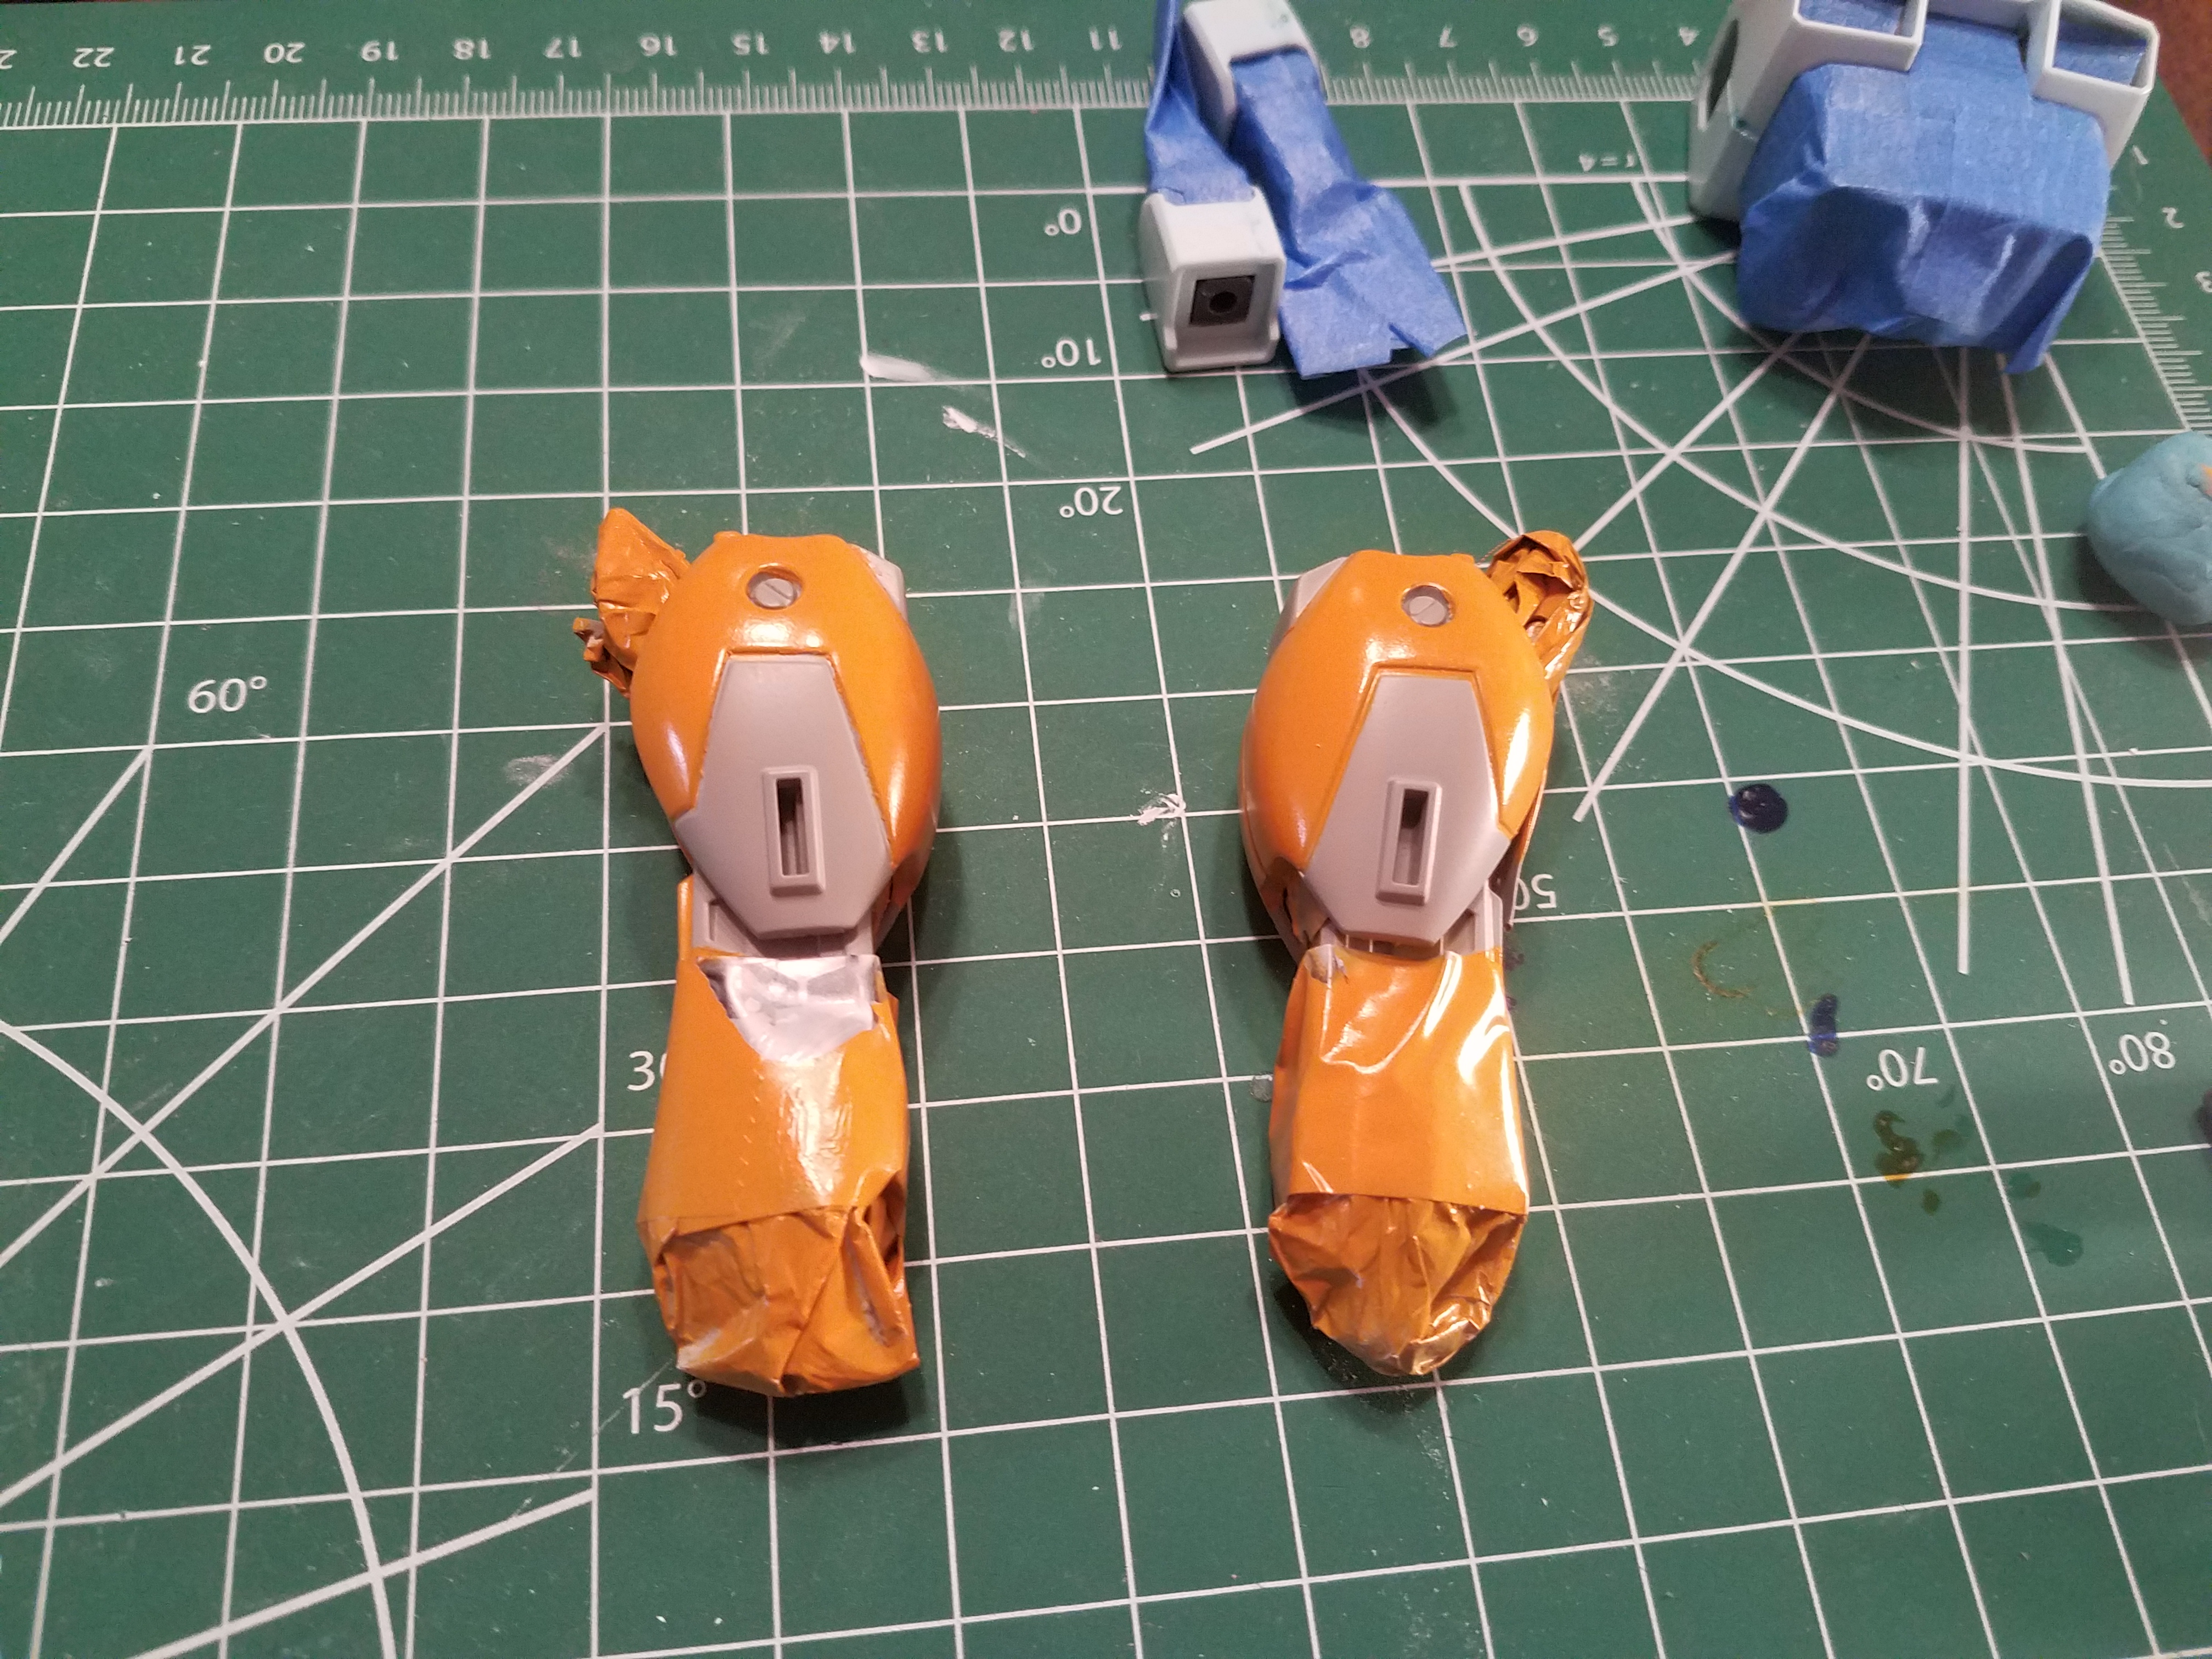
The calves were probably the most complex part to mask - there is a dark gray inner frame, which the left and right halves of the calves fit over. I used some plastic from a grocery store bag to cover the inner frame while I painted these calf pieces gray; then I used painter's tape to mask off the exact areas that I wanted to paint orange. In hindsight, I should have reapplied some primer here; the finish on the orange parts is just slightly worse since it is adhered straight onto the other lacquer. Overall though, this worked well, and once the panel lining is applied, it will cover up the slight imperfections on the masking.
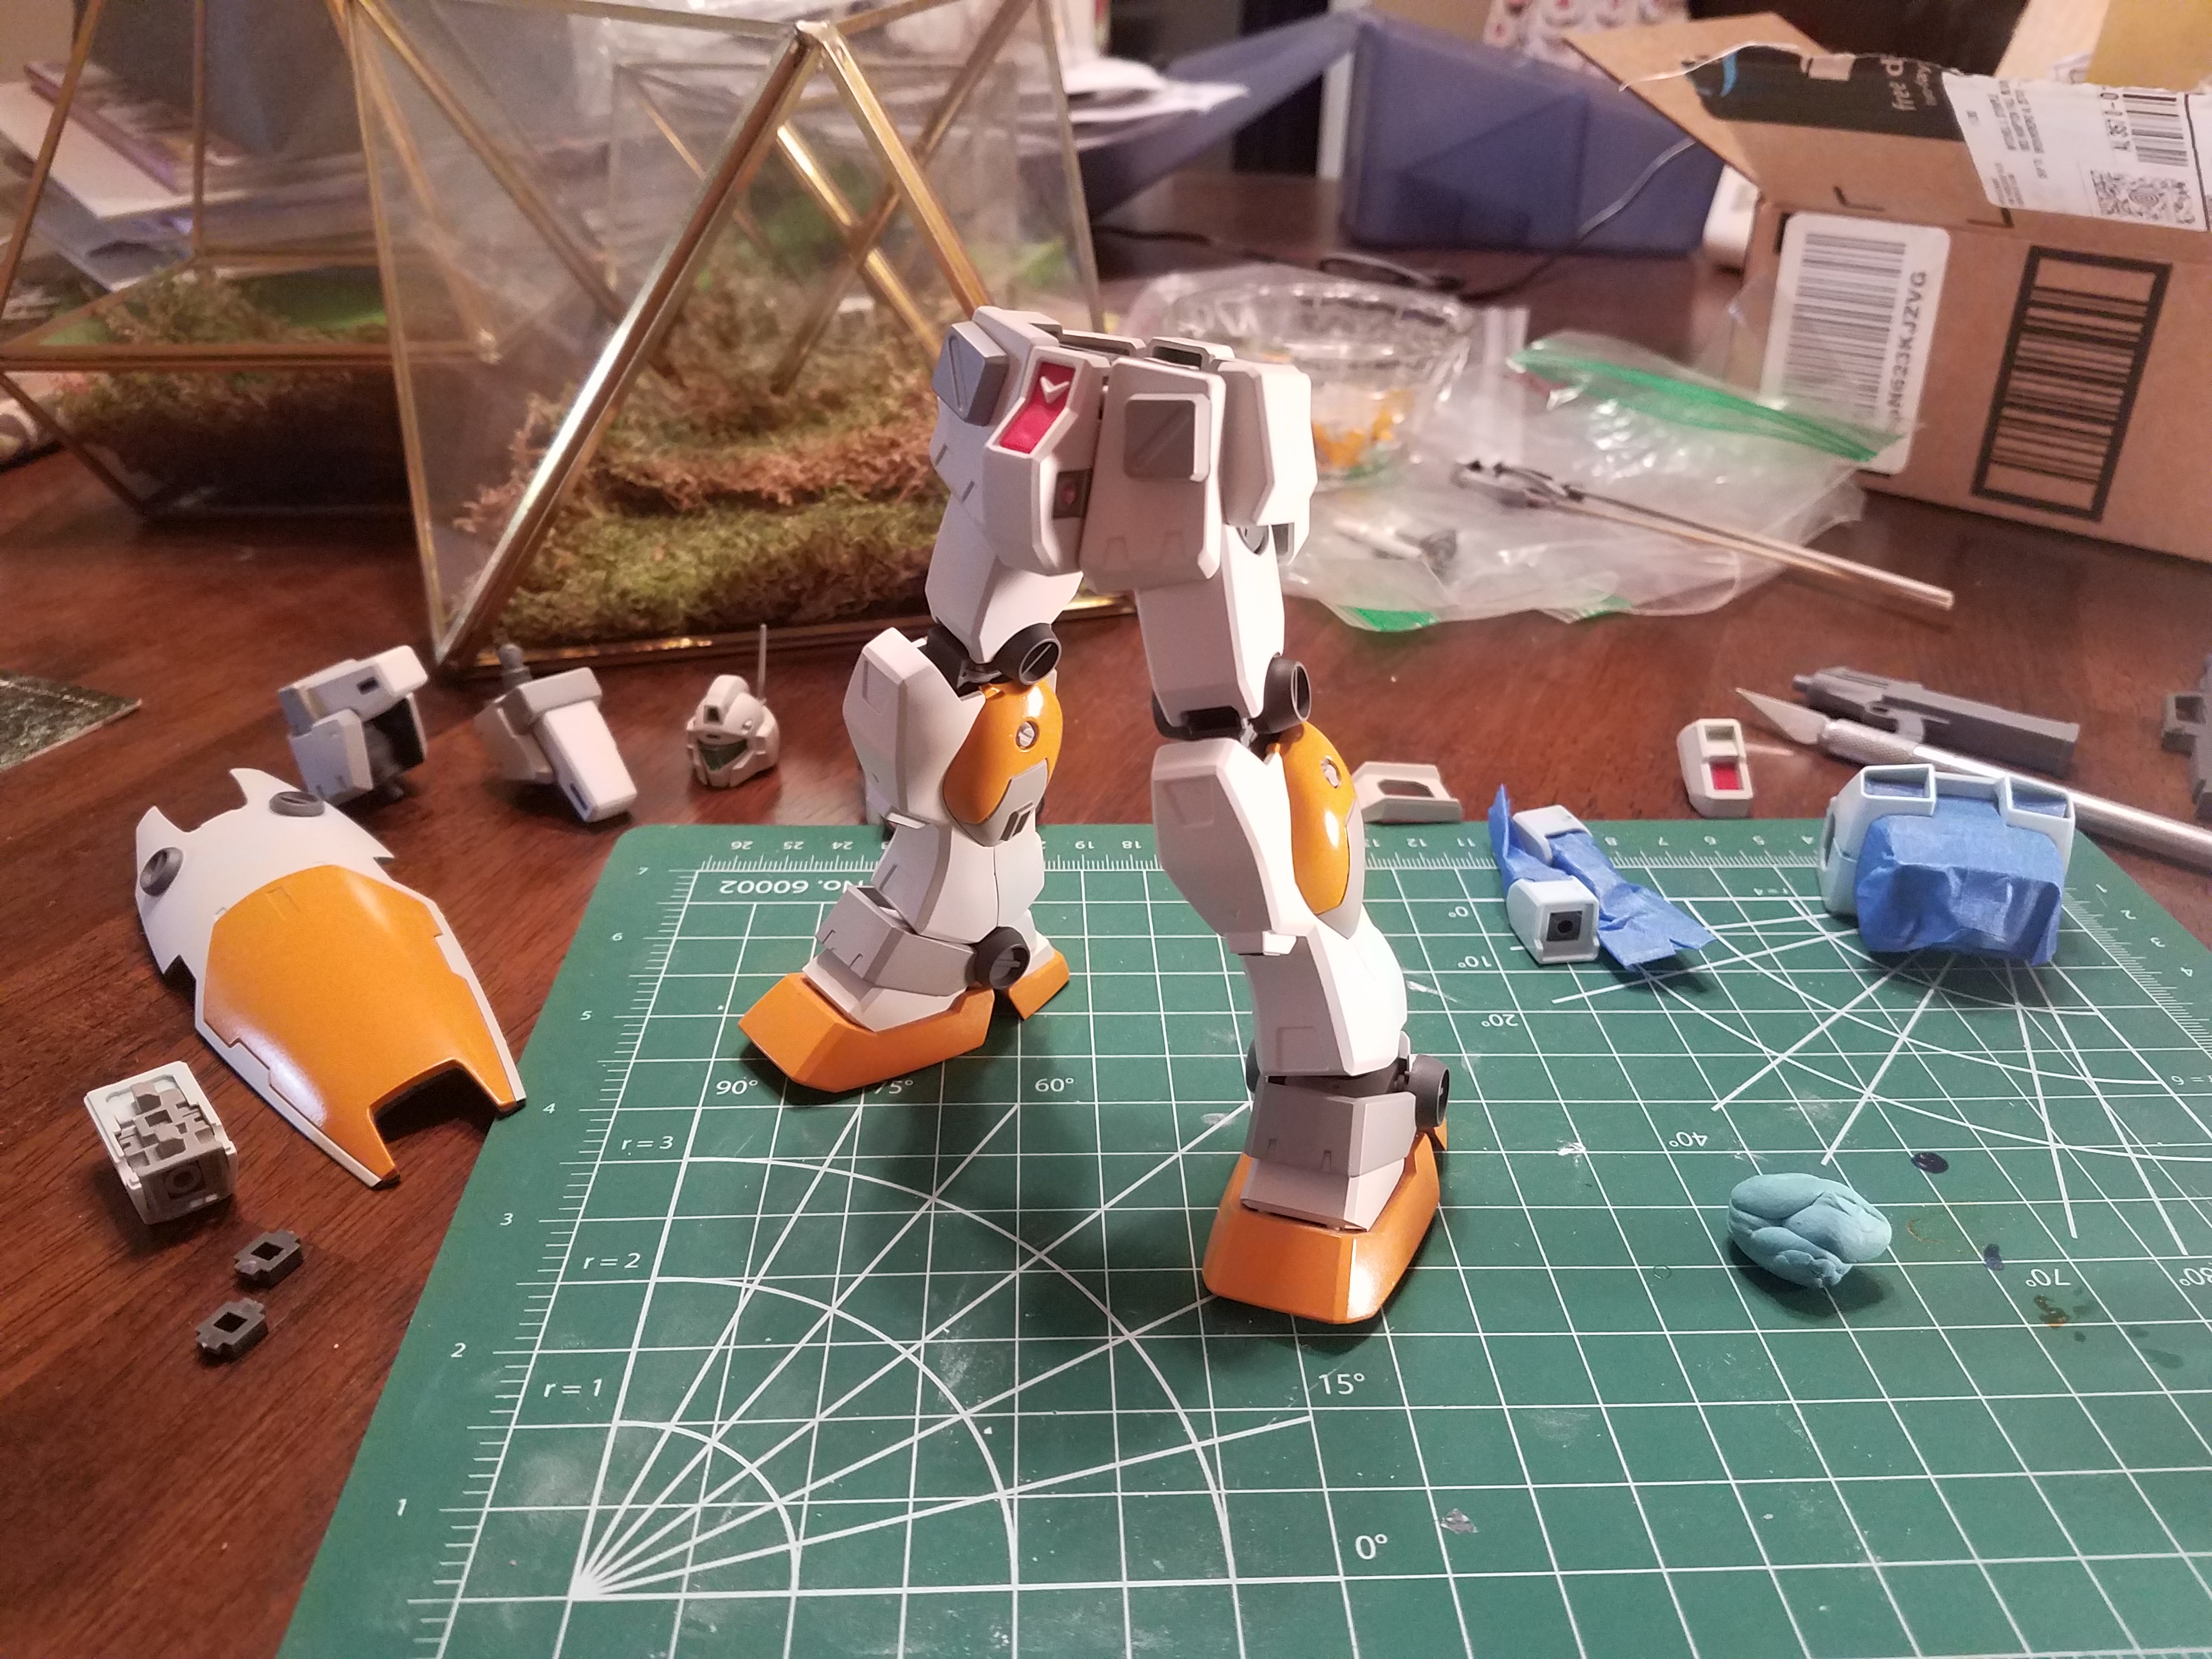
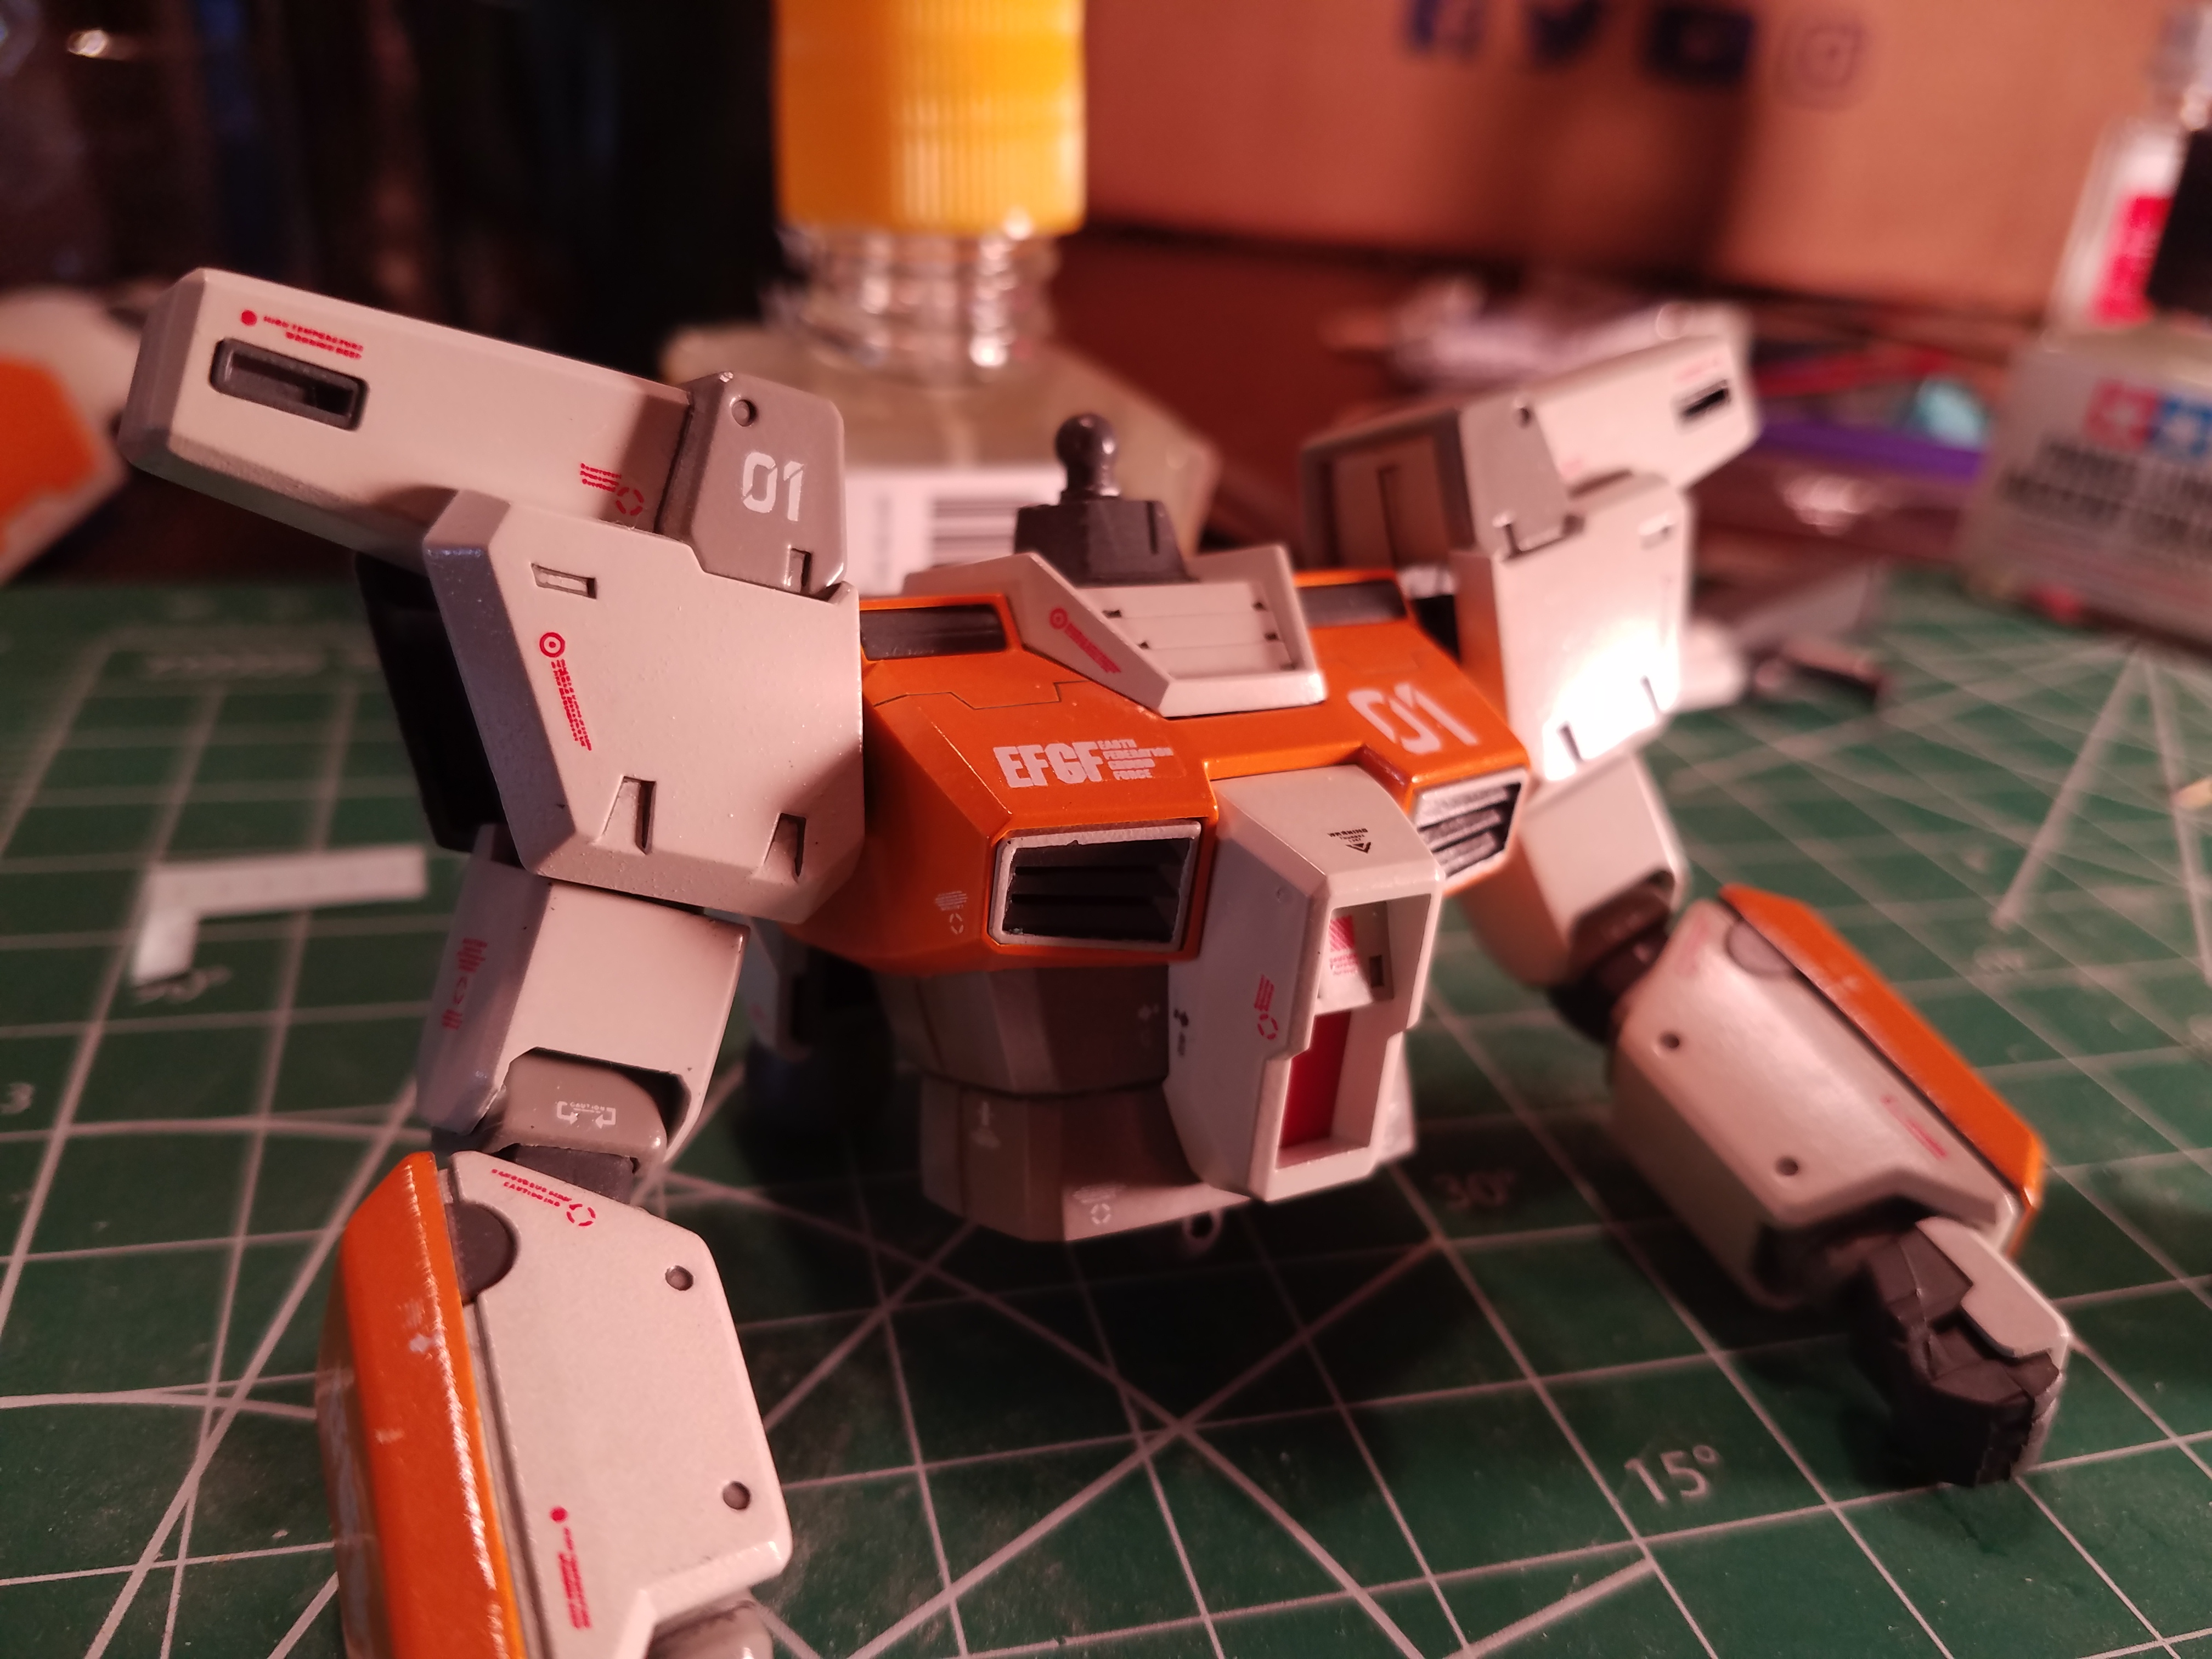
After finishing the calves, I was able to finally assemble the legs and waist - and once more I get to be pretty happy with the color choices. We're rapidly approaching the end of the painting phase. The chest and biceps are the last remaining pieces, as they required me to paint, then mask, then perform additional seam line removal over the pre-painted pieces.
Date Posted: May 6, 2019
Progress Update 7
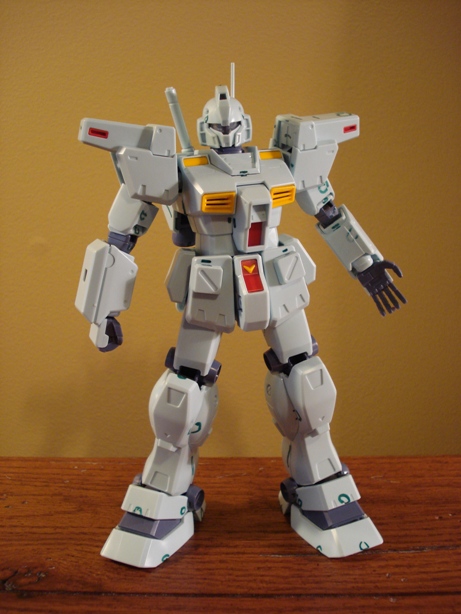
Paint done!
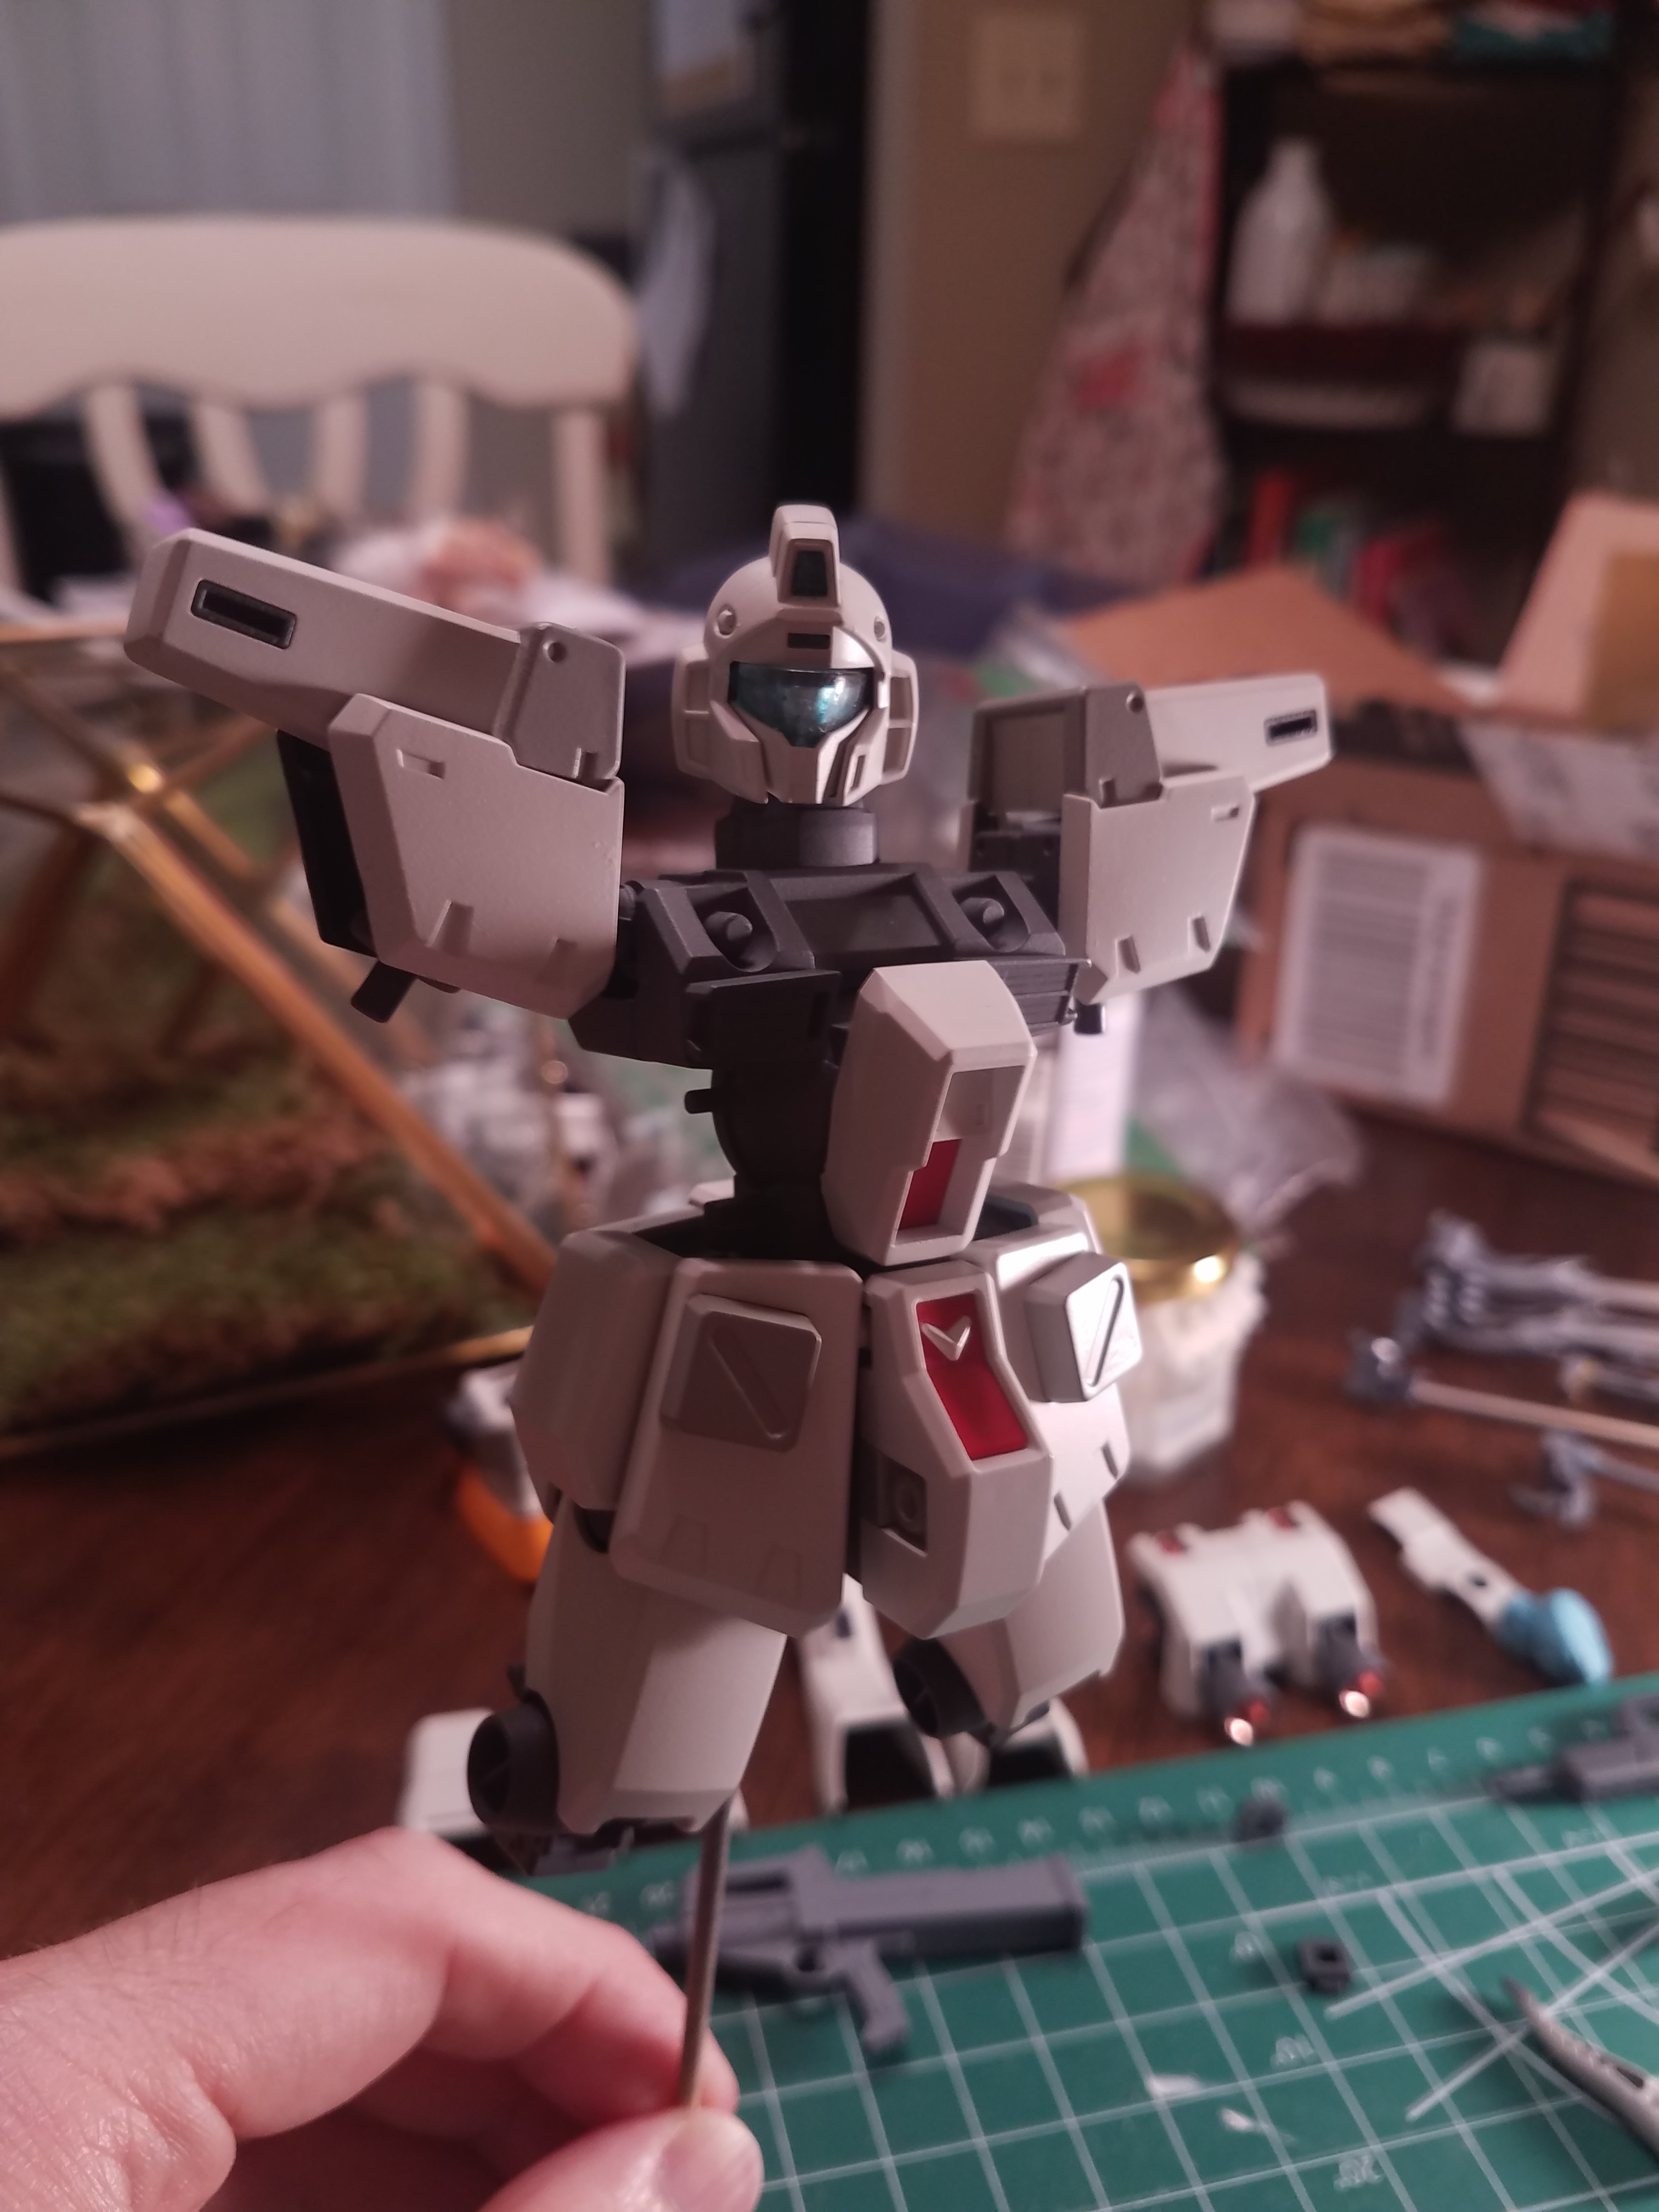
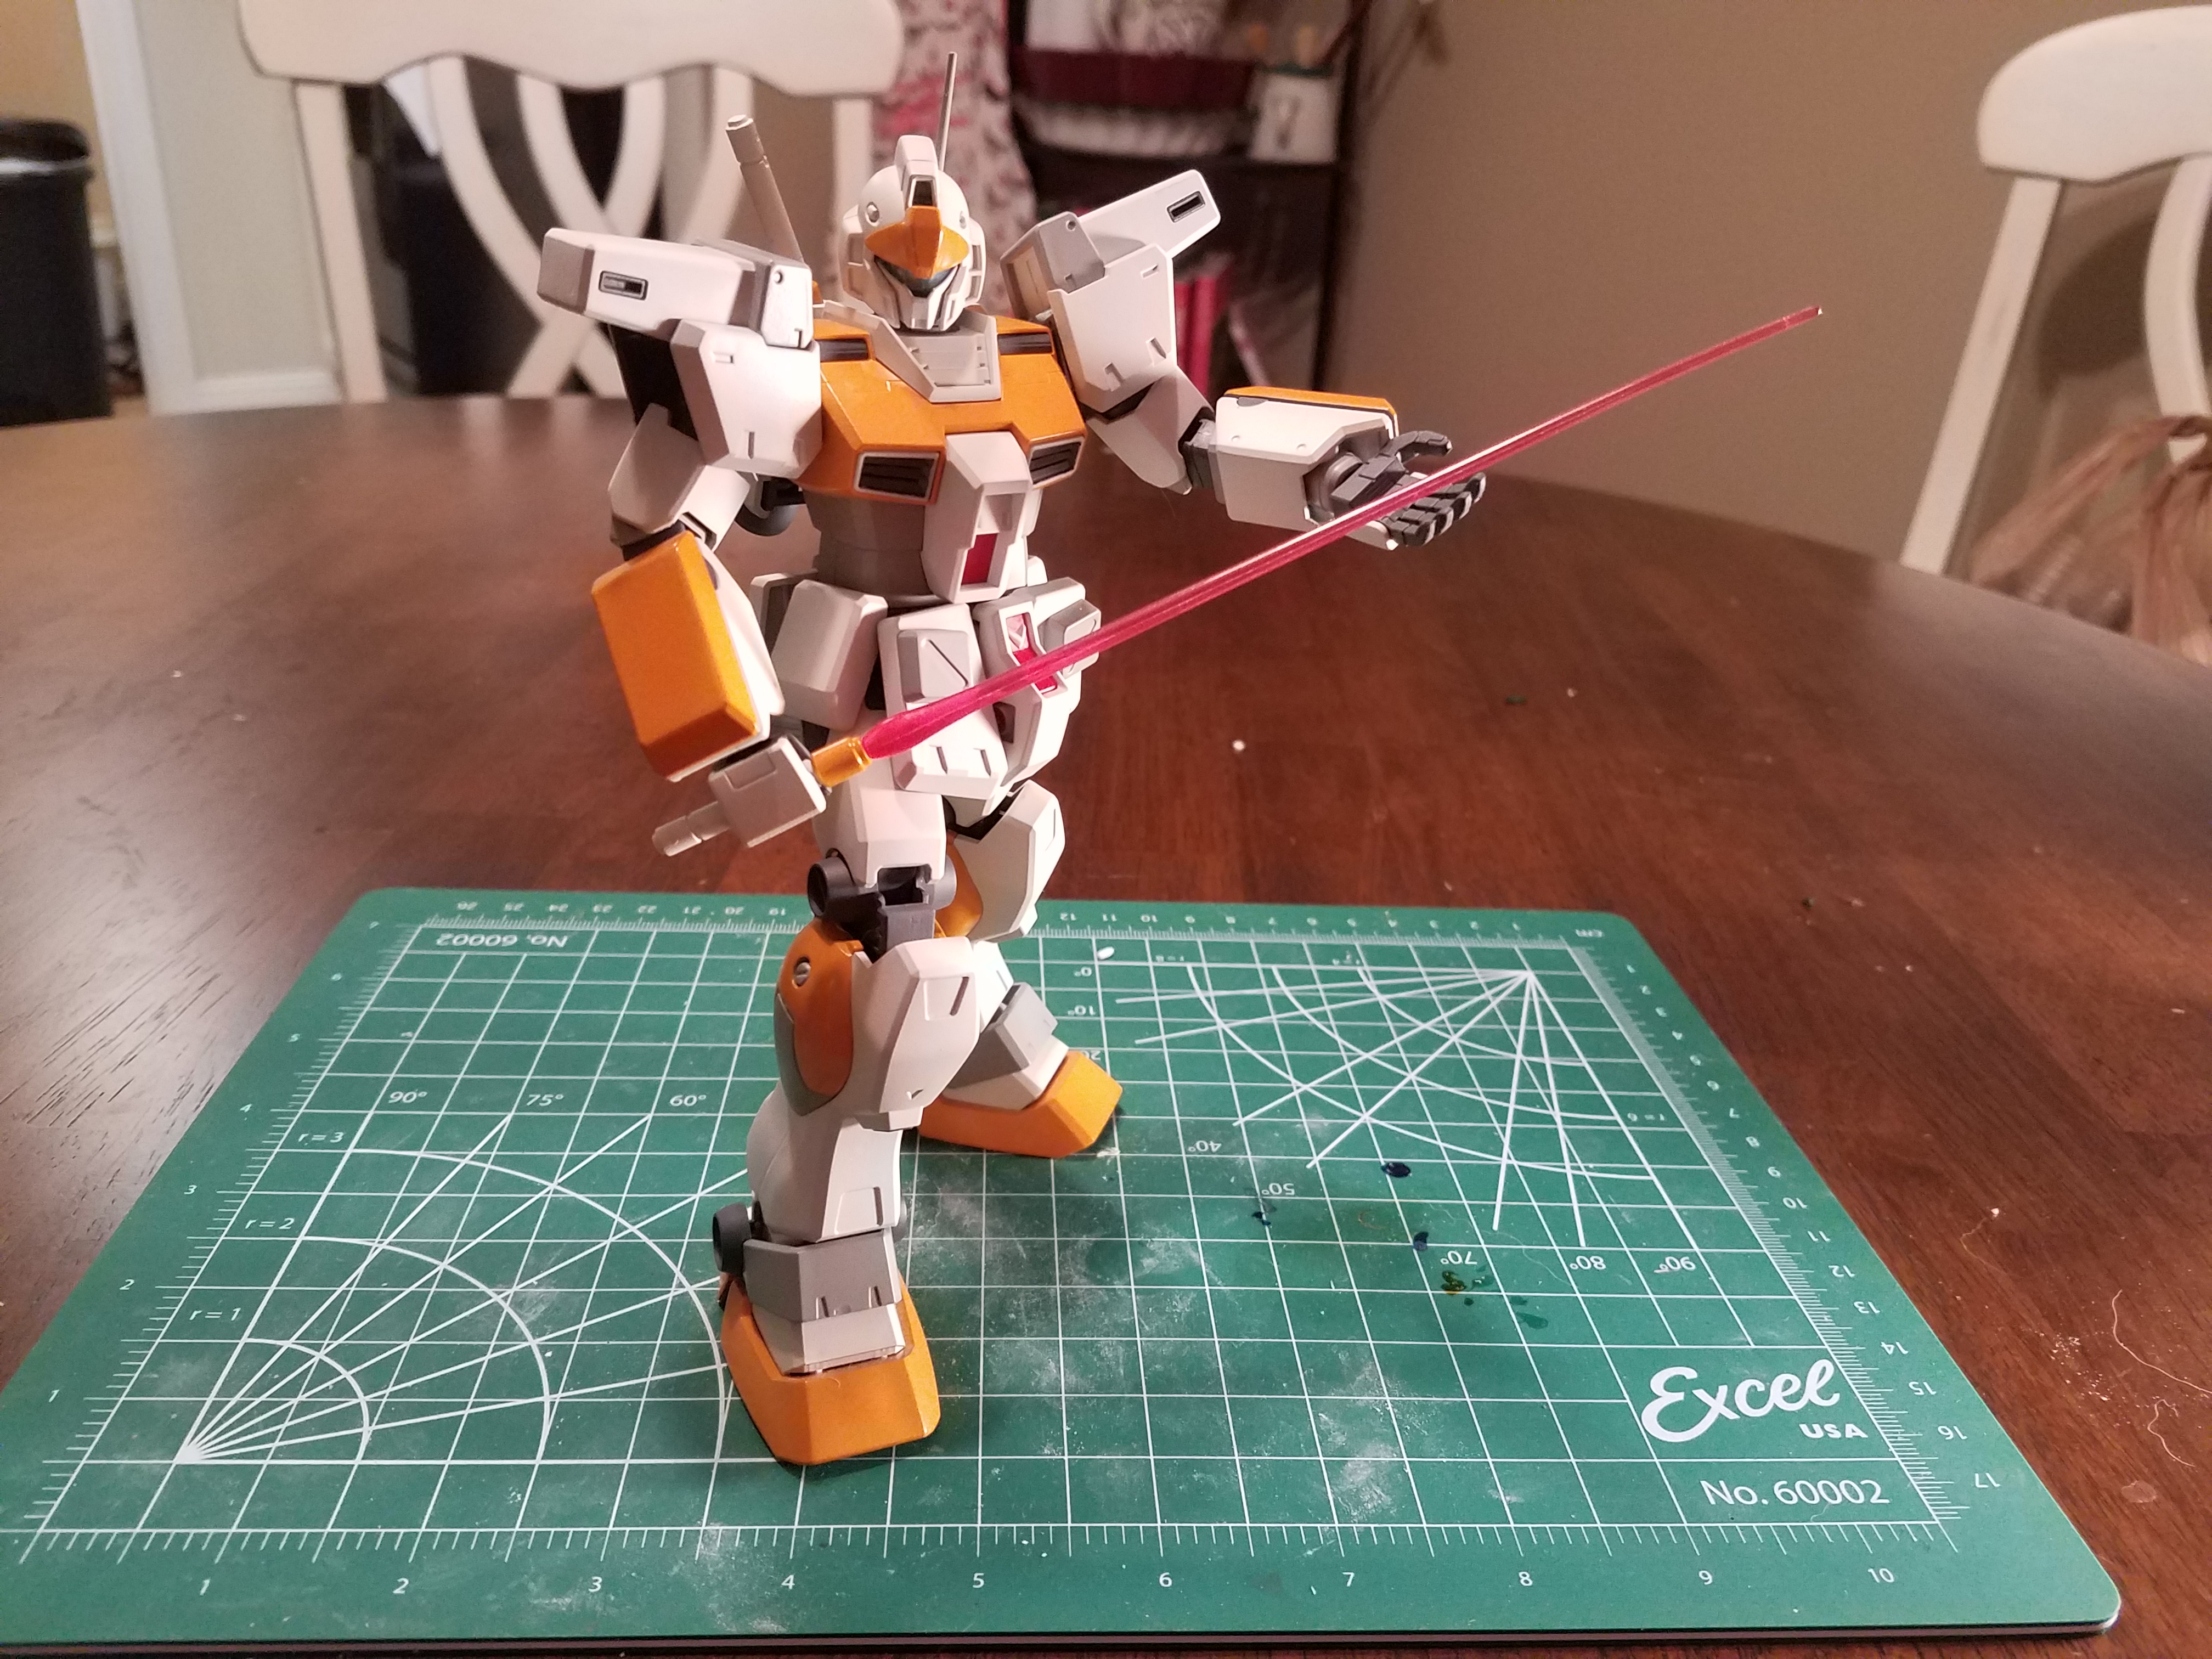
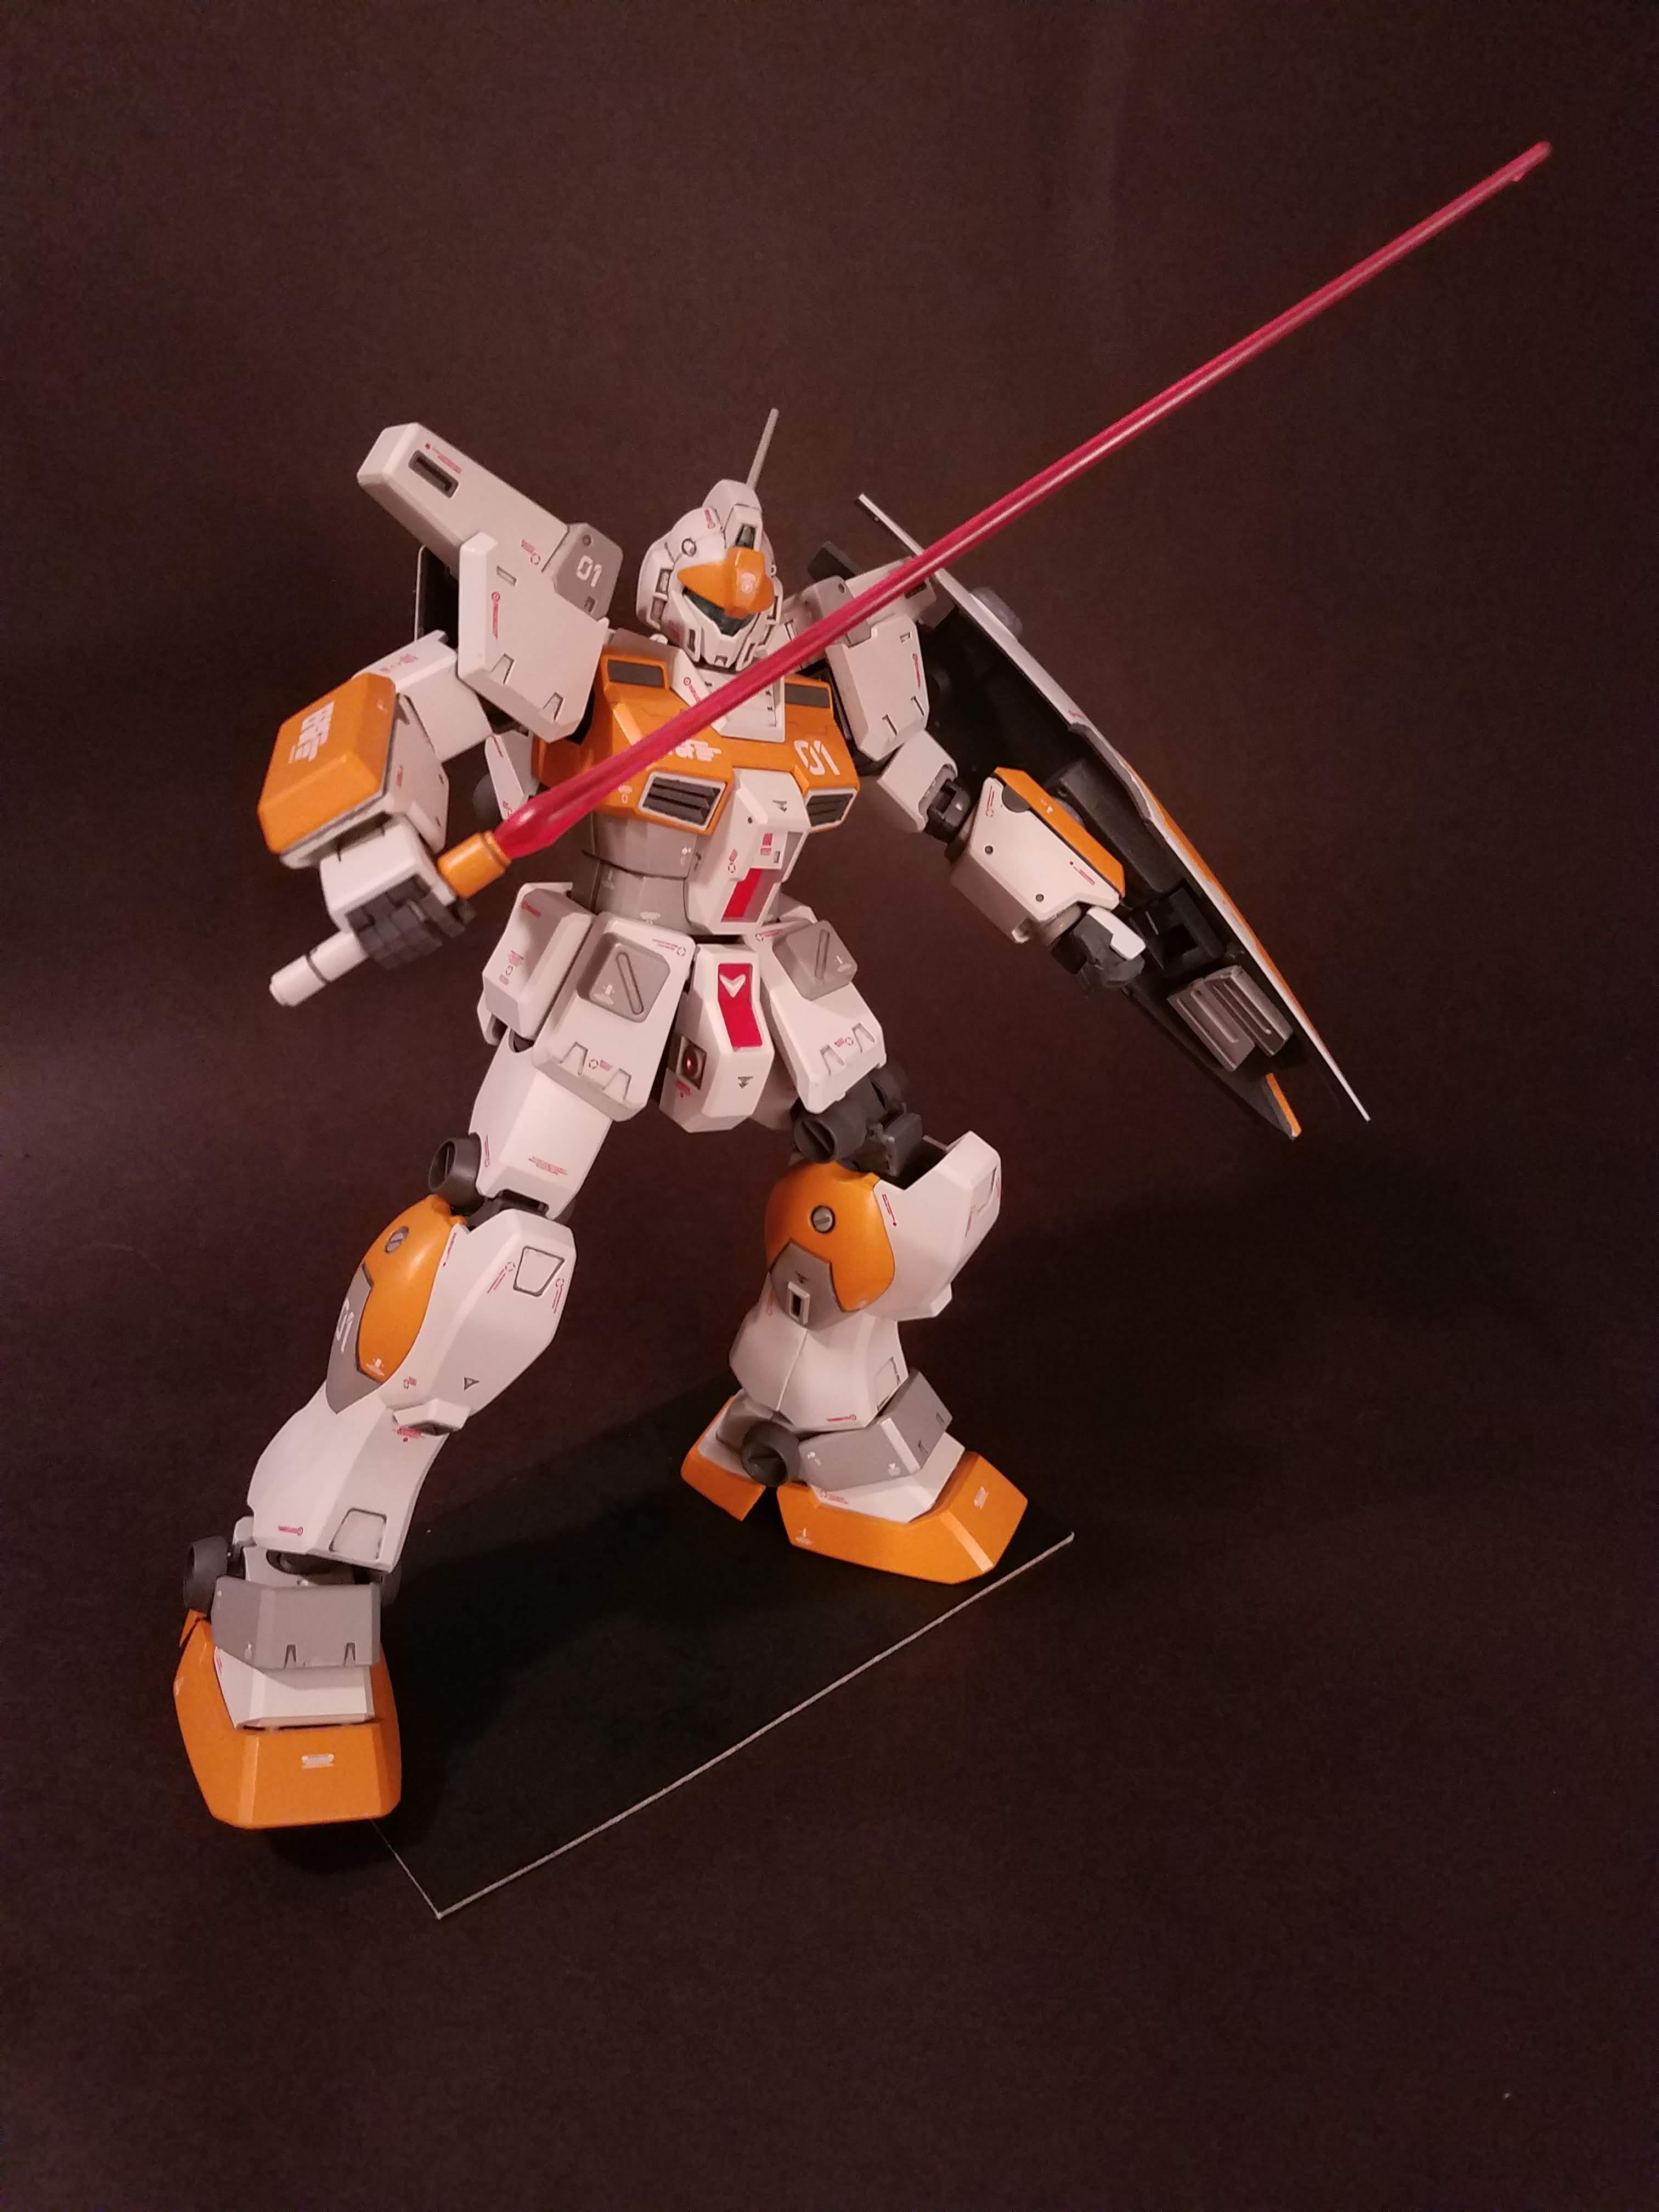
Seeing it come together was really rewarding, but there's still more work to do.
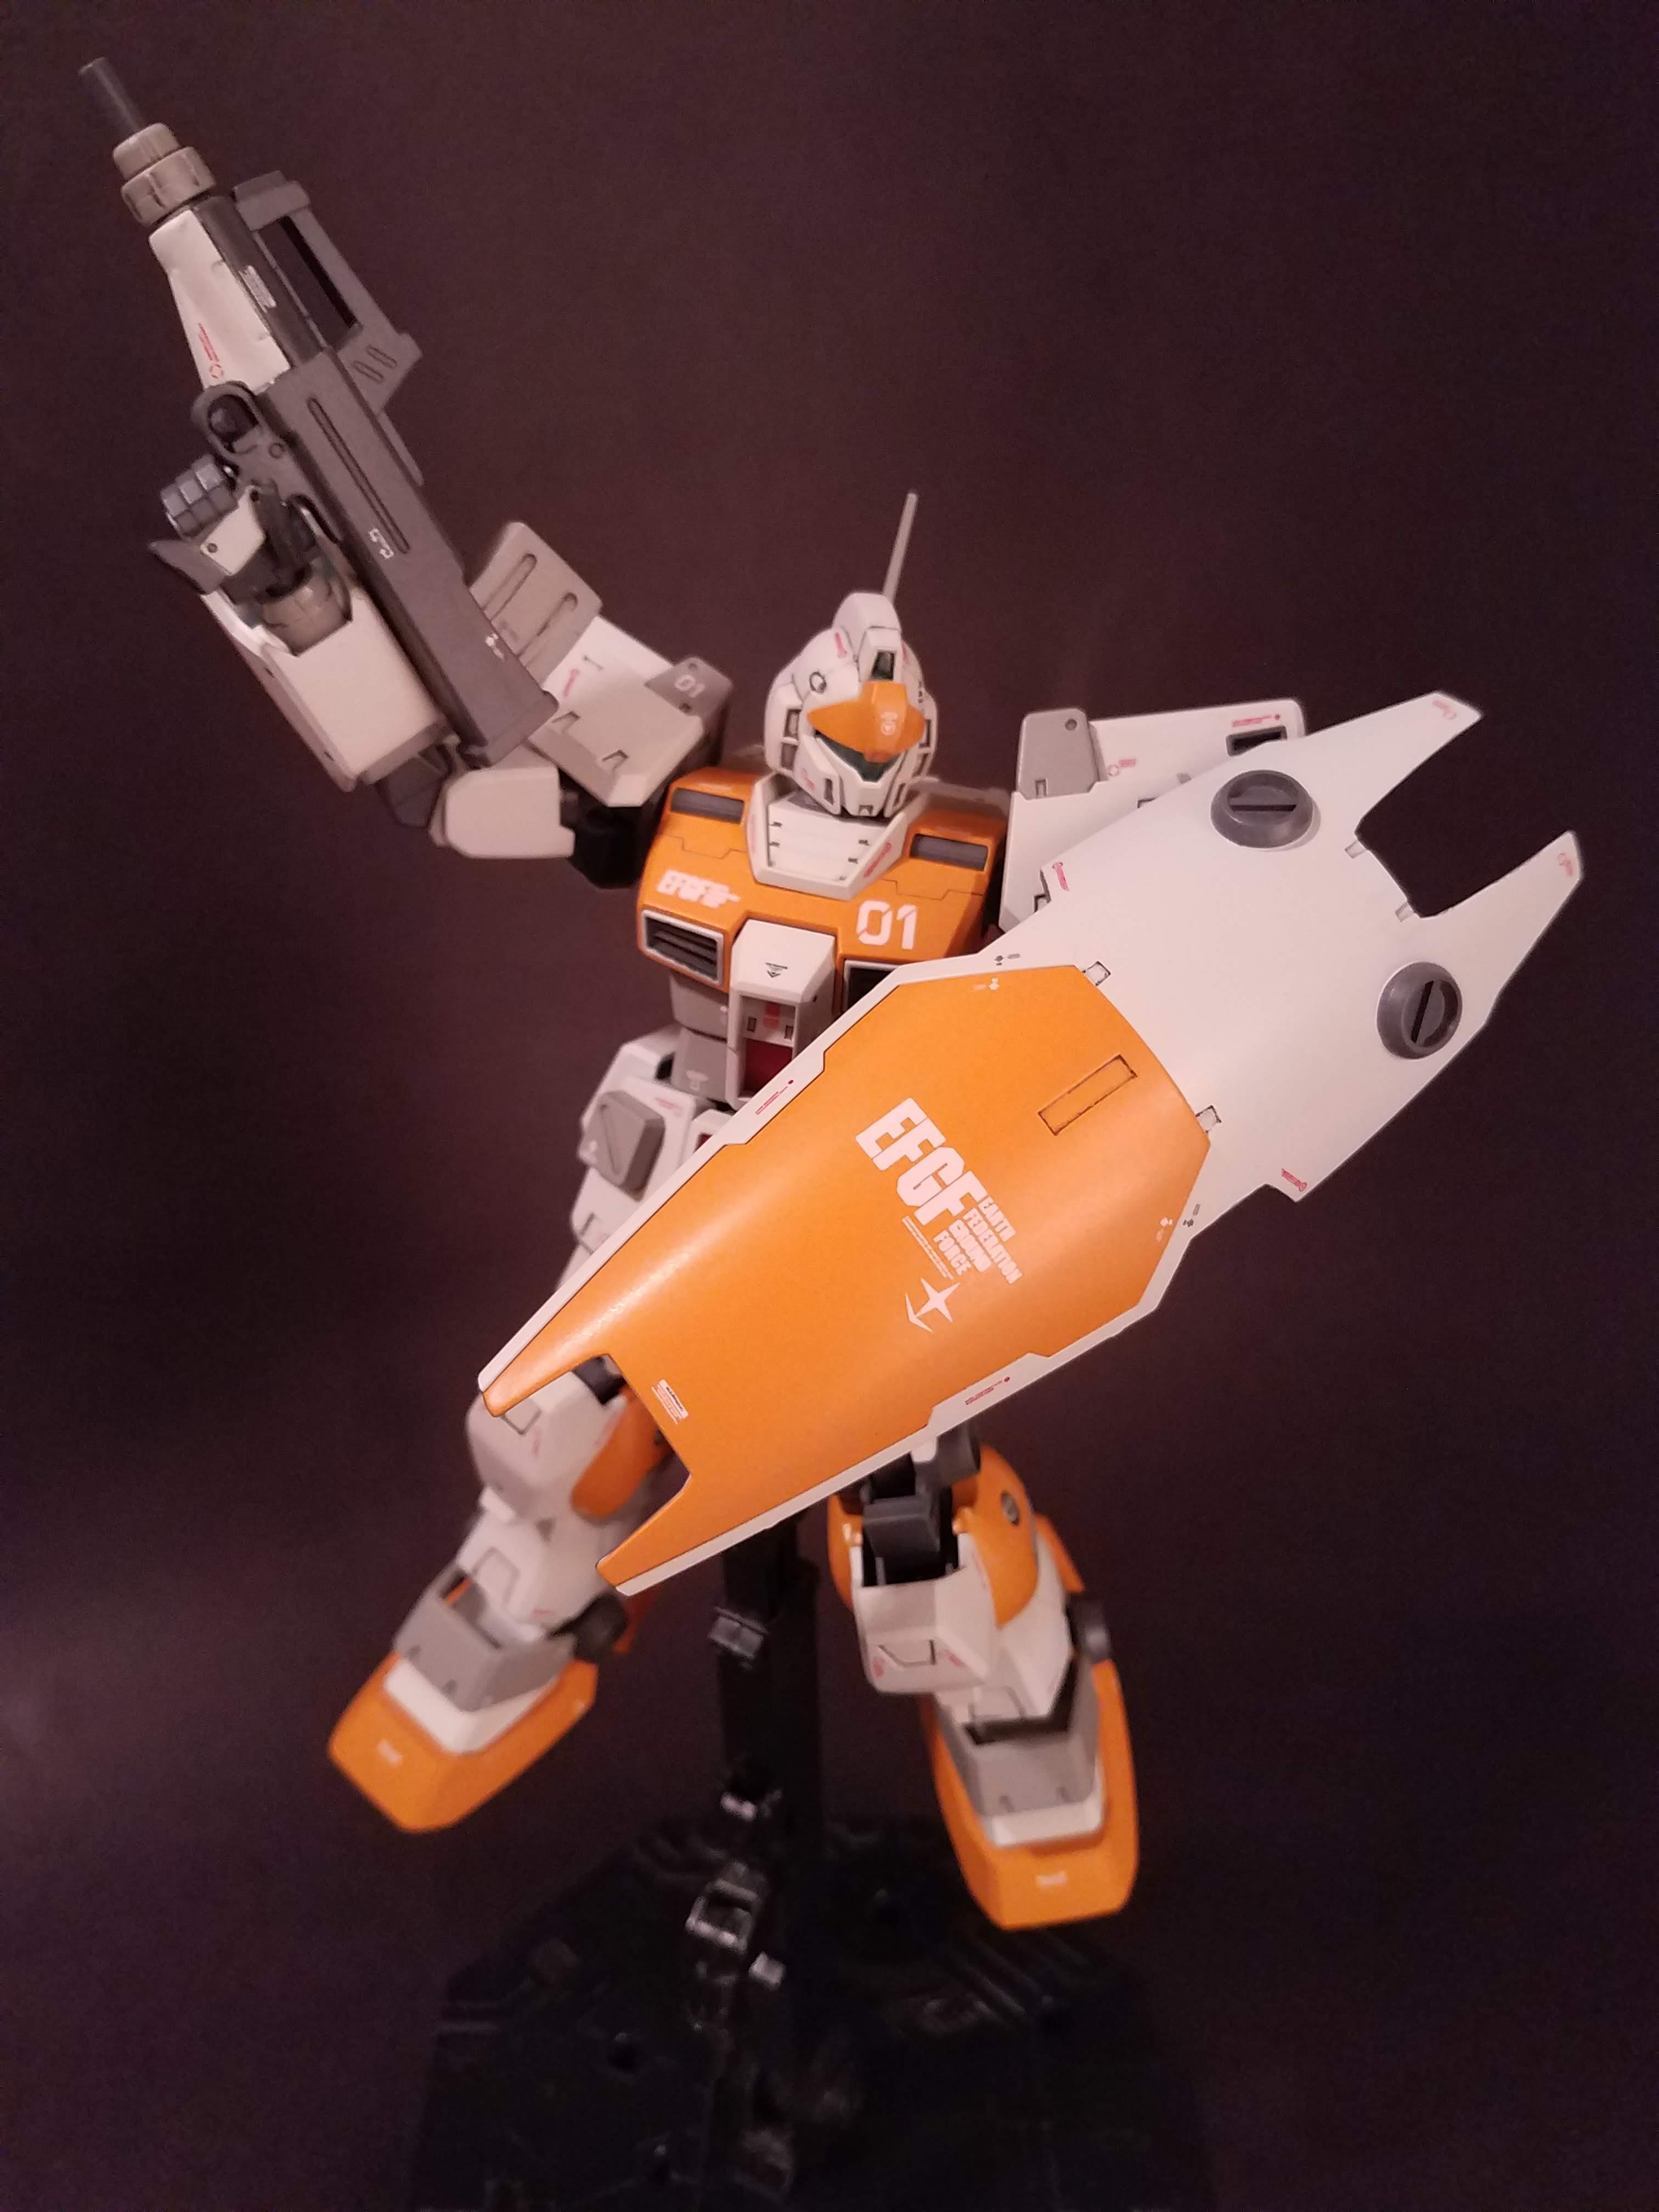
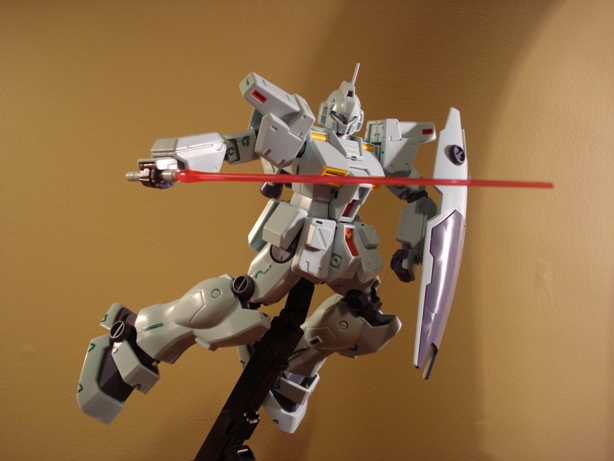
(Nevertheless, I couldn't resist a pose.)
The next step for the main unit was to gloss coat the entire surface in preparation for paneling lining and decal work. However, the humidity was so high the week that I completed the paint job that the gloss coat would have come out horribly - so I took the time to sit down and think about the weapons again.
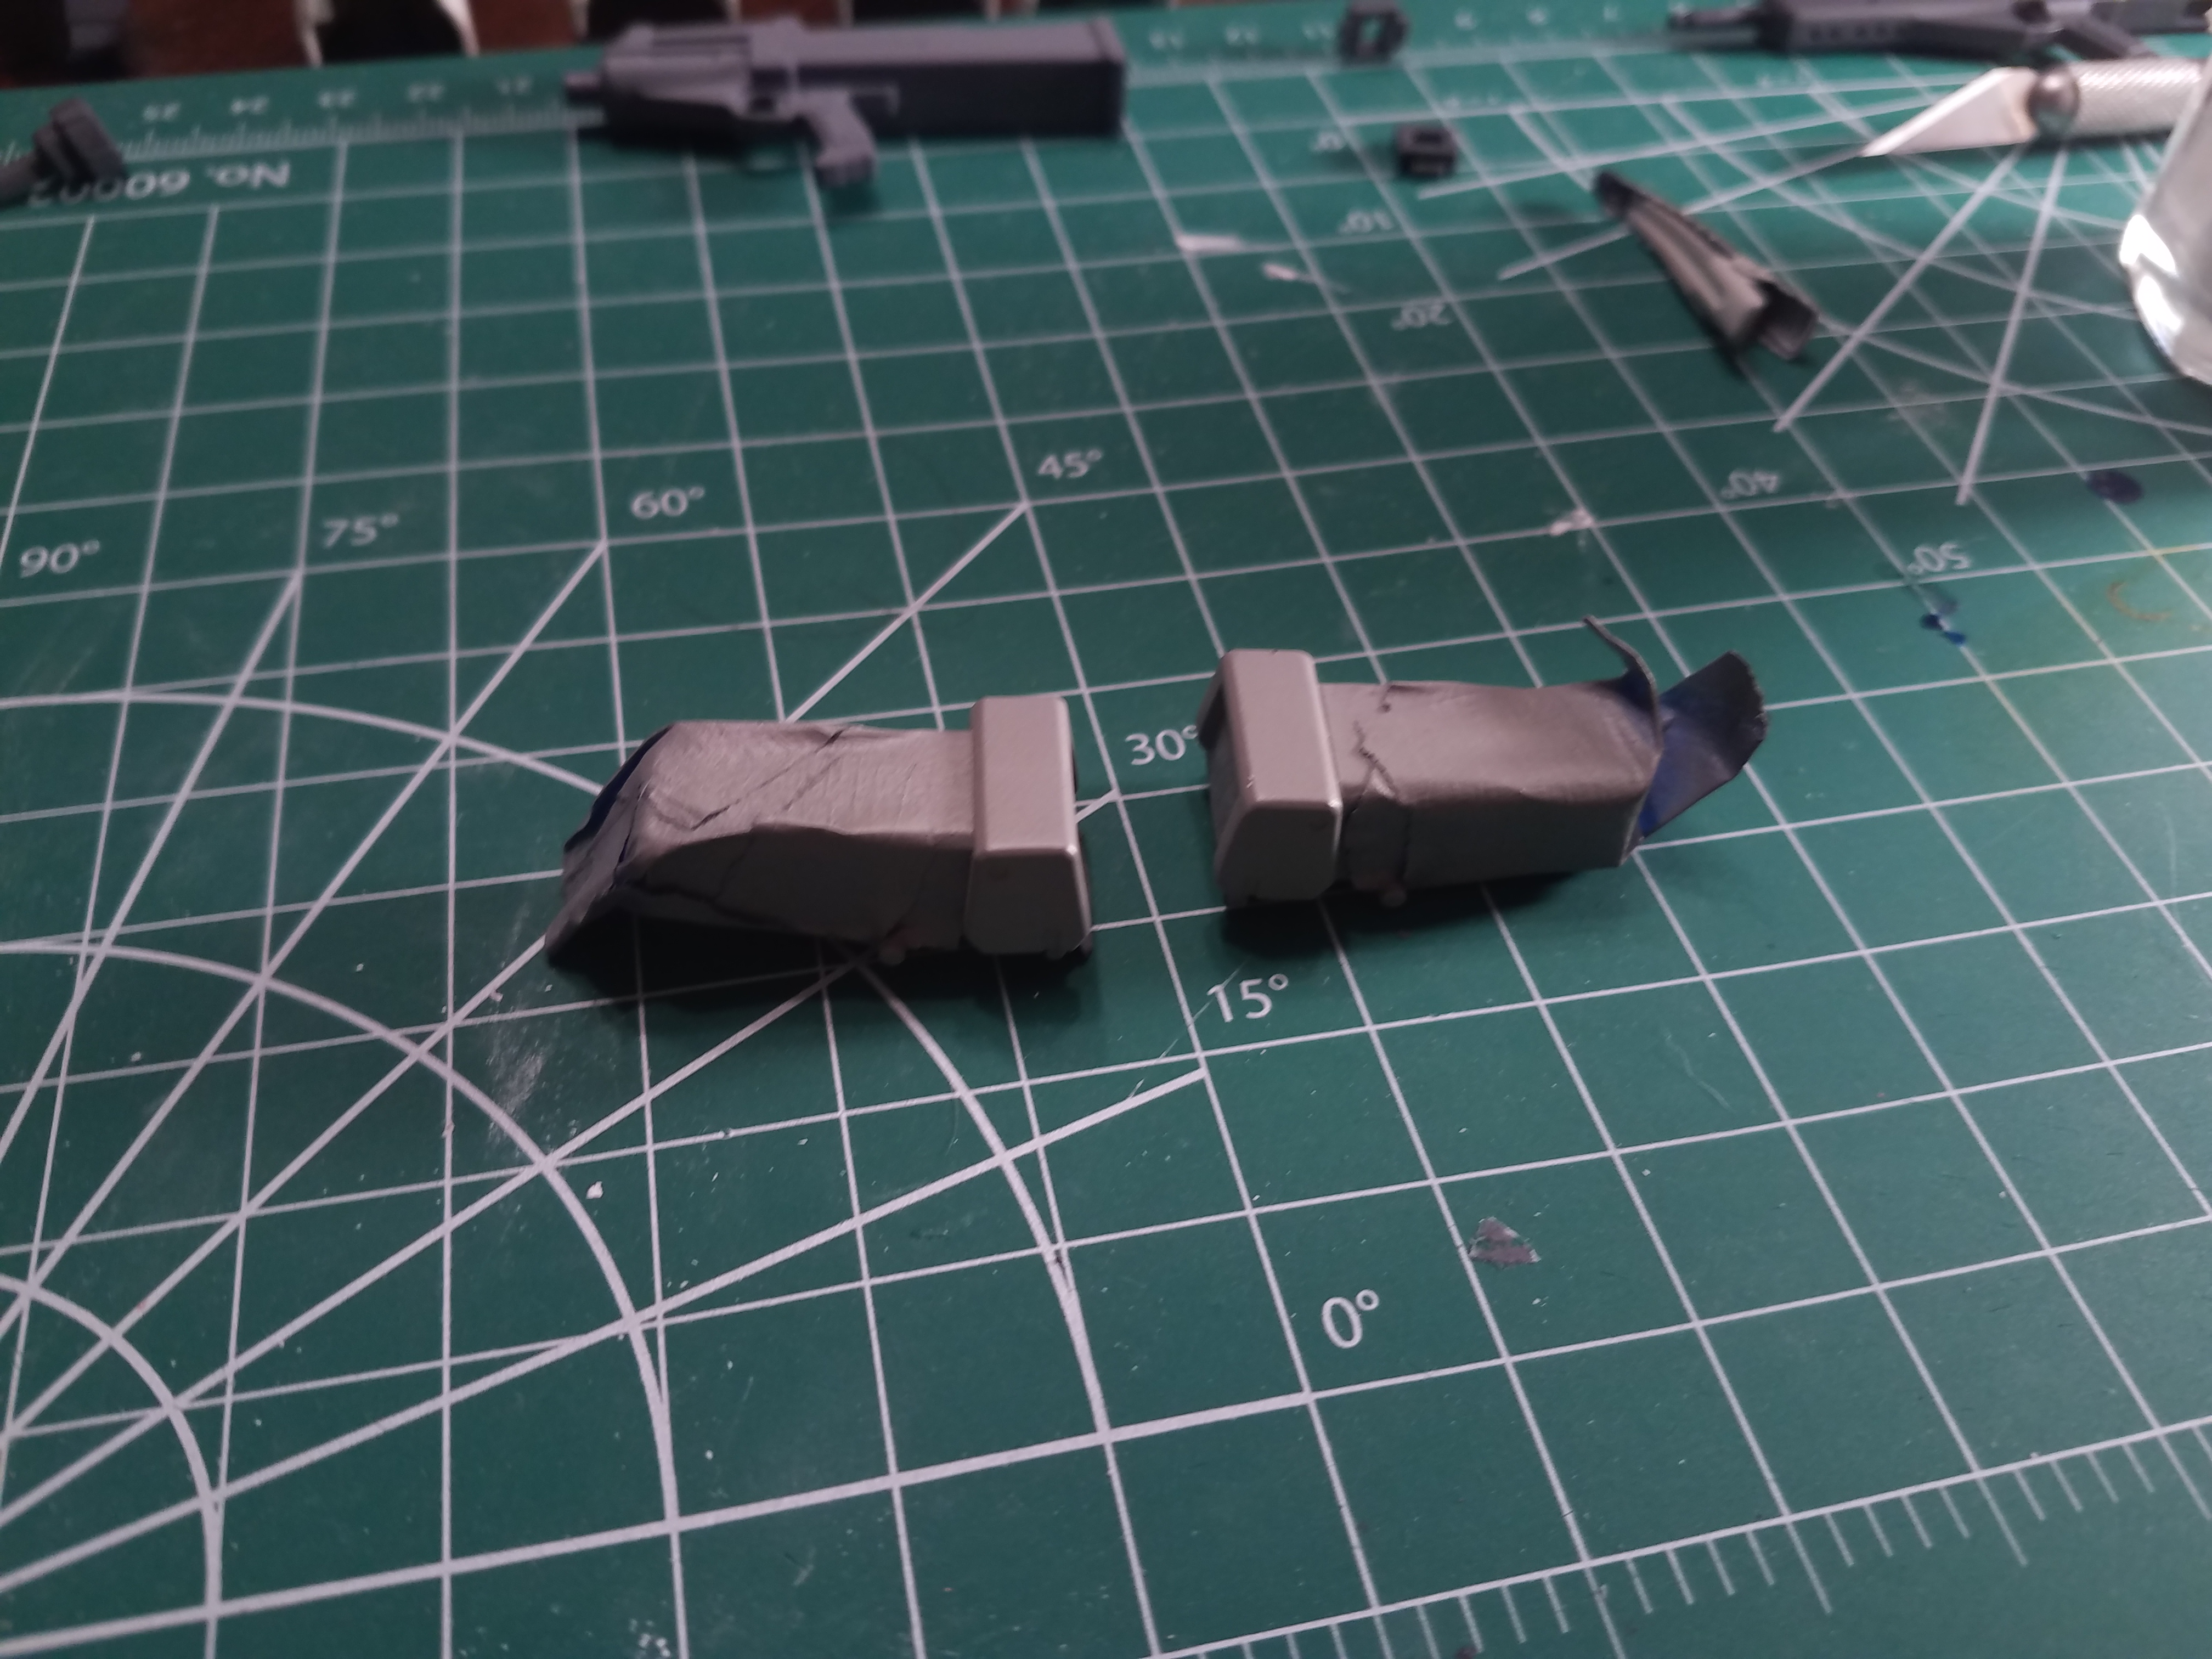
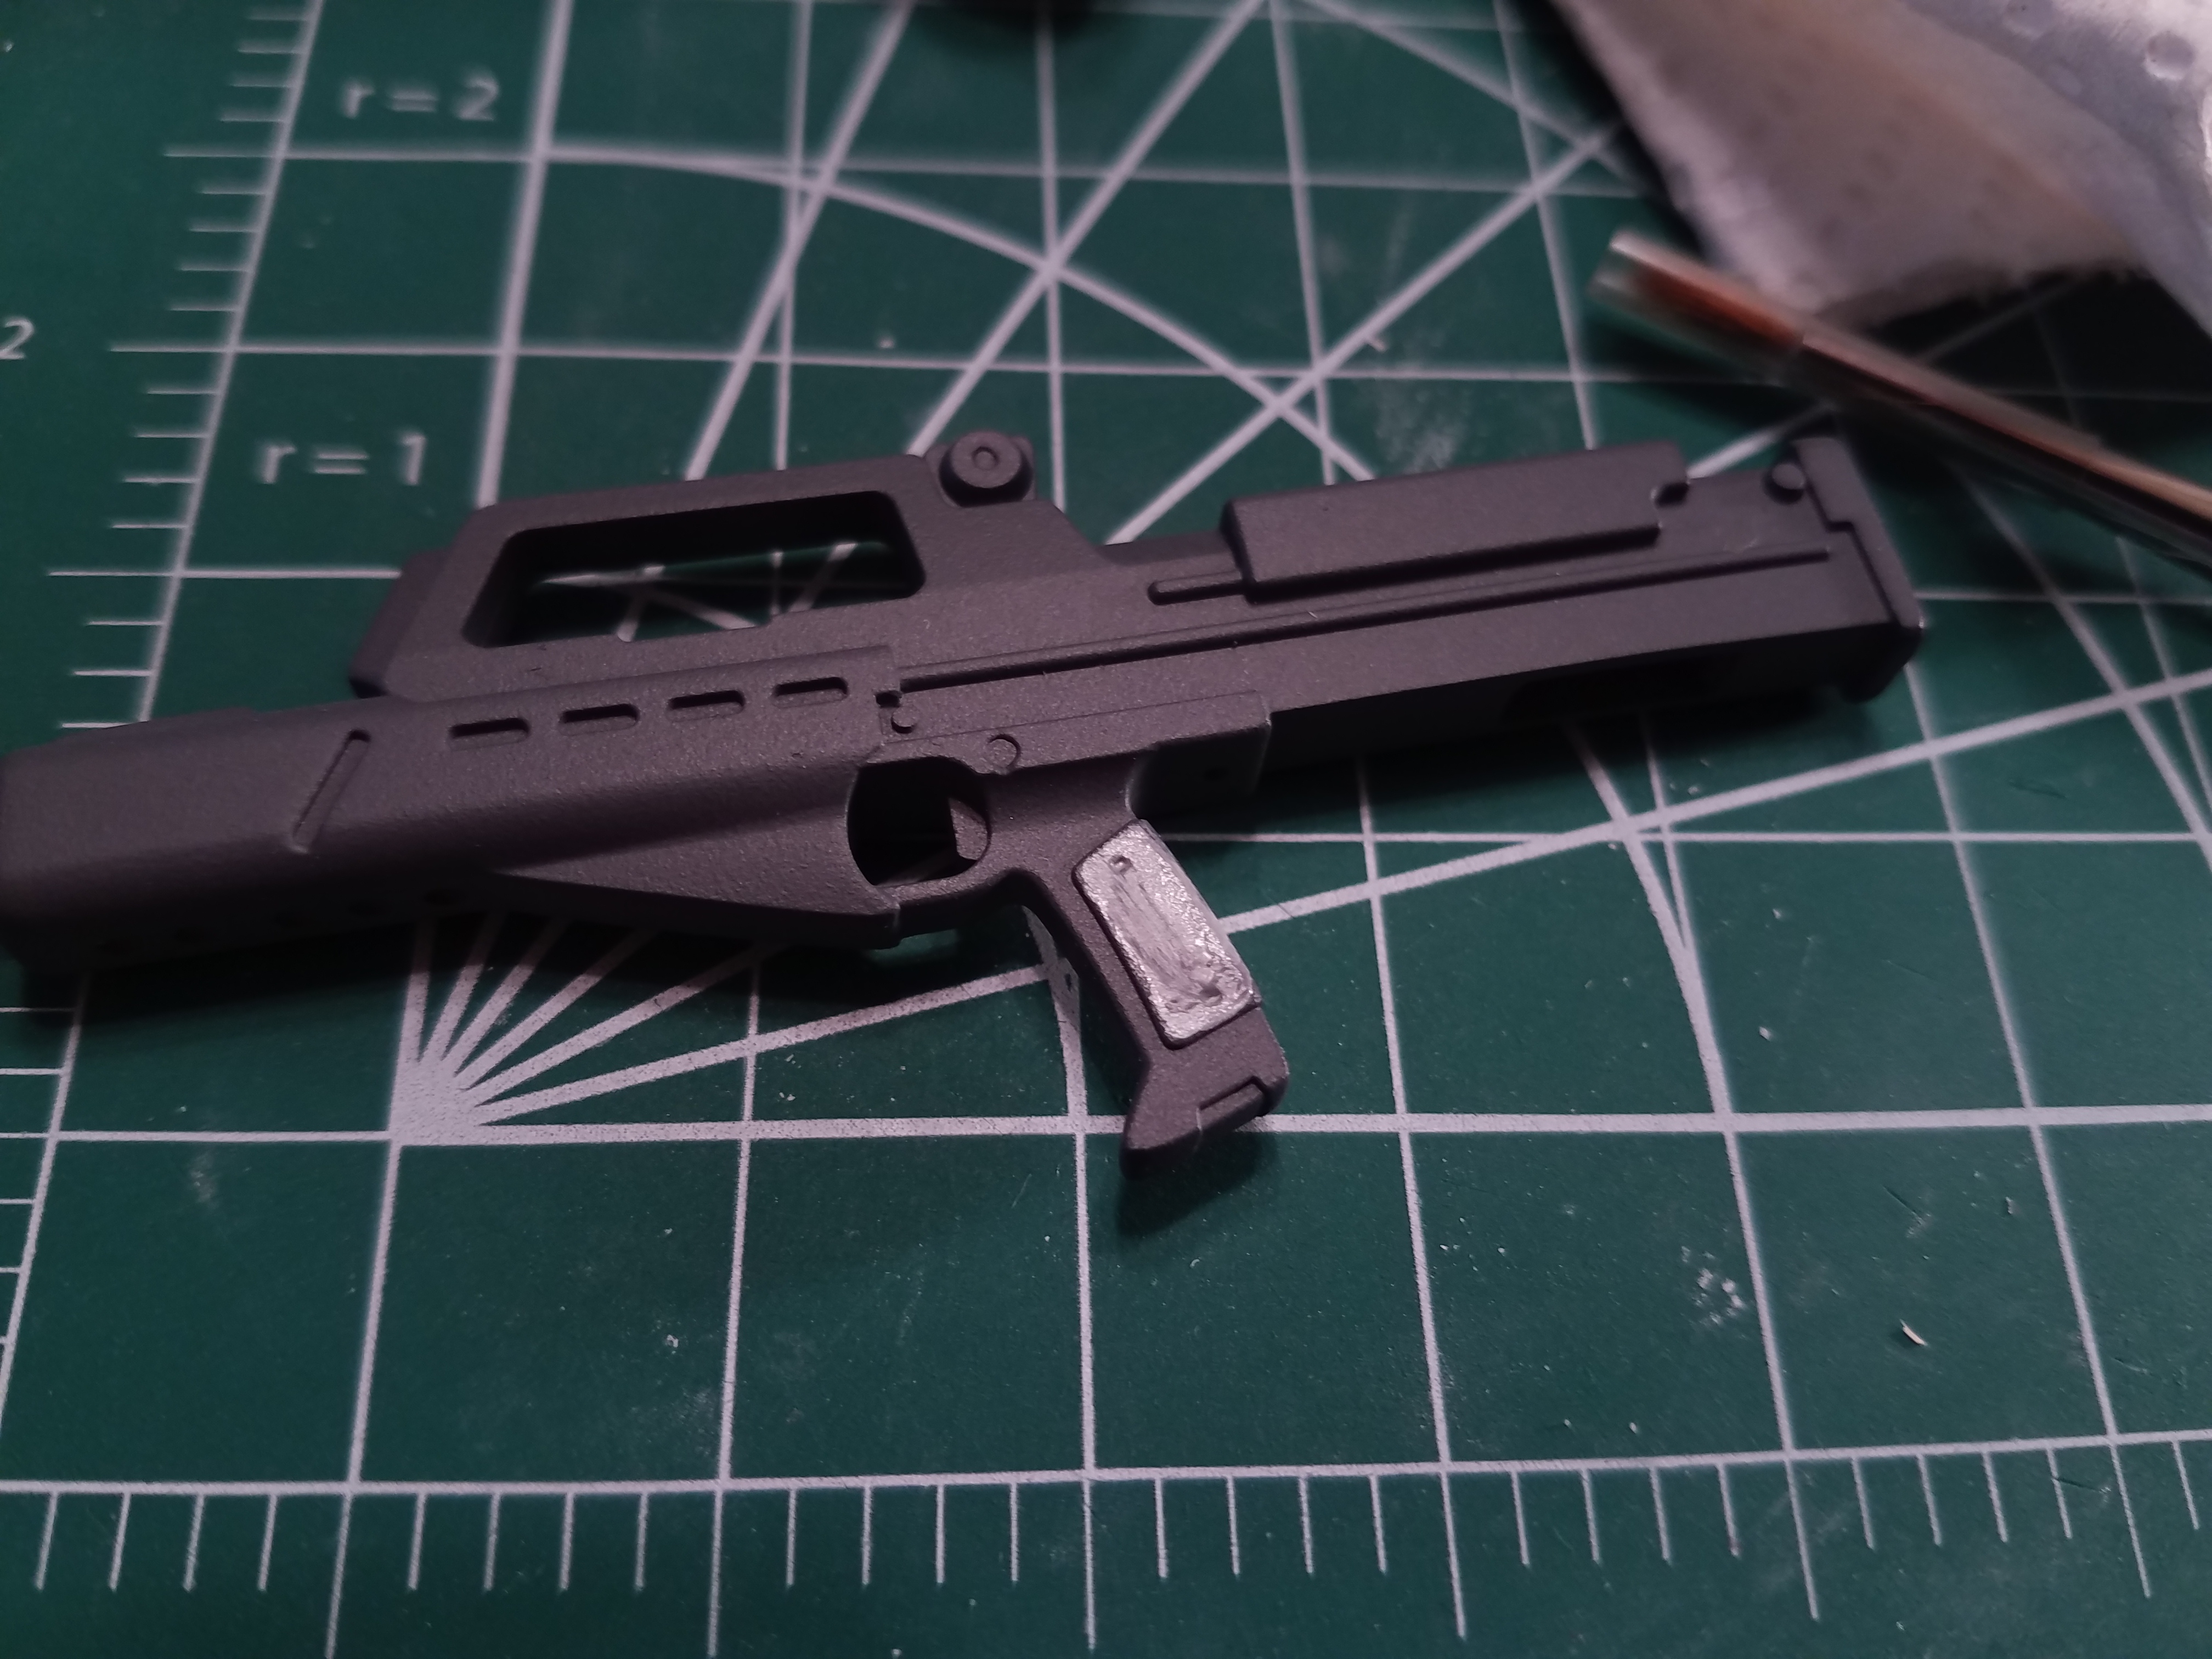
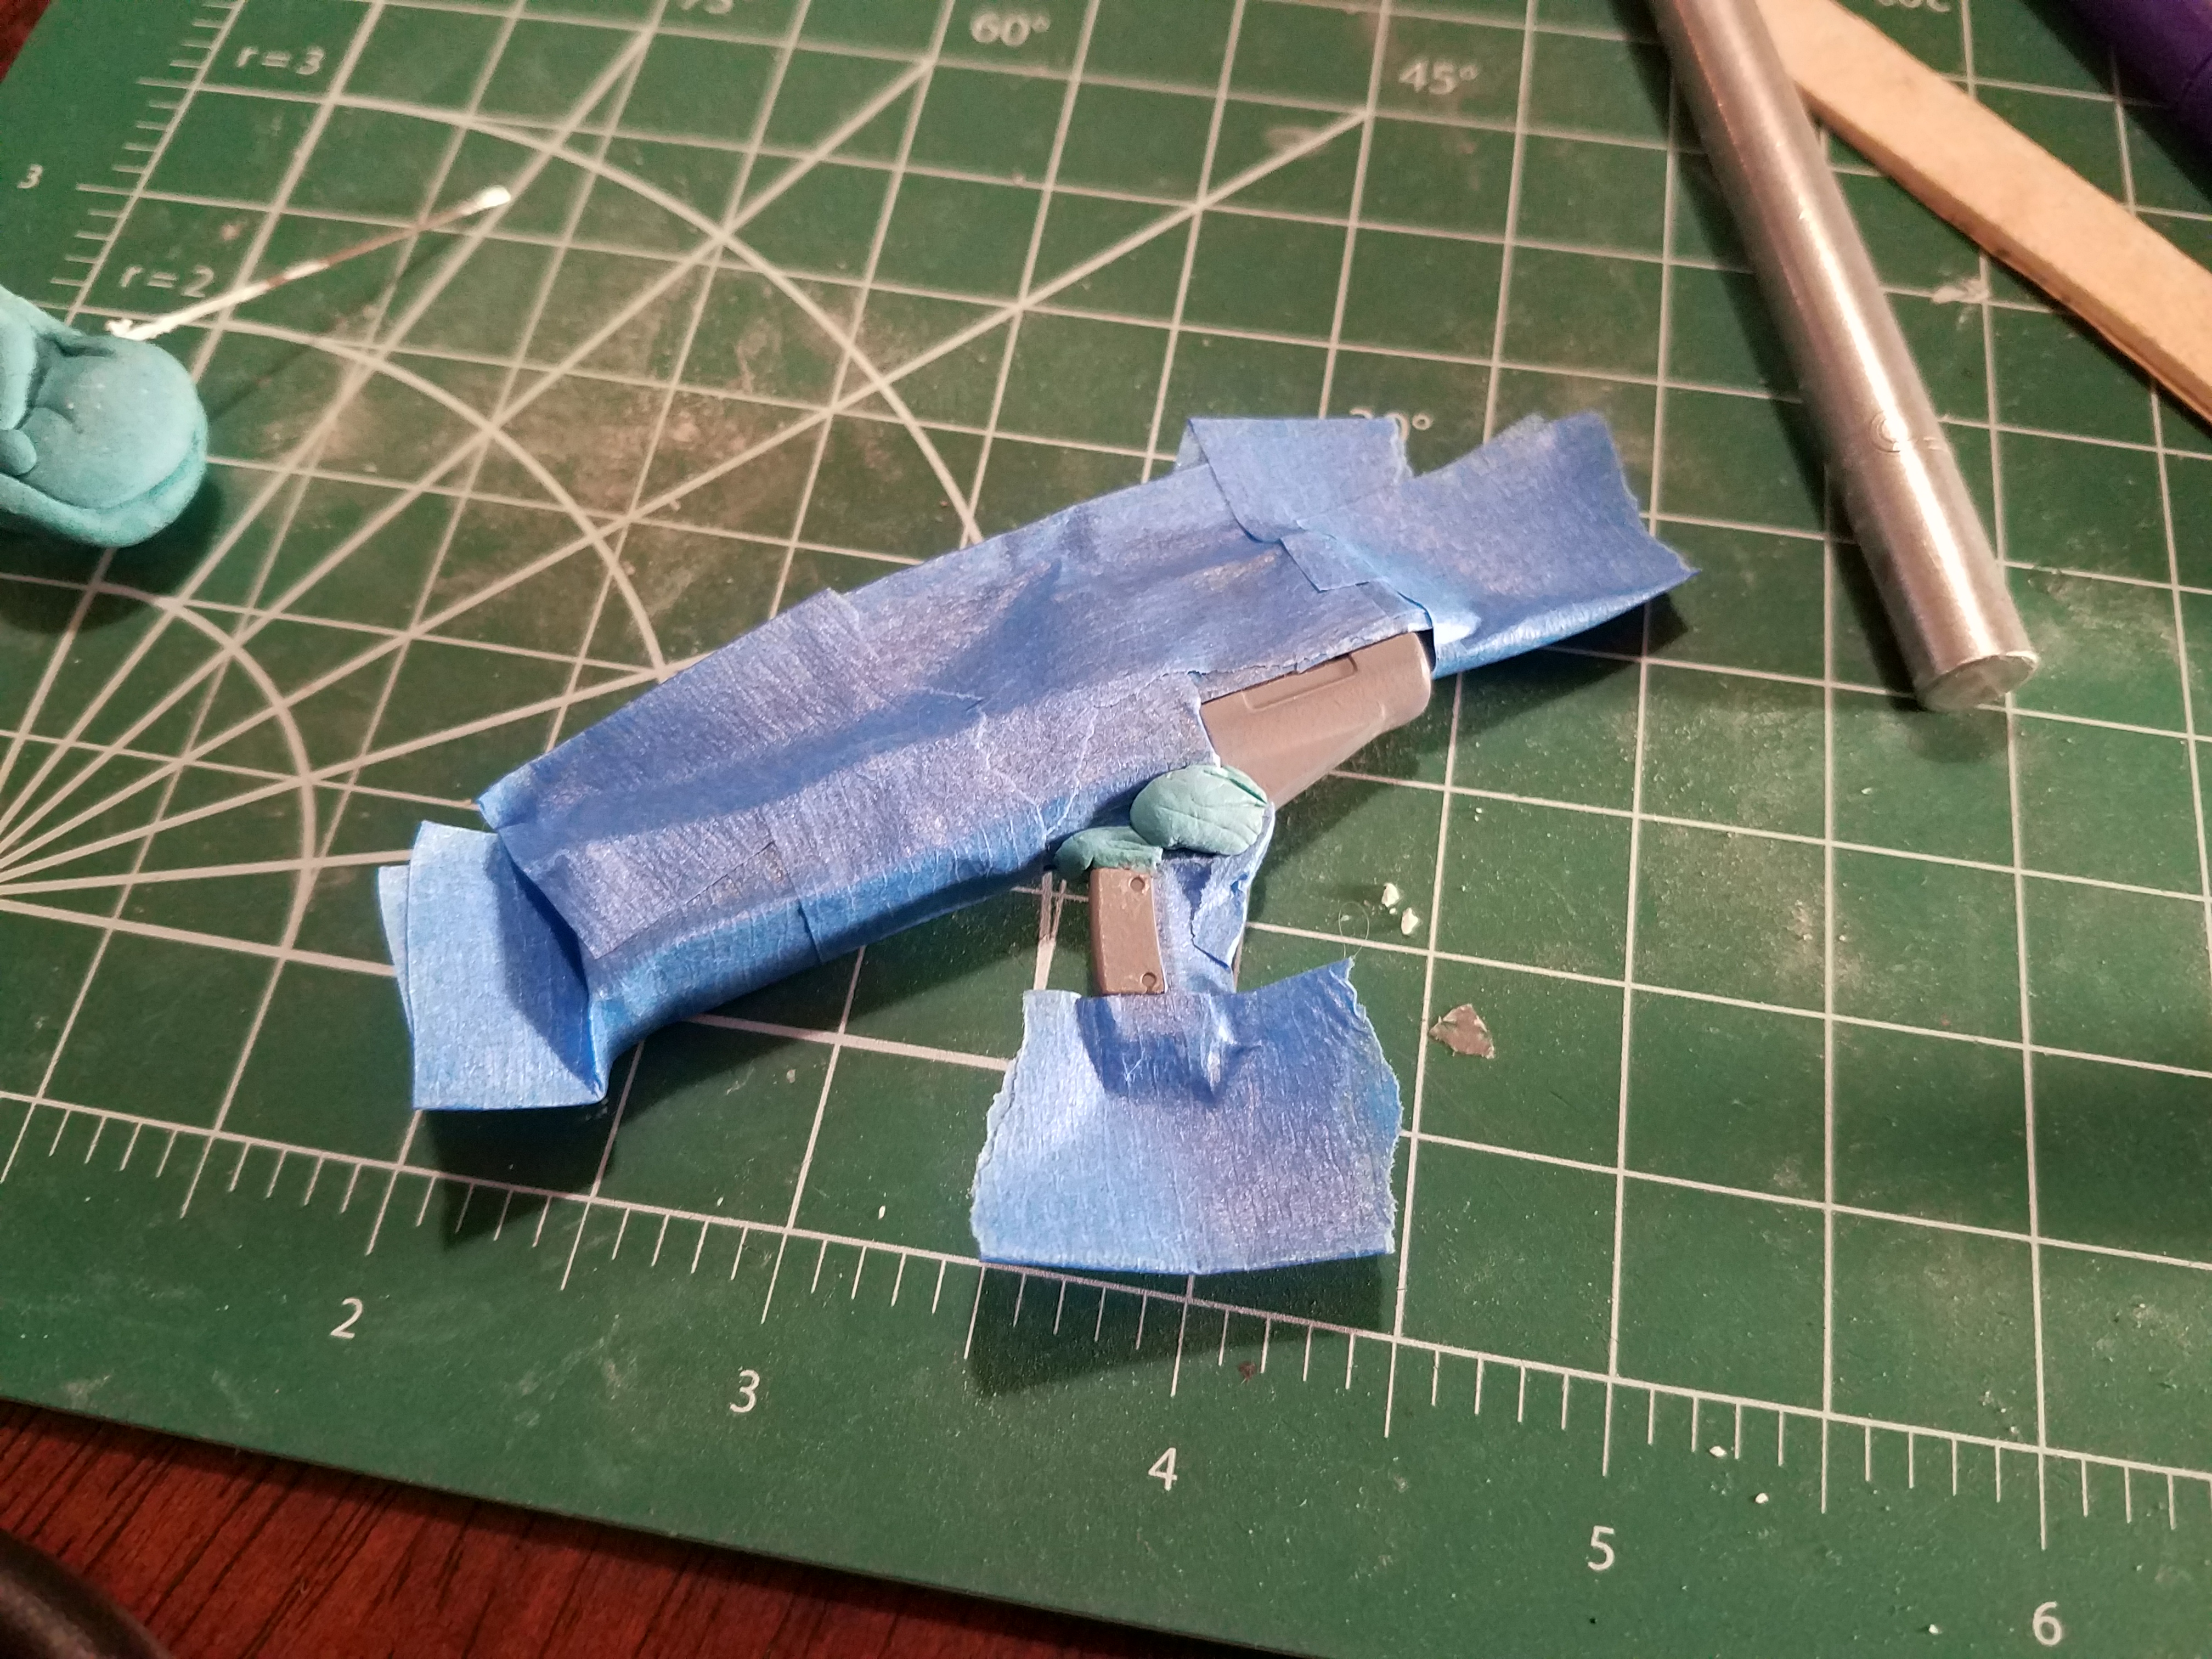
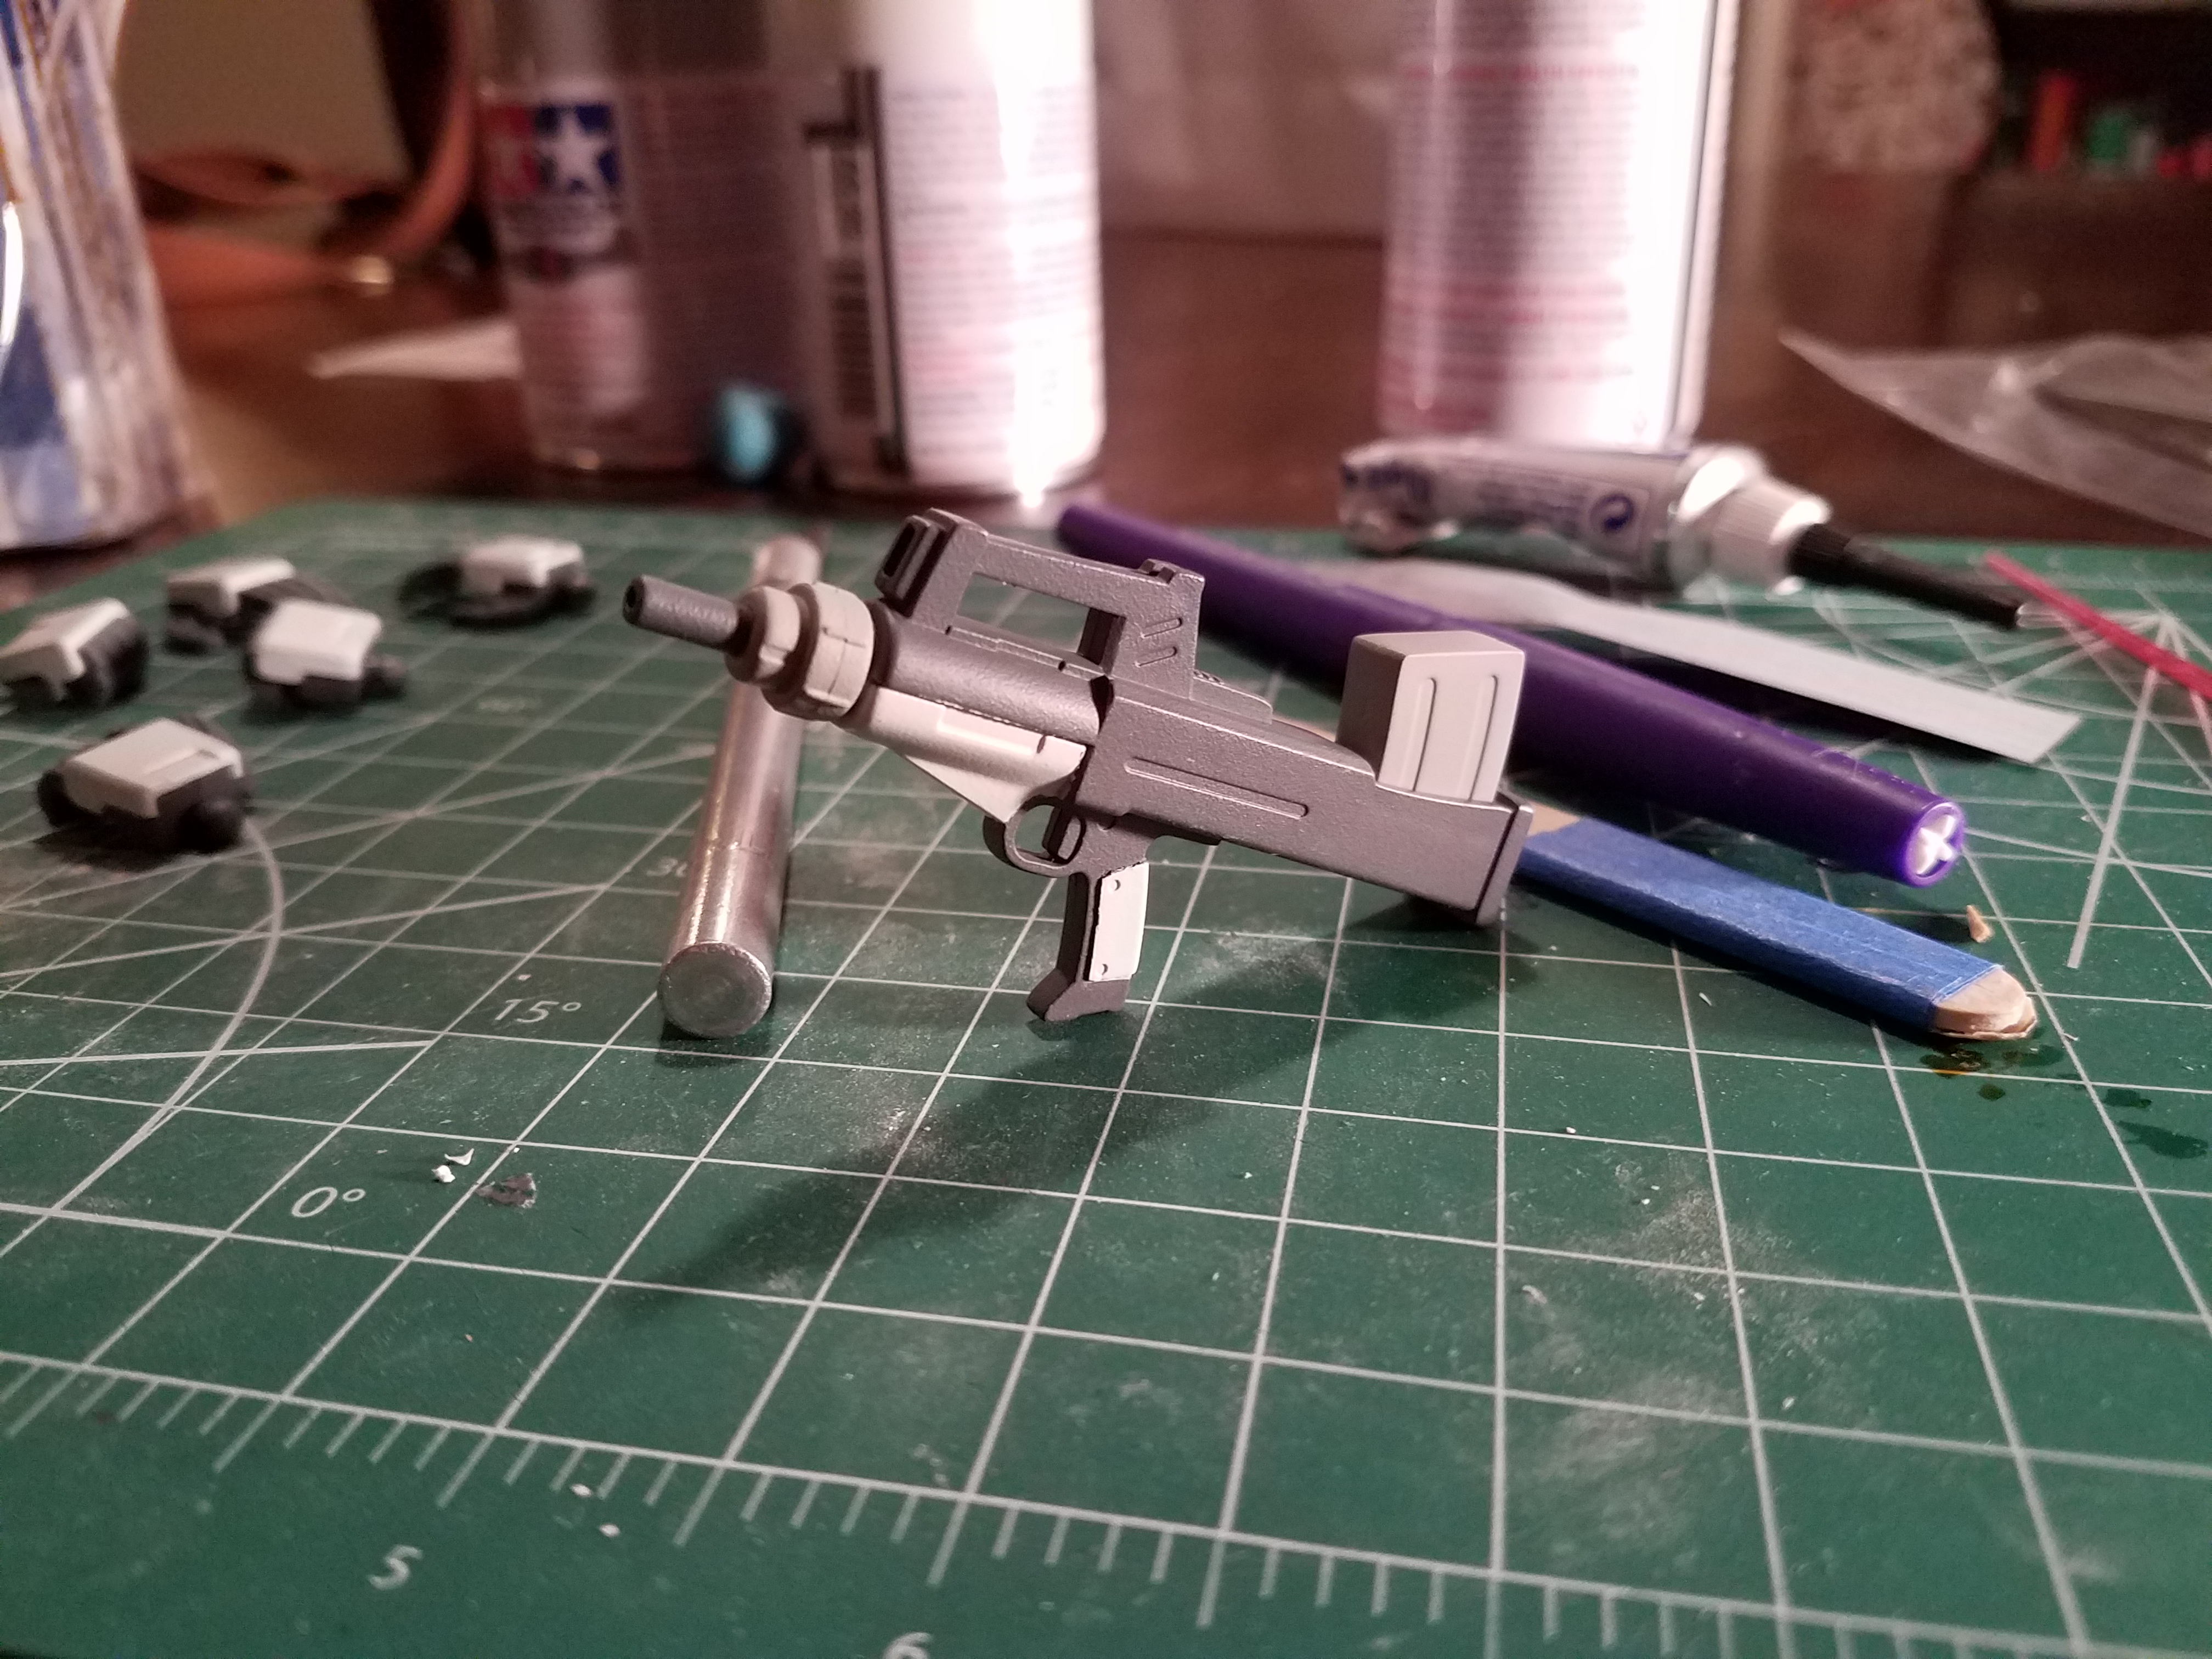
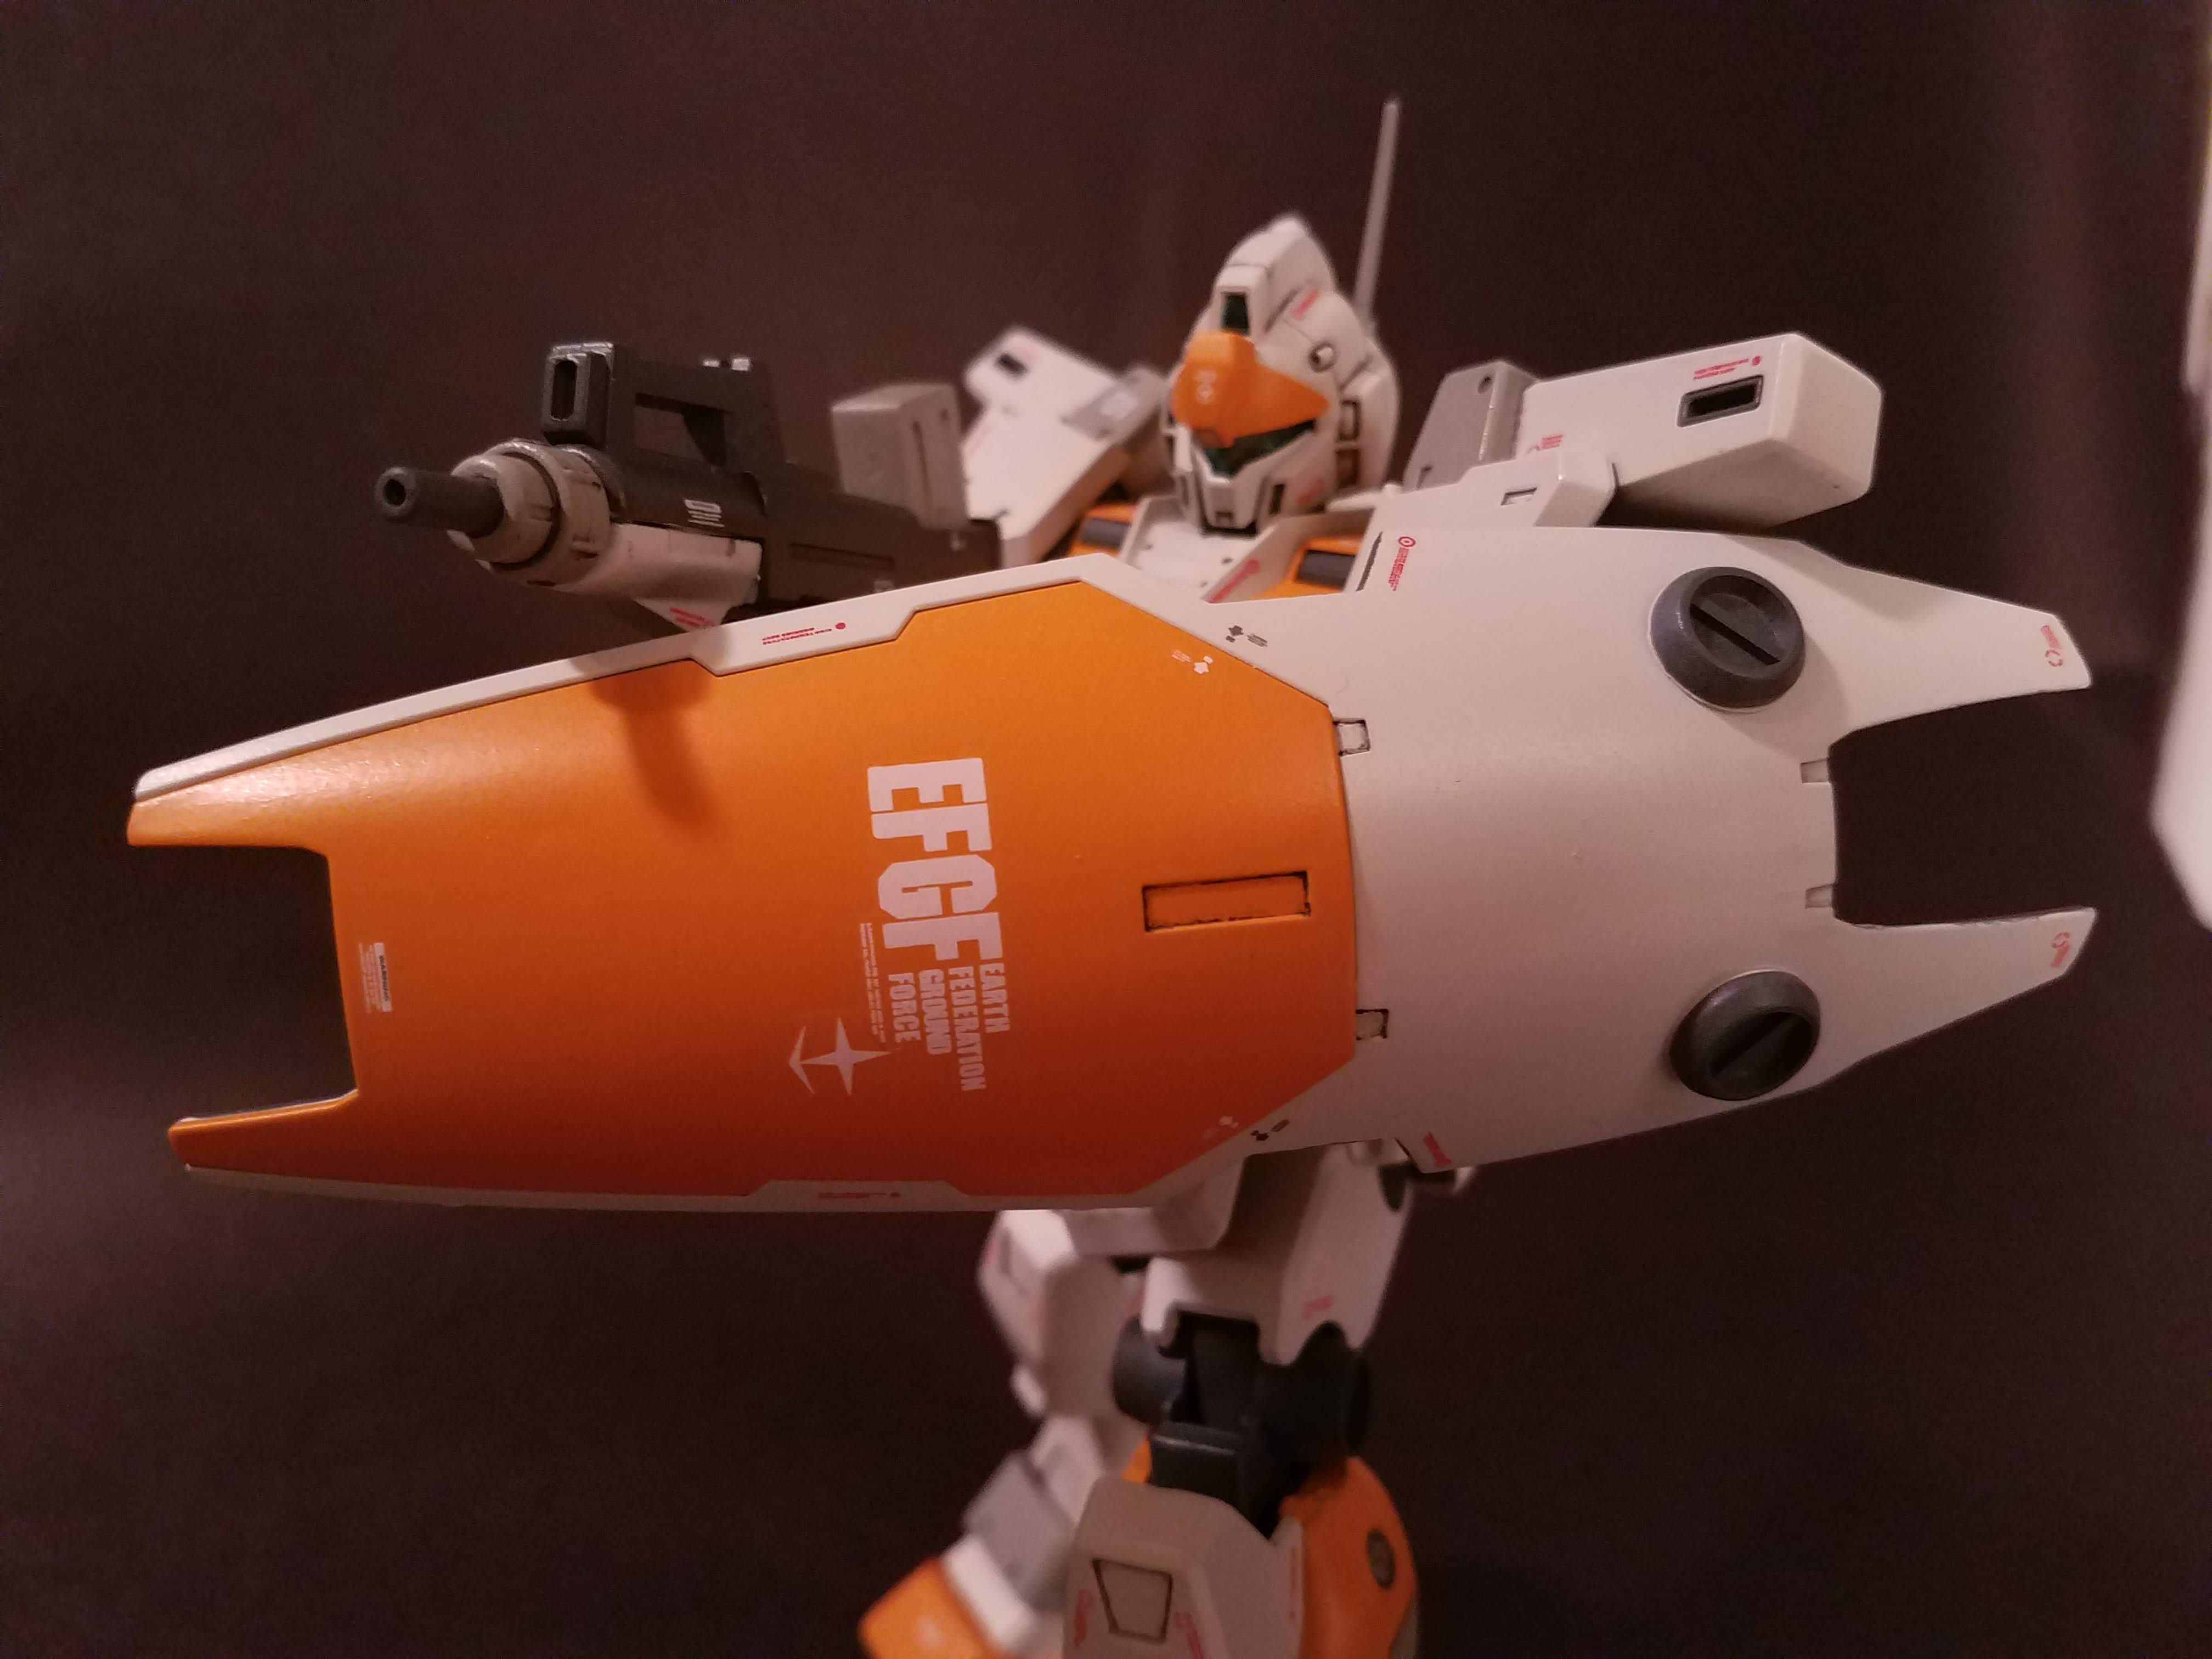
The main rifle for this kit (which can be seen in earlier updates) actually cannot be held correctly. The magazine extends downward behind the grip, which happens to be exactly where the forearm is; and the model lacks the articulation to make this really work. So I decided I wouldn't really focus on that and instead work on the SMG, which has a top-loading magazine which doesn't clip. I carefully masked using both tape and putty to get the light parts exposed per the coloring diagram, resulting in...
A lot better than the flat gray that I thought I was stuck in.
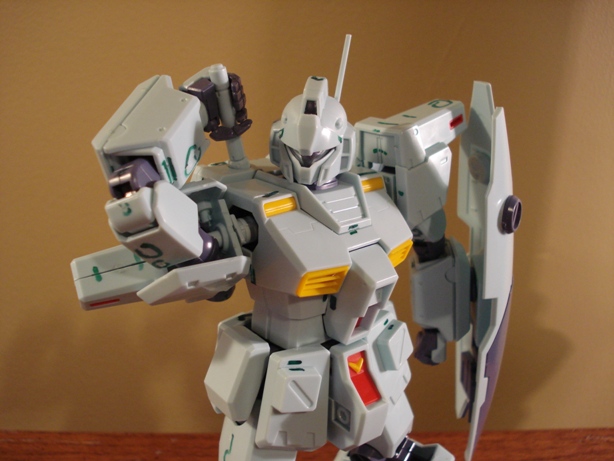
Eventually the humidity settled down and I was able to clear coat. This enabled me to panel line using Tamiya dark gray enamel wash. I actually was kind of disappointed in the quality here; it was not nearly as clean as I would have liked, which you can see in the zoom on the head. If I had planned any weathering effects, it would be perfect, but going for a factory finish means that my standards are a bit higher.
I really think the problem was that the gloss coat was not thick or even enough to wick the wash into the lines consistently. I'll talk more about it in the project completion post, but I think this is absolutely the last time I'm ever using spray cans to work with modeling - there are a lot of drawbacks to the approach.
The next step were decals. I bought some aftermarket waterslide decals on eBay; you cut them off of the sheet, soak them in water for a few seconds, and then you can gently push the plastic decals off of the sheet and onto the model. Once they dry, they are much thinner than stickers, which makes them a lot more natural looking.
This is probably the biggest difference between what this project would have looked like completed in 2012 vs. 2019 - I used to really dislike decals on kits. Now, I think they really add a lot of visual pop. Expecially on the more "mass-produced" suits, I think they really improve the aesthetic and sell the idea of these being weapons.
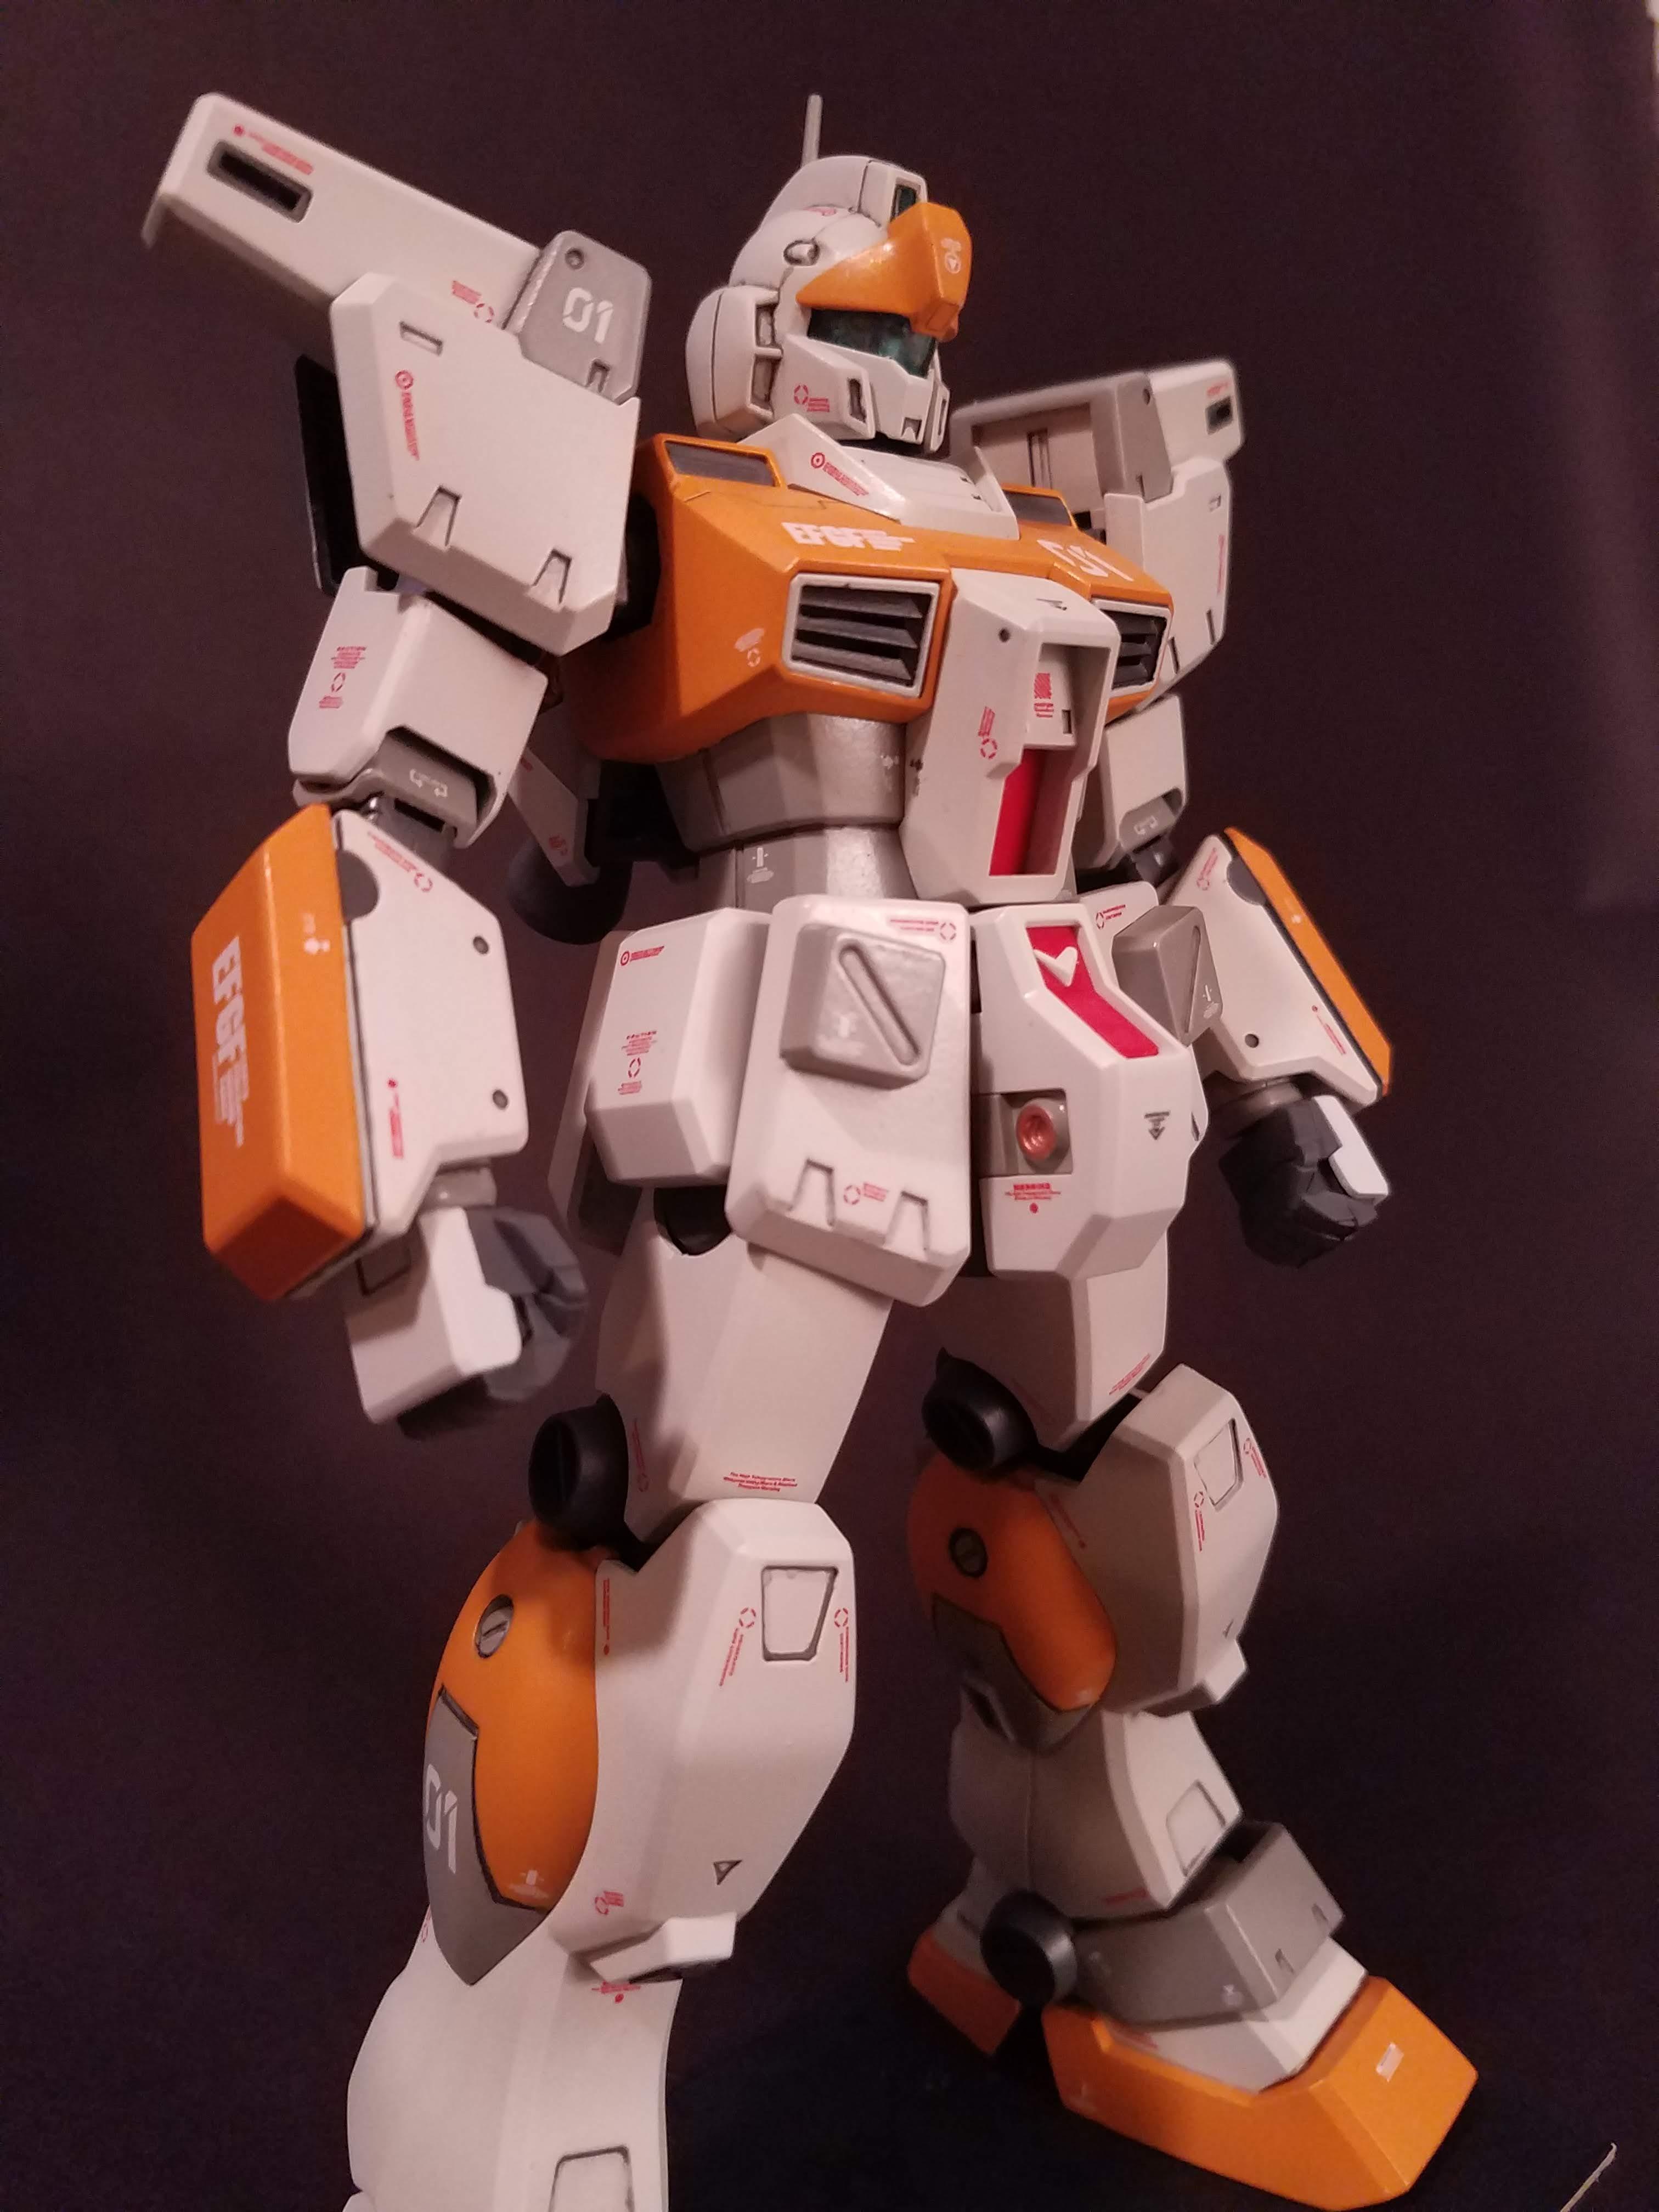
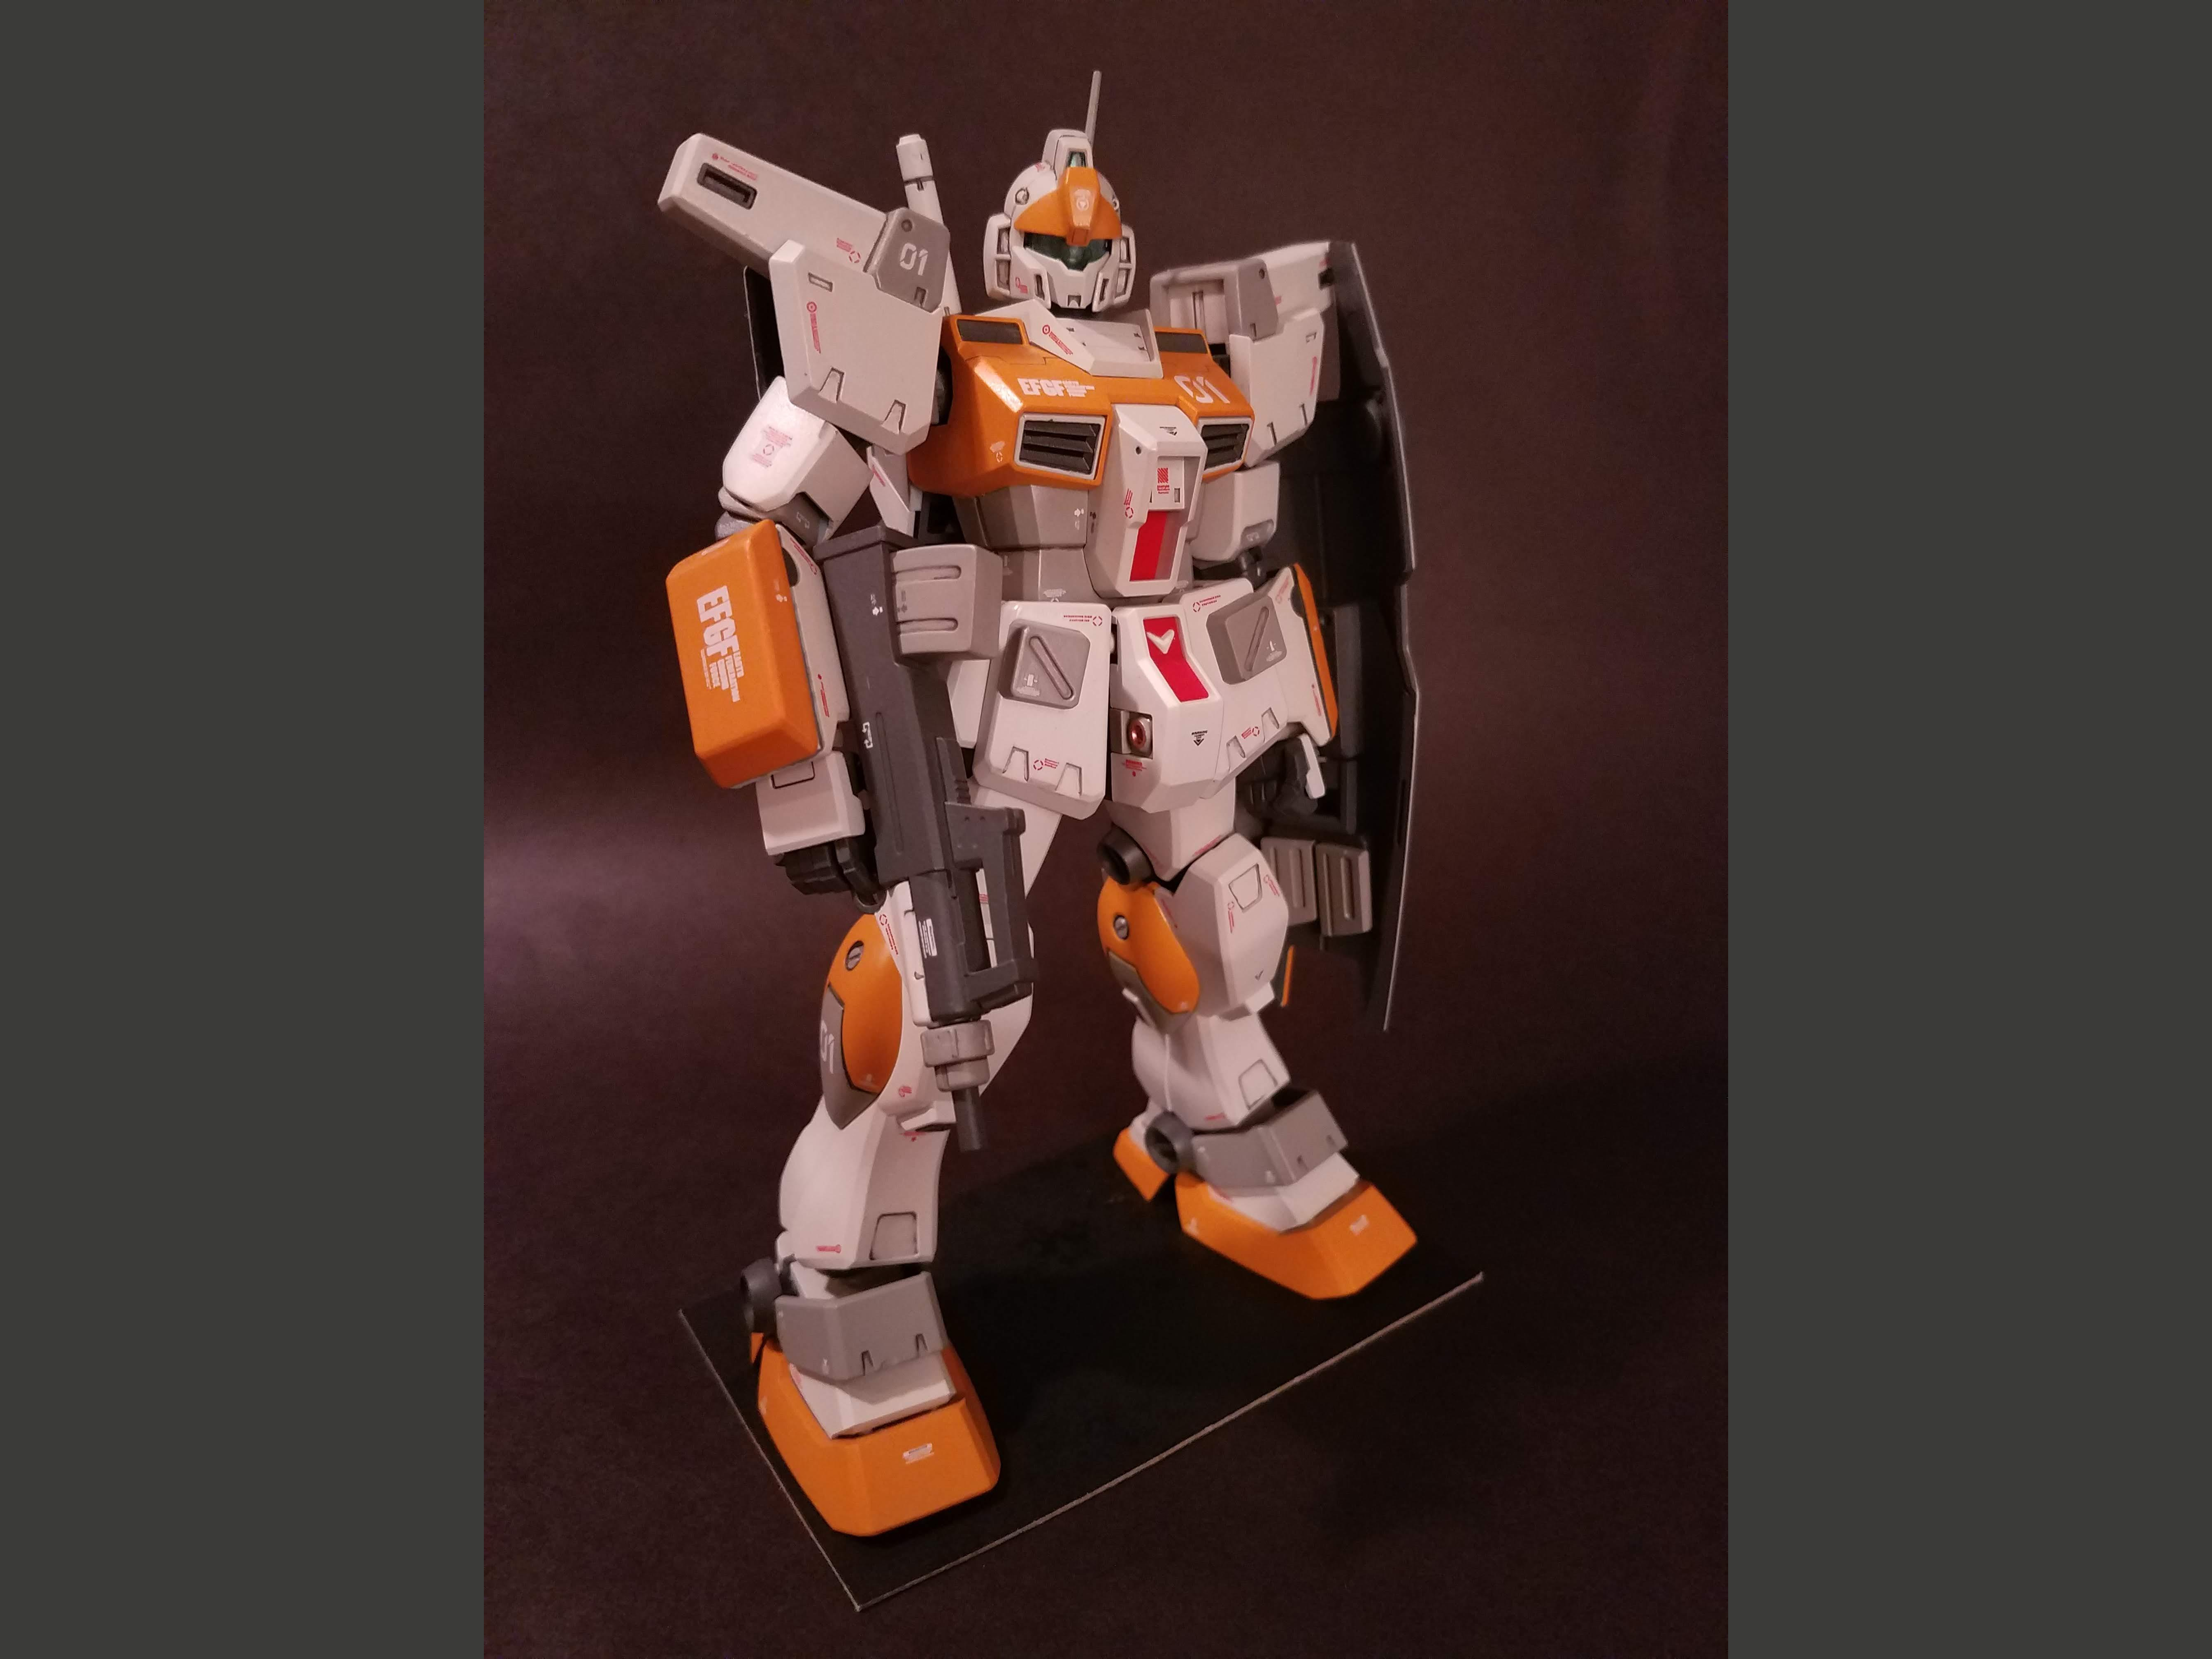
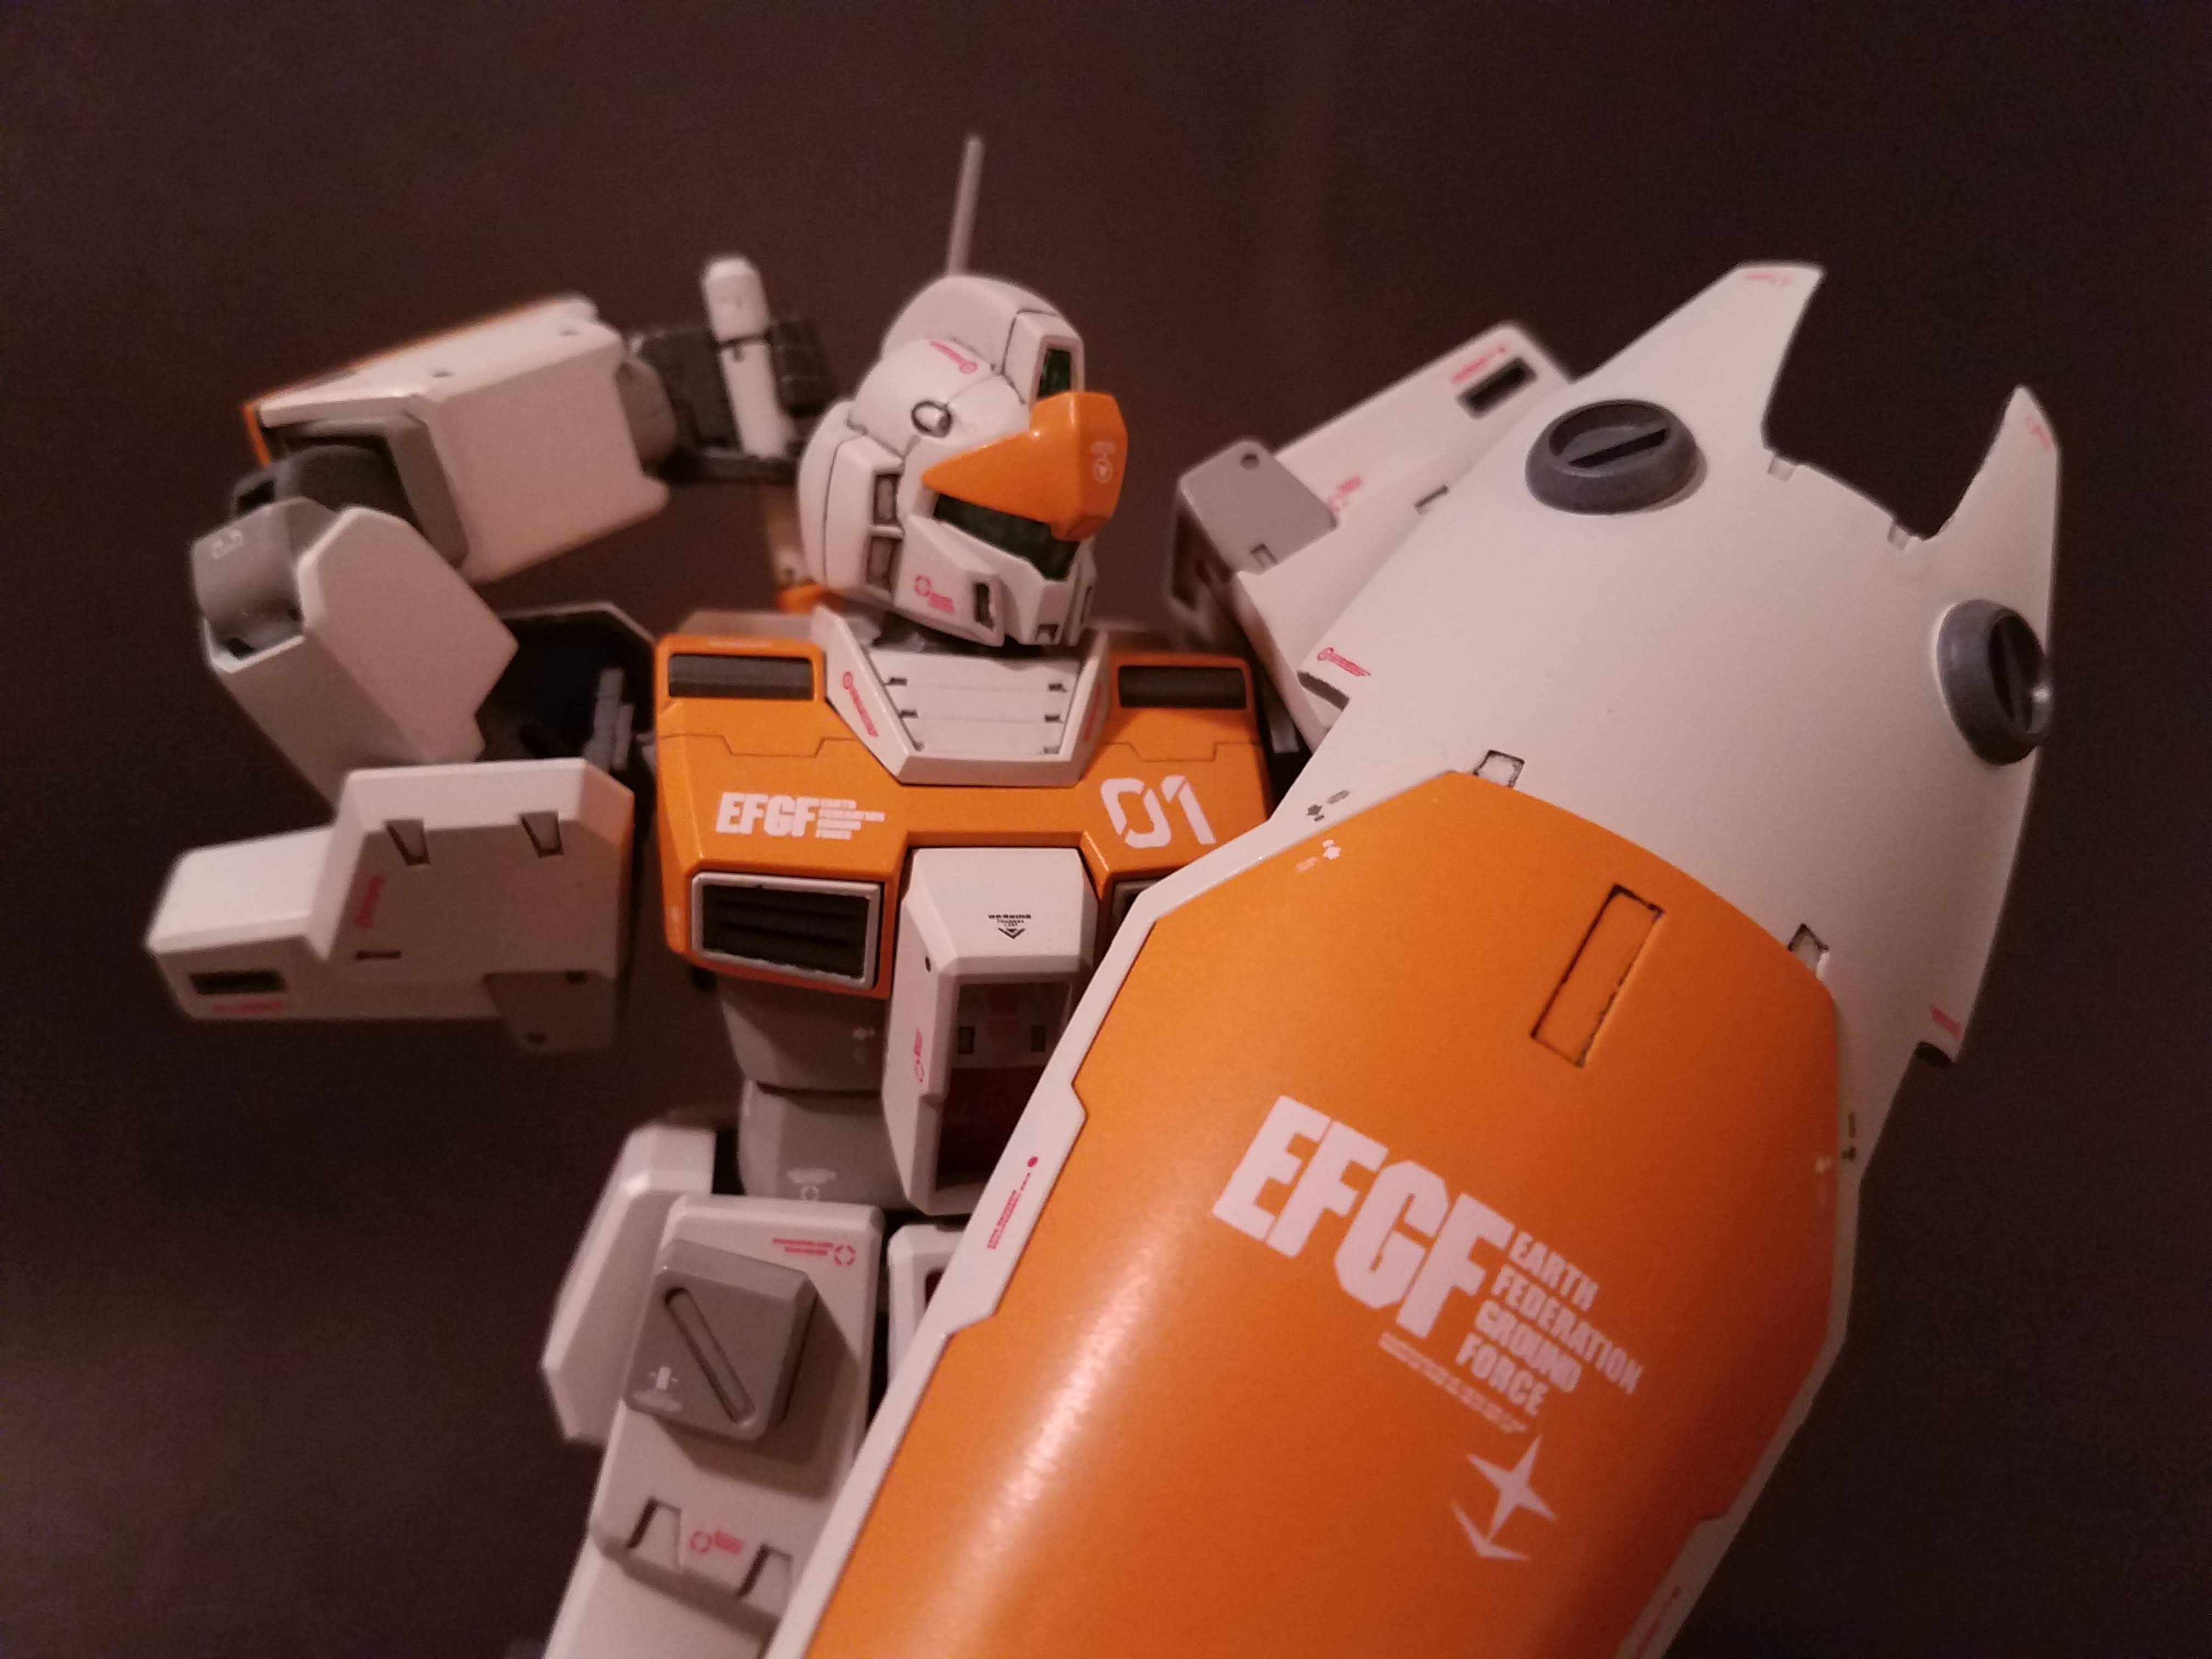
And here are the arms and torso. I love the look of the red decals on the white pieces - it really works with the warm color scheme. Even though the GM Custom is part of the Earth Federation Space Force in
Stardust Memory, I chose Ground Force decals for this kit, as I thought the color scheme was really reminiscent of the
GM Ground Type from
08th MS Team.
The only remaining steps are to finish up the decals and do a final flat topcoat.
Date Posted: May 23, 2019